

Lady Falcon Travelers

Traveler's Notebook Planner flip-through
At the start of the year I made a set-up video of my planner at that moment. Now after 4 months into the system I'm still loving the current set-up. Although I did make some changes along the way. One change was the addition of a daily pages planner, which I use mainly for daily doodles and quotes. The other one is the recent addition of an A5 planner to keep track of how I spend my time during the day. Especially with a home based business it's hard to realize some time for Family and personal stuff. I hope with this new time management and time tracking system to be able to get a better grip on where and how I spend my time and in a way, to convince myself that it is ok to take some personal time every now and again. Today I made 2 video's. The first with a flip-through of my weekly and daily planner inserts and my journaling insert and the other with the new A5 work planner and the time tracking insert, which is basically a vertical week on 4 pages insert, with stylized time bar. (Still looking for a name for the system). You can find the flip-through here https://youtu.be/waz-CFLeeXA And the A5 work planner with time-management insert here https://youtu.be/TlCTW2pm_U0 Once I have tested the time-management system I will add it to the available inserts we have available through the shop. For now, after just one week of trying it out, I can say that I'm really happy with how it's working and the division between planning and tracking is really nice. It show exactly how you can plan things for the day and then life happens and in the end something else happened entirely. It also helps me to see that I spend too much time on the job and not enough time with my family, which, of course is a risk you run by owning a home based business. 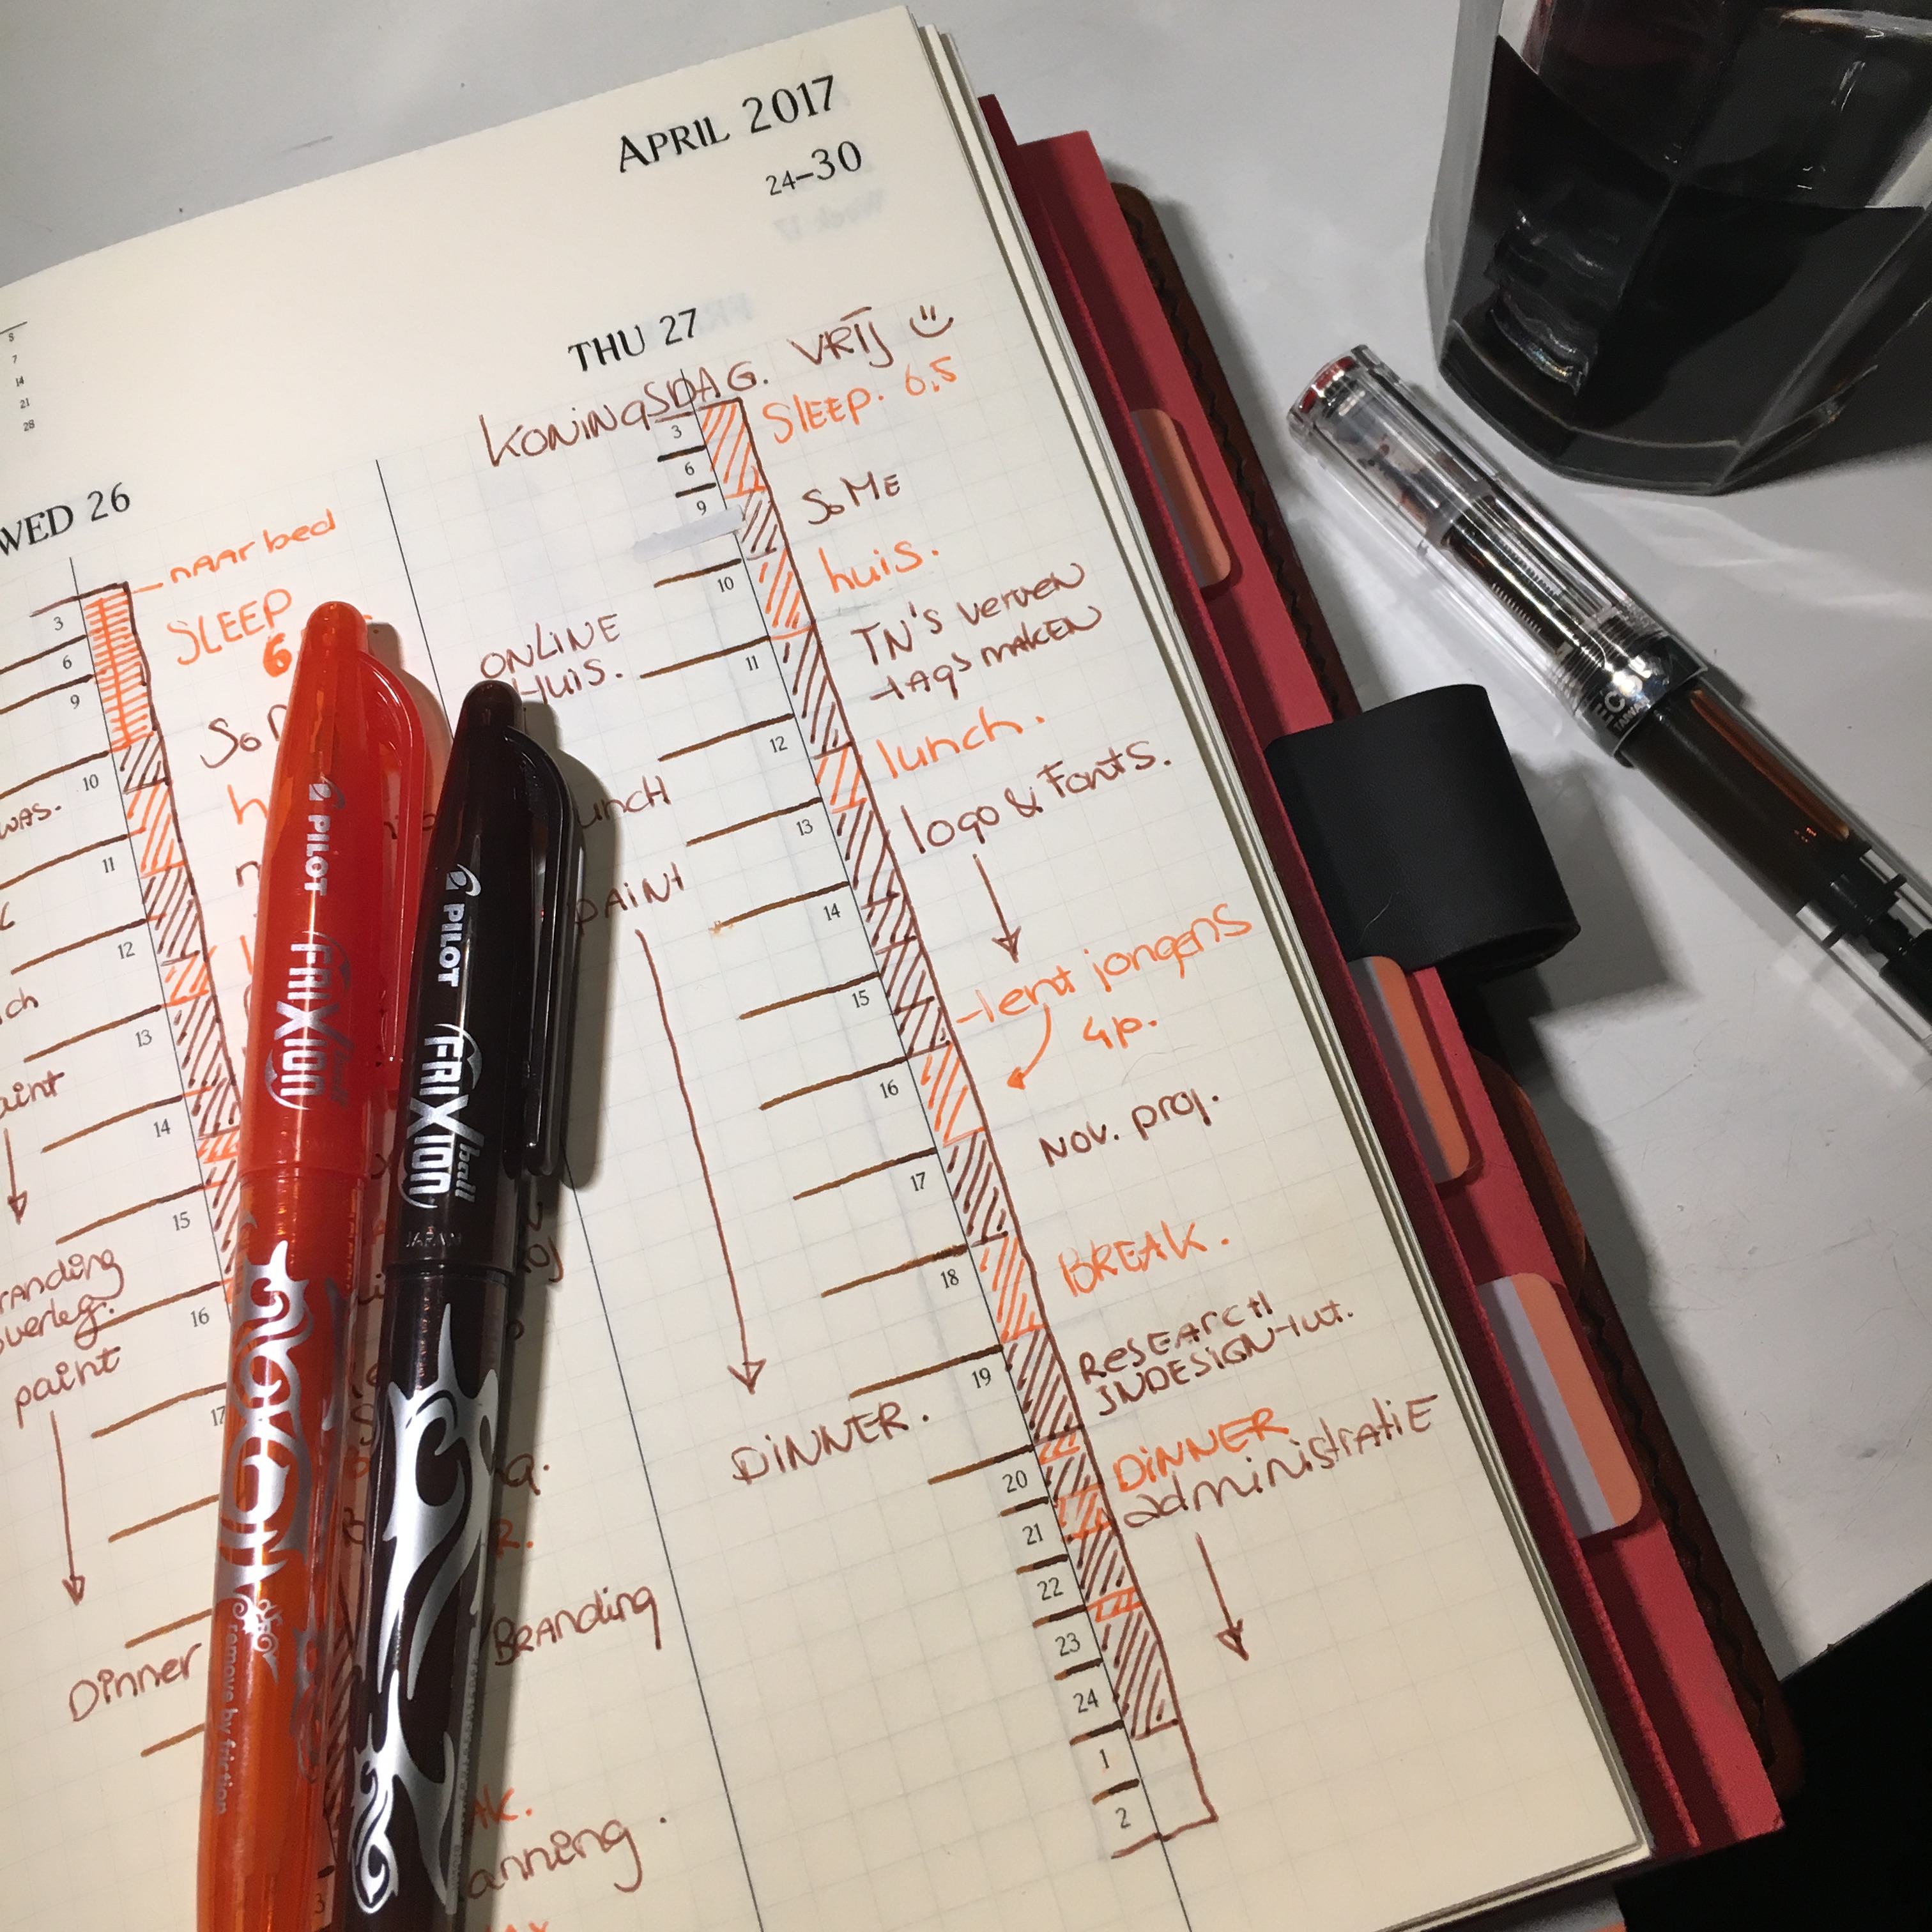 I'm really hoping the system will help me not only to plan better, by identifying the things that interfere with the planning, but also to help me create more time for my family. After all, when you can see that you already put in a 10 hour day, it's easier to say, "ok enough for the day, time to do something else". Where I might otherwise just have gone on, because I lost track of time... The 2 colors pen also help identify the personal time and the work time. For now I do it all with Frixion pens, but who knows I might become confident enough in the future to switch back to fountain pens, I already have the brown and orange ink for it...
  I'm pretty happy with the current lay-out. It's nice and clean, it has a visual representation of the day, with the larger stripes on the midday section and has a practical bar to the right side to track the actual time spent. The left side, the planning side is smaller, since I think I can manage the planning with key words, whereas I probably need more room to the right, tracking side, for any notes or larger descriptions of the things that have passed. Hope you enjoyed watching the video's with me rambling about planners. Please let me know what you think in the comments, or maybe when you think of a catchy name for the tracking system. Have a lovely week, xoxo Monique
I'm really hoping the system will help me not only to plan better, by identifying the things that interfere with the planning, but also to help me create more time for my family. After all, when you can see that you already put in a 10 hour day, it's easier to say, "ok enough for the day, time to do something else". Where I might otherwise just have gone on, because I lost track of time... The 2 colors pen also help identify the personal time and the work time. For now I do it all with Frixion pens, but who knows I might become confident enough in the future to switch back to fountain pens, I already have the brown and orange ink for it... I'm pretty happy with the current lay-out. It's nice and clean, it has a visual representation of the day, with the larger stripes on the midday section and has a practical bar to the right side to track the actual time spent. The left side, the planning side is smaller, since I think I can manage the planning with key words, whereas I probably need more room to the right, tracking side, for any notes or larger descriptions of the things that have passed. Hope you enjoyed watching the video's with me rambling about planners. Please let me know what you think in the comments, or maybe when you think of a catchy name for the tracking system. Have a lovely week, xoxo Monique
New diary style... I'm calling it Grunge..
I needed a new diary for my Personal size Traveler's Notebook, since the old one was only to the end of September ... Somehow it escaped me that October had already come and I still didn't have a new diary for my every day carry .... What is a girl to do in a situation like that....
I already had an idea for a new style diary, I just never came round to actually making it. Making new templates always takes more time than you would anticipate. Which of course is the reason I've been putting making the new diary for my EDC off. However now I could no longer do that, it was now, or just use one of the existing templates
I really wanted the new design, because I wanted it to go with the new paper I now offer as covers for my inserts ...
 So I made myself a new lay-out. Building on the modern style I already offer, changed a bit, added a bit, went for a bit of color and now I have a super cute Grunge style diary
...and combined with my new paper... I'm so loving it
So I made myself a new lay-out. Building on the modern style I already offer, changed a bit, added a bit, went for a bit of color and now I have a super cute Grunge style diary
...and combined with my new paper... I'm so loving it
 I glued a little owl to the inside of the cover, just to get me started...
 I really like this style diary and will definitely develop the design a bit further
 and make it in all other sizes as well
 But for now I'm quite happy with how it looks.
 This diary template, for oct-dec in personal size is availabe in the Lady Falcon Box folder, which you can find via the free printable templates page.
I also added a page to this blog with information about my diaries and the different styles there are. This to make purchasing the right diary for you easier. I also have new listings in my Etsy shop where you can choose your diary template, size and cover. This way I won't need to add a listing for every template I have (listed and non-listed), to the shop and the shop won't get too crowded with loads of listings where you would never be able to find what it is you want...
I hope you enjoyed this and do check out the templates explained page =)
Have a wonderful weekend
xoxo Monique
Here are a few of the new listings for printed inserts. Choose your size and cover and leave me a note with the appropriate template:
Week on two pages:
WOTP Diary inserts, Printed template of your choosing, Traveler's Notebook Insert, Several sizes
WOTP Diary inserts, Printed template of your choosing, Traveler's Notebook Insert, Several sizes, designer cover
Bullet journal inserts, cross-grid, dot-grid, grid or lined:
Bullet Journal inserts, Printed template of your choosing, Traveler's Notebook Insert, Several sizes, Designer cover
Notes inserts, cross-grid, dot-grid, grid, lined, or plain:
Notes inserts, Printed template of your choosing, Traveler's Notebook Insert, Several sizes, Designer cover
This diary template, for oct-dec in personal size is availabe in the Lady Falcon Box folder, which you can find via the free printable templates page.
I also added a page to this blog with information about my diaries and the different styles there are. This to make purchasing the right diary for you easier. I also have new listings in my Etsy shop where you can choose your diary template, size and cover. This way I won't need to add a listing for every template I have (listed and non-listed), to the shop and the shop won't get too crowded with loads of listings where you would never be able to find what it is you want...
I hope you enjoyed this and do check out the templates explained page =)
Have a wonderful weekend
xoxo Monique
Here are a few of the new listings for printed inserts. Choose your size and cover and leave me a note with the appropriate template:
Week on two pages:
WOTP Diary inserts, Printed template of your choosing, Traveler's Notebook Insert, Several sizes
WOTP Diary inserts, Printed template of your choosing, Traveler's Notebook Insert, Several sizes, designer cover
Bullet journal inserts, cross-grid, dot-grid, grid or lined:
Bullet Journal inserts, Printed template of your choosing, Traveler's Notebook Insert, Several sizes, Designer cover
Notes inserts, cross-grid, dot-grid, grid, lined, or plain:
Notes inserts, Printed template of your choosing, Traveler's Notebook Insert, Several sizes, Designer cover
 So I made myself a new lay-out. Building on the modern style I already offer, changed a bit, added a bit, went for a bit of color and now I have a super cute Grunge style diary
...and combined with my new paper... I'm so loving it
So I made myself a new lay-out. Building on the modern style I already offer, changed a bit, added a bit, went for a bit of color and now I have a super cute Grunge style diary
...and combined with my new paper... I'm so loving it
 I glued a little owl to the inside of the cover, just to get me started...
 I really like this style diary and will definitely develop the design a bit further
 and make it in all other sizes as well
 But for now I'm quite happy with how it looks.
This diary template, for oct-dec in personal size is availabe in the Lady Falcon Box folder, which you can find via the free printable templates page.
I also added a page to this blog with information about my diaries and the different styles there are. This to make purchasing the right diary for you easier. I also have new listings in my Etsy shop where you can choose your diary template, size and cover. This way I won't need to add a listing for every template I have (listed and non-listed), to the shop and the shop won't get too crowded with loads of listings where you would never be able to find what it is you want...
I hope you enjoyed this and do check out the templates explained page =)
Have a wonderful weekend
xoxo Monique
Here are a few of the new listings for printed inserts. Choose your size and cover and leave me a note with the appropriate template:
Week on two pages:
WOTP Diary inserts, Printed template of your choosing, Traveler's Notebook Insert, Several sizes
WOTP Diary inserts, Printed template of your choosing, Traveler's Notebook Insert, Several sizes, designer cover
Bullet journal inserts, cross-grid, dot-grid, grid or lined:
Bullet Journal inserts, Printed template of your choosing, Traveler's Notebook Insert, Several sizes, Designer cover
Notes inserts, cross-grid, dot-grid, grid, lined, or plain:
Notes inserts, Printed template of your choosing, Traveler's Notebook Insert, Several sizes, Designer cover
But for now I'm quite happy with how it looks.
This diary template, for oct-dec in personal size is availabe in the Lady Falcon Box folder, which you can find via the free printable templates page.
I also added a page to this blog with information about my diaries and the different styles there are. This to make purchasing the right diary for you easier. I also have new listings in my Etsy shop where you can choose your diary template, size and cover. This way I won't need to add a listing for every template I have (listed and non-listed), to the shop and the shop won't get too crowded with loads of listings where you would never be able to find what it is you want...
I hope you enjoyed this and do check out the templates explained page =)
Have a wonderful weekend
xoxo Monique
Here are a few of the new listings for printed inserts. Choose your size and cover and leave me a note with the appropriate template:
Week on two pages:
WOTP Diary inserts, Printed template of your choosing, Traveler's Notebook Insert, Several sizes
WOTP Diary inserts, Printed template of your choosing, Traveler's Notebook Insert, Several sizes, designer cover
Bullet journal inserts, cross-grid, dot-grid, grid or lined:
Bullet Journal inserts, Printed template of your choosing, Traveler's Notebook Insert, Several sizes, Designer cover
Notes inserts, cross-grid, dot-grid, grid, lined, or plain:
Notes inserts, Printed template of your choosing, Traveler's Notebook Insert, Several sizes, Designer cover
A6, Fieldnotes/Pocket or Passport booklet making tutorial
Just a quick post today, with a video tutorial I made about printing and making A6, Fieldnotes (Pocket), Passport sized booklets when you onlu have A4 sized paper.
I don't think this will work with letter sized paper, because the dimensions and proportions are not completely comparable to A4 paper. However, the templates for FN and PP booklets might work.
If you do get it to work, please let me know =)

 Definitely feel like everything is coming together.
 I can take everything I've learned in the past years...
 And pour it into these notebooks =)
 This little passport traveler will go up in my shop soon and if you want to make your own booklets, I have several templates freely available. I also sell templates through my Etsy shop, as instant downloads.
Please remember, there's a difference between the A6/FN/PP templates for A5 printing and those that are A4 printing, as I showed in the video.
If you want a specific template, but can't find it, you can always drop me a line and I will try to make it together with you and for you.
I hope you enjoy making your booklets. If you have any questions, please don't hesitate to ask. I will do my best to answer all.
Have a wonderful day.
This little passport traveler will go up in my shop soon and if you want to make your own booklets, I have several templates freely available. I also sell templates through my Etsy shop, as instant downloads.
Please remember, there's a difference between the A6/FN/PP templates for A5 printing and those that are A4 printing, as I showed in the video.
If you want a specific template, but can't find it, you can always drop me a line and I will try to make it together with you and for you.
I hope you enjoy making your booklets. If you have any questions, please don't hesitate to ask. I will do my best to answer all.
Have a wonderful day.
[youtube=http://www.youtube.com/watch?v=ZEssAIdOvto]
I also have a few pictures of the little passport I made.
I made it last night after I came home from work and drove for 1.5 hrs through a whole lot of snow....
It's so much fun to make these.
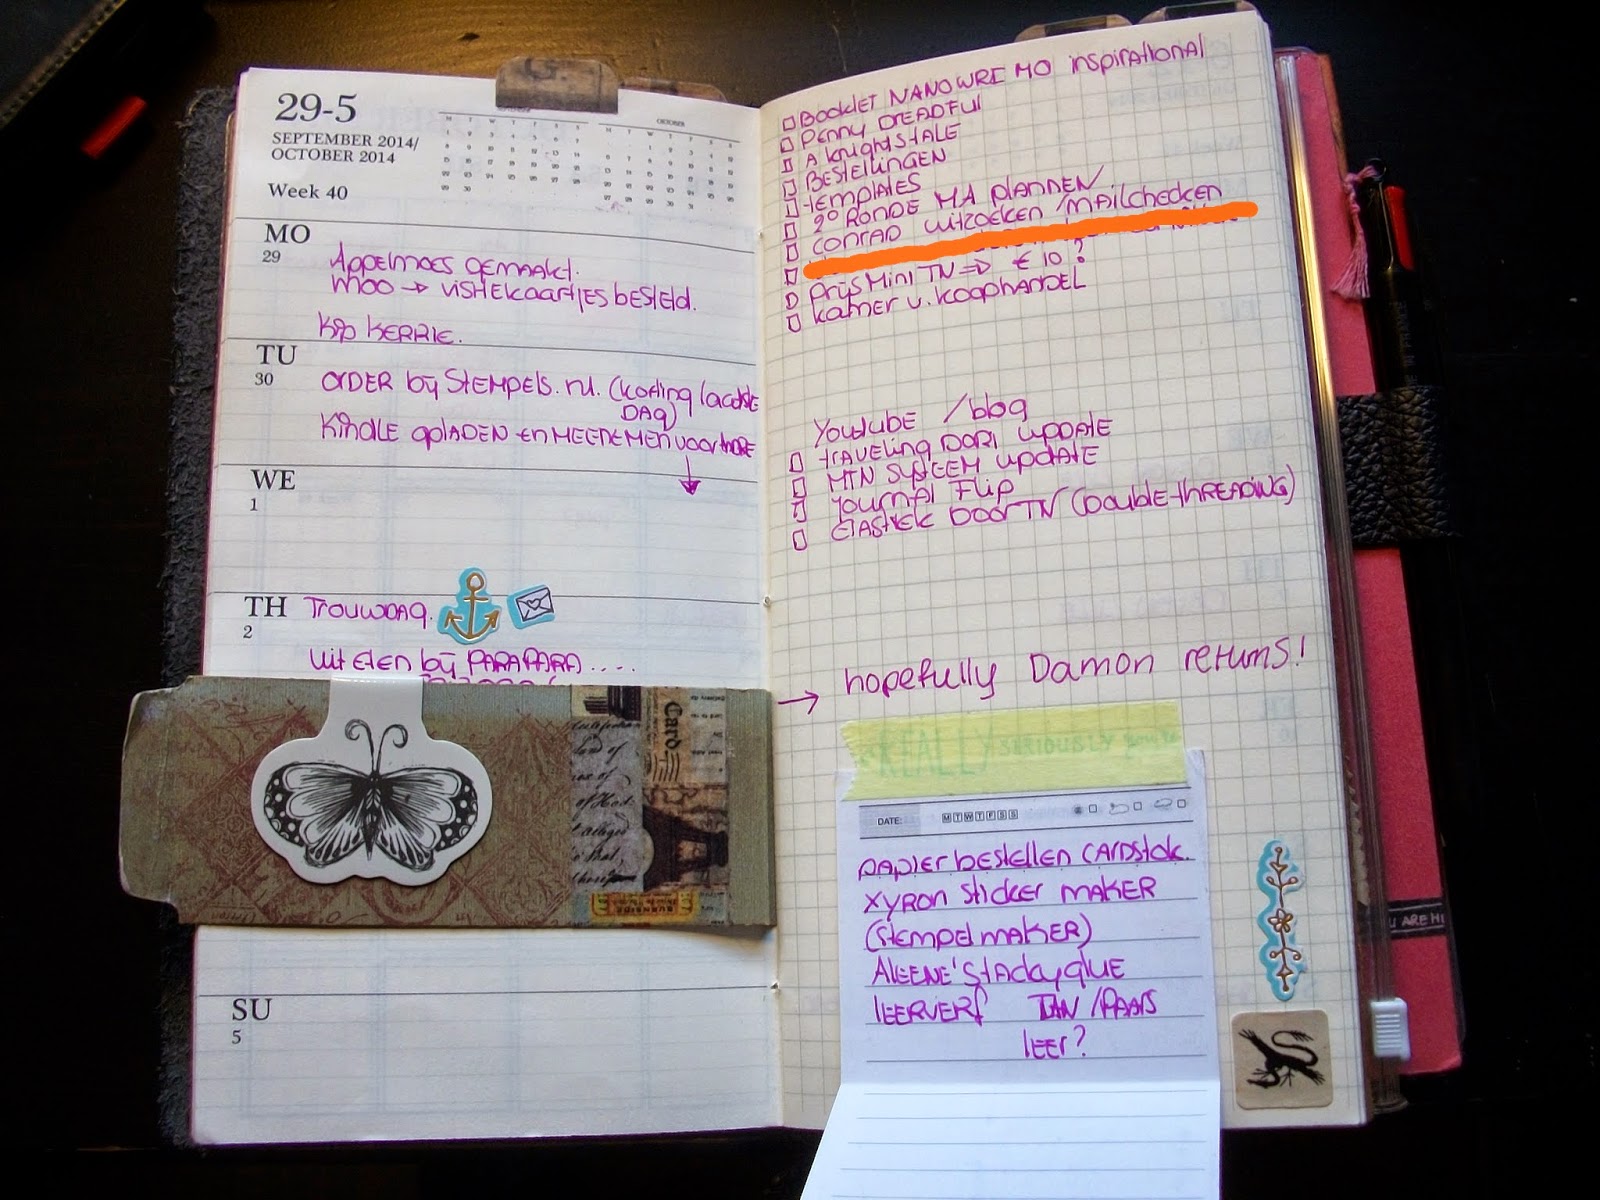
How I'm using my Traveler's Notebooks at the moment
A year has passed since I made my first leather Traveler's Notebook and I've been using this sytem now for well over a year.
I've been making my own diaries and inserts right from the start and have adapted the system to suit my needs. I've used several different lay-outs and setups through-out this period, but I think I have now found a setup that works exactly how I like it.

I have 4 RS TN's for different purposes, one for work, one for art journaling, one for my Etsy store and one personal journal and diary/agenda. I also have a Fieldnotes sized TN for lists and keeping track of online orders and a small Passport sized one that I use as a wallet.
At first I used a setup with a MOTP, a WOTP and a daily diary with a chronodex adaptation to fit a 24 hr day. As time progressed and I was slowly overcoming the symptoms of my burn-out, I found I didn't need a full daily page to keep track of what I was doing. I did however want to keep at least a page per week.
___Warning, picture heavy post___
I didn't like how everything was in seperate booklets and wanted to contain it all into one. So I designed a diary that would do all that, the MOTP, the weekly and a page per week for tasks and stuff.

This month I tried this setup out after having tested it for my work diary.

Here's the MOTP, which is followed by the weekly pages.
I felt the boxes were to dark, so for the new template I made the boxes thinner/lighter...but I'll have to wait till the new year comes around to use the new template...no sense wasting a perfectly good diary, right?

The first week I kept fairly simpel. Used a fountain pen with pink ink, bought originally for my daughter, but I think I'm going to keep it =)

Now I'm pretty sure these pictures are not very interesting for anyone who isn't interrested in diaries and planning and such.

Still, I thought I'd add them, just to give the complete picture ;-)

And who knows you might like this setup, in which case these pictures may give you an impression about how this can be used.

Now we've come to the next month and a few things are already entered in there, among other things, my 22nd wedding anniversary ;-)

As you can see, the monthly pages go before the weekly.
To keep the weeks from splitting I decided to place the monthly pages in front of the week where the thursday was in the new month. Like the way we decide wether the first day of the new year is also in the first week of the new year...

When I feel I don't have enough space or, like in this case, I want something I can move to another page/week, I use tip-ins with washi.
At the end of the booklet I pasted a list with tried and tested menu ideas...in case we run out of things to think of for dinner.

to the right I pasted a list with dutch holidays.
I mark those on the last pages as well, since these are yearly overviews.

In this TN I also have a Midori zipper pouch.

A home made file folder with pen-loops.

A Midori card file.

And a journaling booklet.

Which will be full tonight...

I won't show pictures of the journaling booklet in this blogpost, since this one is picture heavy enough as it is.

I like decorating my booklets, but I'm not prone to using any one style...

I just use whatever I feel like.

Or even whatever I bump into at the time on my desk...


There's a little elephant, an oister I bought from a friend's shop and the remaining wings of a fairy I got in a swap last year...honestly, it was a fairy. It broke off, but as a reminder of the kindness of the person who sent it, I keep the wings on there ;-)
I hope you liked my boring diary pages anyhow and I wish you a lovely week.
I've been making my own diaries and inserts right from the start and have adapted the system to suit my needs. I've used several different lay-outs and setups through-out this period, but I think I have now found a setup that works exactly how I like it.
I have 4 RS TN's for different purposes, one for work, one for art journaling, one for my Etsy store and one personal journal and diary/agenda. I also have a Fieldnotes sized TN for lists and keeping track of online orders and a small Passport sized one that I use as a wallet.
At first I used a setup with a MOTP, a WOTP and a daily diary with a chronodex adaptation to fit a 24 hr day. As time progressed and I was slowly overcoming the symptoms of my burn-out, I found I didn't need a full daily page to keep track of what I was doing. I did however want to keep at least a page per week.
___Warning, picture heavy post___
I didn't like how everything was in seperate booklets and wanted to contain it all into one. So I designed a diary that would do all that, the MOTP, the weekly and a page per week for tasks and stuff.
This month I tried this setup out after having tested it for my work diary.
Here's the MOTP, which is followed by the weekly pages.
I felt the boxes were to dark, so for the new template I made the boxes thinner/lighter...but I'll have to wait till the new year comes around to use the new template...no sense wasting a perfectly good diary, right?
The first week I kept fairly simpel. Used a fountain pen with pink ink, bought originally for my daughter, but I think I'm going to keep it =)
Now I'm pretty sure these pictures are not very interesting for anyone who isn't interrested in diaries and planning and such.
Still, I thought I'd add them, just to give the complete picture ;-)
And who knows you might like this setup, in which case these pictures may give you an impression about how this can be used.
Now we've come to the next month and a few things are already entered in there, among other things, my 22nd wedding anniversary ;-)
As you can see, the monthly pages go before the weekly.
To keep the weeks from splitting I decided to place the monthly pages in front of the week where the thursday was in the new month. Like the way we decide wether the first day of the new year is also in the first week of the new year...
When I feel I don't have enough space or, like in this case, I want something I can move to another page/week, I use tip-ins with washi.
At the end of the booklet I pasted a list with tried and tested menu ideas...in case we run out of things to think of for dinner.
to the right I pasted a list with dutch holidays.
I mark those on the last pages as well, since these are yearly overviews.
In this TN I also have a Midori zipper pouch.
A home made file folder with pen-loops.
A Midori card file.
And a journaling booklet.
Which will be full tonight...
I won't show pictures of the journaling booklet in this blogpost, since this one is picture heavy enough as it is.
I like decorating my booklets, but I'm not prone to using any one style...
I just use whatever I feel like.
Or even whatever I bump into at the time on my desk...
I have 3 bookmarks, that I don't use as such, but I do like to keep some charms on there.
There's a little elephant, an oister I bought from a friend's shop and the remaining wings of a fairy I got in a swap last year...honestly, it was a fairy. It broke off, but as a reminder of the kindness of the person who sent it, I keep the wings on there ;-)
I hope you liked my boring diary pages anyhow and I wish you a lovely week.
Got Tangled...
Yesterday I was browsing through Pinterest looking for some inspiration, I stumbled upon a beautiful collection of Tangle patterns. When I clicked trough to the blog I found they were made by a lovely lady named Emily Houtz. She made an entire set of Tangle reference cards and they were free to download.
With this many Tangle examples I figured I could perhaps make a booklet with Tangle examples to take with me in my Traveler's Notebook. After a bit of fiddling (quite a bit actualy) I managed to get them into the format I wanted them and made a trial booklet for my daughter.
She loved it very much an proceeded to make a cover for her booklet filled with doodles. Her cover not finished so I can't show it here yet, but she's having so much fun with it.
Looking at this I thought maybe other people would like a booklet like this as well, so I wrote to Emily to see if she would mind me sharing the booklet I made with her Tangles. I got a lovely email back from her and she graciously allowed me to share the booklet template with you.
 I adjusted the template file a little and made an example booklet. I'll be taking this one with me in my RS TN.
 The booklet consists of 60 pages.
 Filled with tangle examples.
 In several different styles.
 And room to add your own at the end.
 I made mine with a plain cover...just printed with the vintage pens...leaving room for me to doodle on the cover.... once I get a bit more practice. At least now I will always have some examples with me.
Please check out Emily's blog or her Flickr pages for more inspiration. She has some wonderful examples.
The booklet pdf is free to download from the dropbox link on my Midori TN Free inserts page. You will find the template in the RS folder (RS tangle sets.pdf)
With printing this, set the printer to double sided printing (or brochure and flip on the short side). Use the booklet setting from the pdf settings, as shown in the picture below, select all pages and choose both sides for the subset when printing double sided. (sorry I only have the dutch version of the settings)
I made mine with a plain cover...just printed with the vintage pens...leaving room for me to doodle on the cover.... once I get a bit more practice. At least now I will always have some examples with me.
Please check out Emily's blog or her Flickr pages for more inspiration. She has some wonderful examples.
The booklet pdf is free to download from the dropbox link on my Midori TN Free inserts page. You will find the template in the RS folder (RS tangle sets.pdf)
With printing this, set the printer to double sided printing (or brochure and flip on the short side). Use the booklet setting from the pdf settings, as shown in the picture below, select all pages and choose both sides for the subset when printing double sided. (sorry I only have the dutch version of the settings)
 Have fun making your booklet and Tangles.
A new quotes insert template
Recently I updated my Midori TN free inserts page with the link to the location where you can download them. I also added my new logo and the link to my Etsy shop. In case you would like me to make you a Traveler's Notebook or inserts for Traveler's Notebooks.
 Among the inserts are some templates with quotes I collected overt the past year and used with my art journals. An insert with random quotes and an insert with Hitchhikers Guide quotes by Douglas Adams, since this is one of my all time favorite books. I've shared these free templates already on my facebook page and in several Facebook groups, but thought I'd share them here as well.
I used the last one as a travel journal while on holiday and realy enjoyed the setup.
Among the inserts are some templates with quotes I collected overt the past year and used with my art journals. An insert with random quotes and an insert with Hitchhikers Guide quotes by Douglas Adams, since this is one of my all time favorite books. I've shared these free templates already on my facebook page and in several Facebook groups, but thought I'd share them here as well.
I used the last one as a travel journal while on holiday and realy enjoyed the setup.
 In one of the Facebook groups I'm a member of, Midori Traveler's Notebook Forum, a lovely lady, named Cassandra, posts daily quotes, QOTD. I thought it was a shame to see those quotes disappear into the stream of the timeline and asked her if she was alright with me collecting those quotes to gather them into a booklet. Which she was and she graciously allowed me to share the booklet.
Yesterday I printed my new journal booklet with Cassandra's quotes and made some covers to go with it. My daughter accompanied me while making a mess. We had a lot of fun together. She made the middle cover and I think it turned out beautiful.
In one of the Facebook groups I'm a member of, Midori Traveler's Notebook Forum, a lovely lady, named Cassandra, posts daily quotes, QOTD. I thought it was a shame to see those quotes disappear into the stream of the timeline and asked her if she was alright with me collecting those quotes to gather them into a booklet. Which she was and she graciously allowed me to share the booklet.
Yesterday I printed my new journal booklet with Cassandra's quotes and made some covers to go with it. My daughter accompanied me while making a mess. We had a lot of fun together. She made the middle cover and I think it turned out beautiful.
 We used some spray inks with stencils for these covers.
 Flipped them over after the first spray to get the reverse effect.
 Rubbed some ink into another stencil.
 Used stamps. old dictionary paper and washi tape to decorate a little further.
 The back cover is folded so we have room to keep some papers, ephemera and stuff in the back of the booklet.
 Added a little flap at the bottom of the back cover inside the flap. and added some decorative papers.
 Finaly we folded the printed papers for the insert and assembled the booklets. So here are some pictures of one of the finished inserts.
 Inside fron cover.
 Each right page has a quote.
 The back cover with the flap.
 And inserted an envelope and a pcture I wanted to keep.

 I'm afraid the lady didn't stamp as well as I wanted, but I still like it. She's one of my newest Stampers Anonymous stamps and I realy love these.
 So true....
 We had a lot of fun making these and I hope you enjoyed watching. Have fun making your own and I wish you a wonderful week.