

Since I started making Traveler's Notebooks I have tried out several different ways to thread the elastic through the spine to keep the notebooks inside.
Obviously I started with the normal method, which is one thread, this is realy plenty to keep the notebooks in place.

You start with keeping a length of elastic on the side, long enough to go from the bottom to the top.

Thread the rest through the second hole from the back to the front and up through the next hole, back to the outside.

Go over the top and pull the elastic into the slit at the top. Come all the way down and pull it through the slit on de bottom, to the back.
If your's doesn't have a slit, you'll have to thread it through the holes, from the outside to the inside at the top hole and the reverse at the bottom hole.
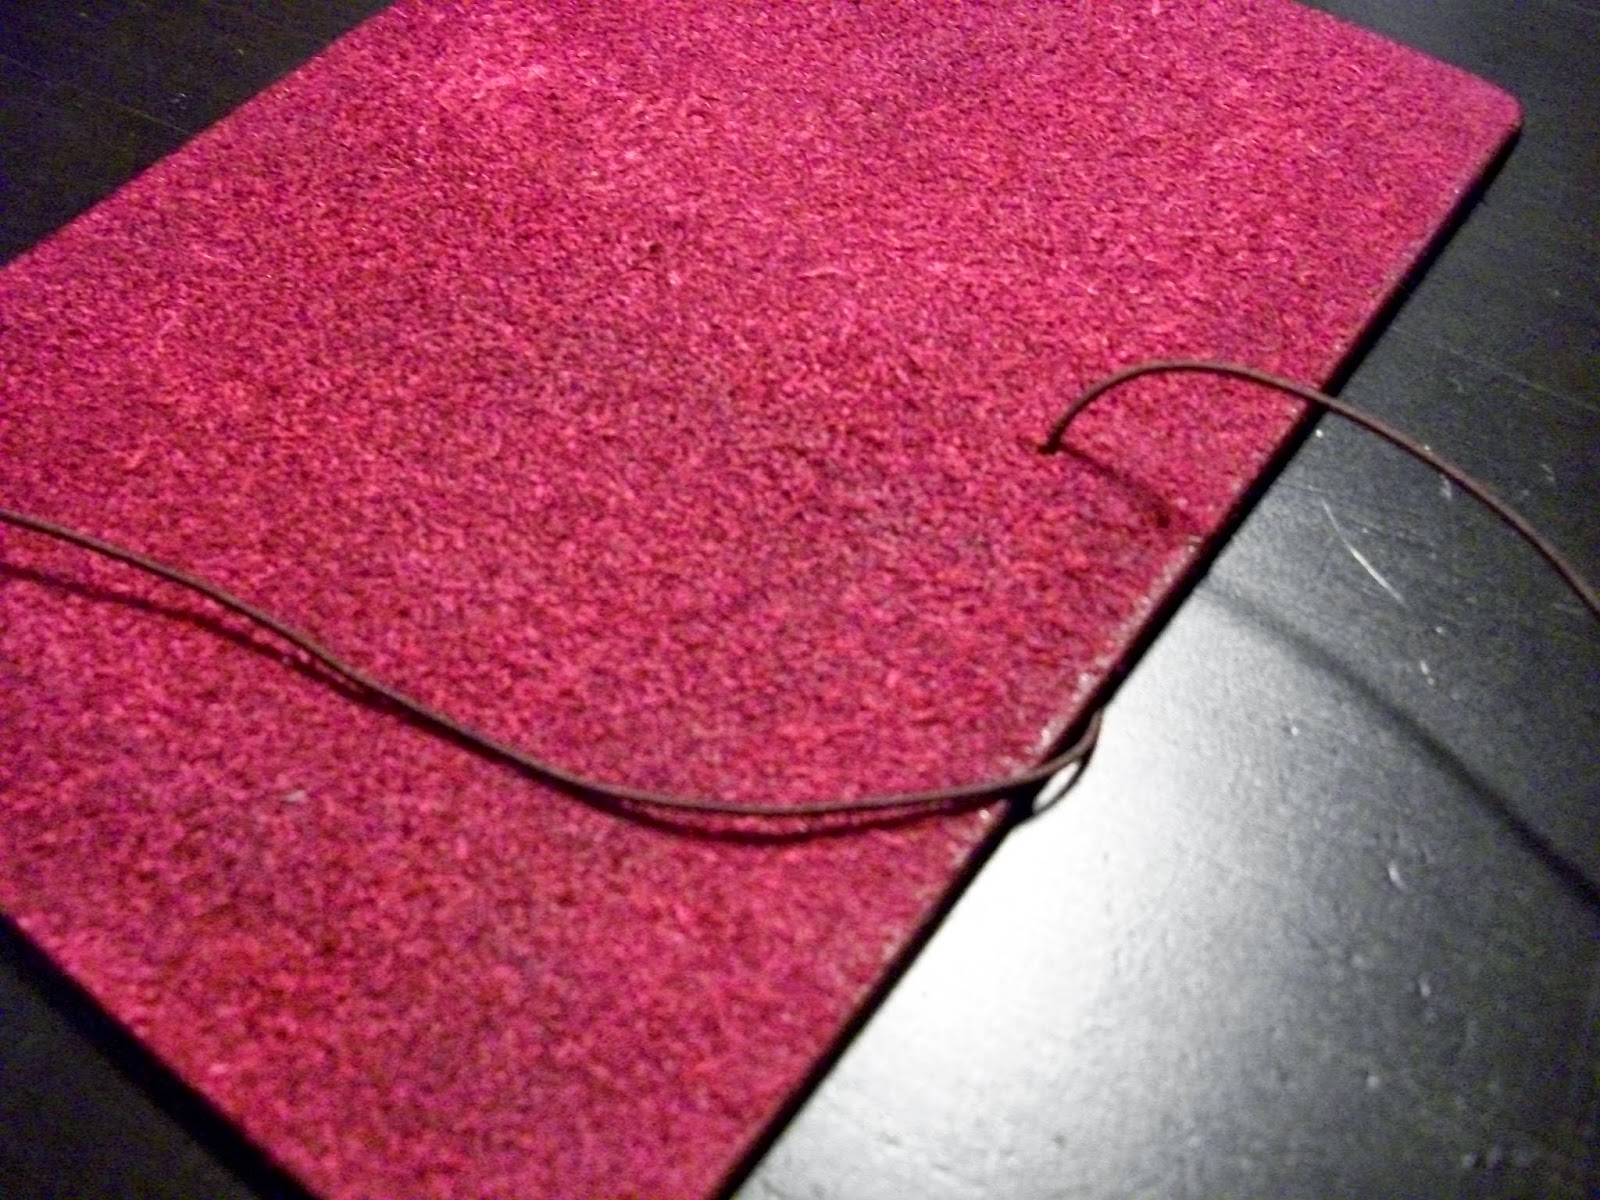
Now you flip it over to put the elastic through the second hole from the bottom. To aid me in pulling the elastic through the hole I use a wire folded in half, kinda like a hair pin.

As you can see, it goes through the same hole we started with, the loose end is still there.

From the inside it looks like this after you've pulled it through. Next step is to pull it through the second hole from the top, not the far top hole. From the inside to the outside.

Now all you have to do is to pull the loose elastic, which we left at the beginning, up through the bottom hole slit, up and around to the back, through the top hole slit.
In case you don't use the tin clasp, you can just pull the top elastic to the inside and the bottom one as well. You can then tie a knot in them on the inside and be done. You'll also have to tie your waxed cord for the bookmark to one of the elastics.

At the top on the outside you now have two bits of elastic. You can put each elastic through one of the holes on the underside of the tin clasp (there are 2 on the underside and 1 at the top).
Take the waxed cord and pull through the hole next to the top elastic, using the same folded wire (or anything else that's strong enough)

You now have something that looks like this.
Take the top elastic and the waxed cord in one hand, the bottom elastic in the other and tie a knot.


When the knot is sunken well into the clasp, close the clasp by either tapping it with a hammer, or squeeze it with pliers, like I ususaly do.
I use a little scrap piece of leather to keep the clasp from getting scarred by the pliers. You don't need to do that, I just prefer it this way. It not only protects the clasp, but also the leather from getting scratched by the tools. Which is another reason why I prefer not to use a hammer.
This piece of leather will last you a long time. It has been my aid since I first started using the tin clasps almost a year ago now. Closing the clasp doesn't need a lot of pressure, but be sure to squeeze it nice and tight.

You can now cut the bits sticking out, right next to the clasp. Pull the waxed cord to the front, if you haven't already and cut it to size. Don't cut it too short, because you may want to tie some dangly things from it =)
All you need now is an elastic to keep your Traveler's notebook closed and you're good to go...well and some inserts of course...

I hope this has been helpful. Should you have any questions about any of this, please don't hesitate to ask.
I wish you a wonderful weekend.
Obviously I started with the normal method, which is one thread, this is realy plenty to keep the notebooks in place.
However I got so many requests to put two elastics in the spine, that I started trying out different ways to thread the elastic. I looked around for ways other people were threading their Traveler's Notebooks and found several, but none of them really appealed to me.
The first and easiest way I found would be the sideways threading, as opposed to the regular vertical threading. This seems very nice in the beginning, but has a tendency to deform the spine, so that wasn't going to work for me.
I also like to use the little tin clasp, since it performs two functions. It not only keeps the elastic for the spine, but it also holds the bookmark, keeping the amount of knots needed to attach everything to a minimum.
Threading two elastics and the bookmark through the little tin clasp is a challenge, since it is so small. You'd have to fiddle it through, tie a knot and then squeeze it closed. Plus I had a terrible time keeping the elstics nicely lined up, major OCD kicking in...yeah, that didn't work out too great. At least not the way I like it.
So I came up with an alternative threading, where I thread one long elastic through the spine twice, attach the waxed cord for the bookmark, keep everything lined up nicely and still easily use the tin claps to secure it all.
You start with keeping a length of elastic on the side, long enough to go from the bottom to the top.
Thread the rest through the second hole from the back to the front and up through the next hole, back to the outside.
Go over the top and pull the elastic into the slit at the top. Come all the way down and pull it through the slit on de bottom, to the back.
If your's doesn't have a slit, you'll have to thread it through the holes, from the outside to the inside at the top hole and the reverse at the bottom hole.
Now you flip it over to put the elastic through the second hole from the bottom. To aid me in pulling the elastic through the hole I use a wire folded in half, kinda like a hair pin.
As you can see, it goes through the same hole we started with, the loose end is still there.
From the inside it looks like this after you've pulled it through. Next step is to pull it through the second hole from the top, not the far top hole. From the inside to the outside.
Now all you have to do is to pull the loose elastic, which we left at the beginning, up through the bottom hole slit, up and around to the back, through the top hole slit.
In case you don't use the tin clasp, you can just pull the top elastic to the inside and the bottom one as well. You can then tie a knot in them on the inside and be done. You'll also have to tie your waxed cord for the bookmark to one of the elastics.
At the top on the outside you now have two bits of elastic. You can put each elastic through one of the holes on the underside of the tin clasp (there are 2 on the underside and 1 at the top).
Take the waxed cord and pull through the hole next to the top elastic, using the same folded wire (or anything else that's strong enough)
You now have something that looks like this.
Take the top elastic and the waxed cord in one hand, the bottom elastic in the other and tie a knot.
Nice and tight,... but not too tight. You want the elastics to be firm enough to hold your booklets, but not so firm that they will tear your booklets.
The waxed cord sticking out is probably too long at this point and since we don't want to waste any, you pull it as short as you can. By doing this, usualy, the little knot disappears into the tin clasp. If it doesn't, pull the elastics on the inside to get the knot safely lodged inside the tin clasp. Remember to pull them all together.
When the knot is sunken well into the clasp, close the clasp by either tapping it with a hammer, or squeeze it with pliers, like I ususaly do.
I use a little scrap piece of leather to keep the clasp from getting scarred by the pliers. You don't need to do that, I just prefer it this way. It not only protects the clasp, but also the leather from getting scratched by the tools. Which is another reason why I prefer not to use a hammer.
This piece of leather will last you a long time. It has been my aid since I first started using the tin clasps almost a year ago now. Closing the clasp doesn't need a lot of pressure, but be sure to squeeze it nice and tight.
You can now cut the bits sticking out, right next to the clasp. Pull the waxed cord to the front, if you haven't already and cut it to size. Don't cut it too short, because you may want to tie some dangly things from it =)
All you need now is an elastic to keep your Traveler's notebook closed and you're good to go...well and some inserts of course...
I hope this has been helpful. Should you have any questions about any of this, please don't hesitate to ask.
I wish you a wonderful weekend.
Comments
rose of Walk in the Woods, LLC
Such a lovely travelers journal ~ and cool technique for holdin' it all together!
June 01, 2017
Monique
Thank you Rose
June 01, 2017
Leave a comment