

Lady Falcon Travelers

My planner last month, July
Last month was quite a hectic one and with the holiday at our doorstep I decided to go and try the #onebookjuly challenge and switch from several notebooks to just 1 B6 slim for personal and 1 A5 for work. I changed my personal planner to B6 slim because I wanted to try that size to take with me on holiday and I can definitely say that I enjoyed using this size, so I may end up using it a while longer.
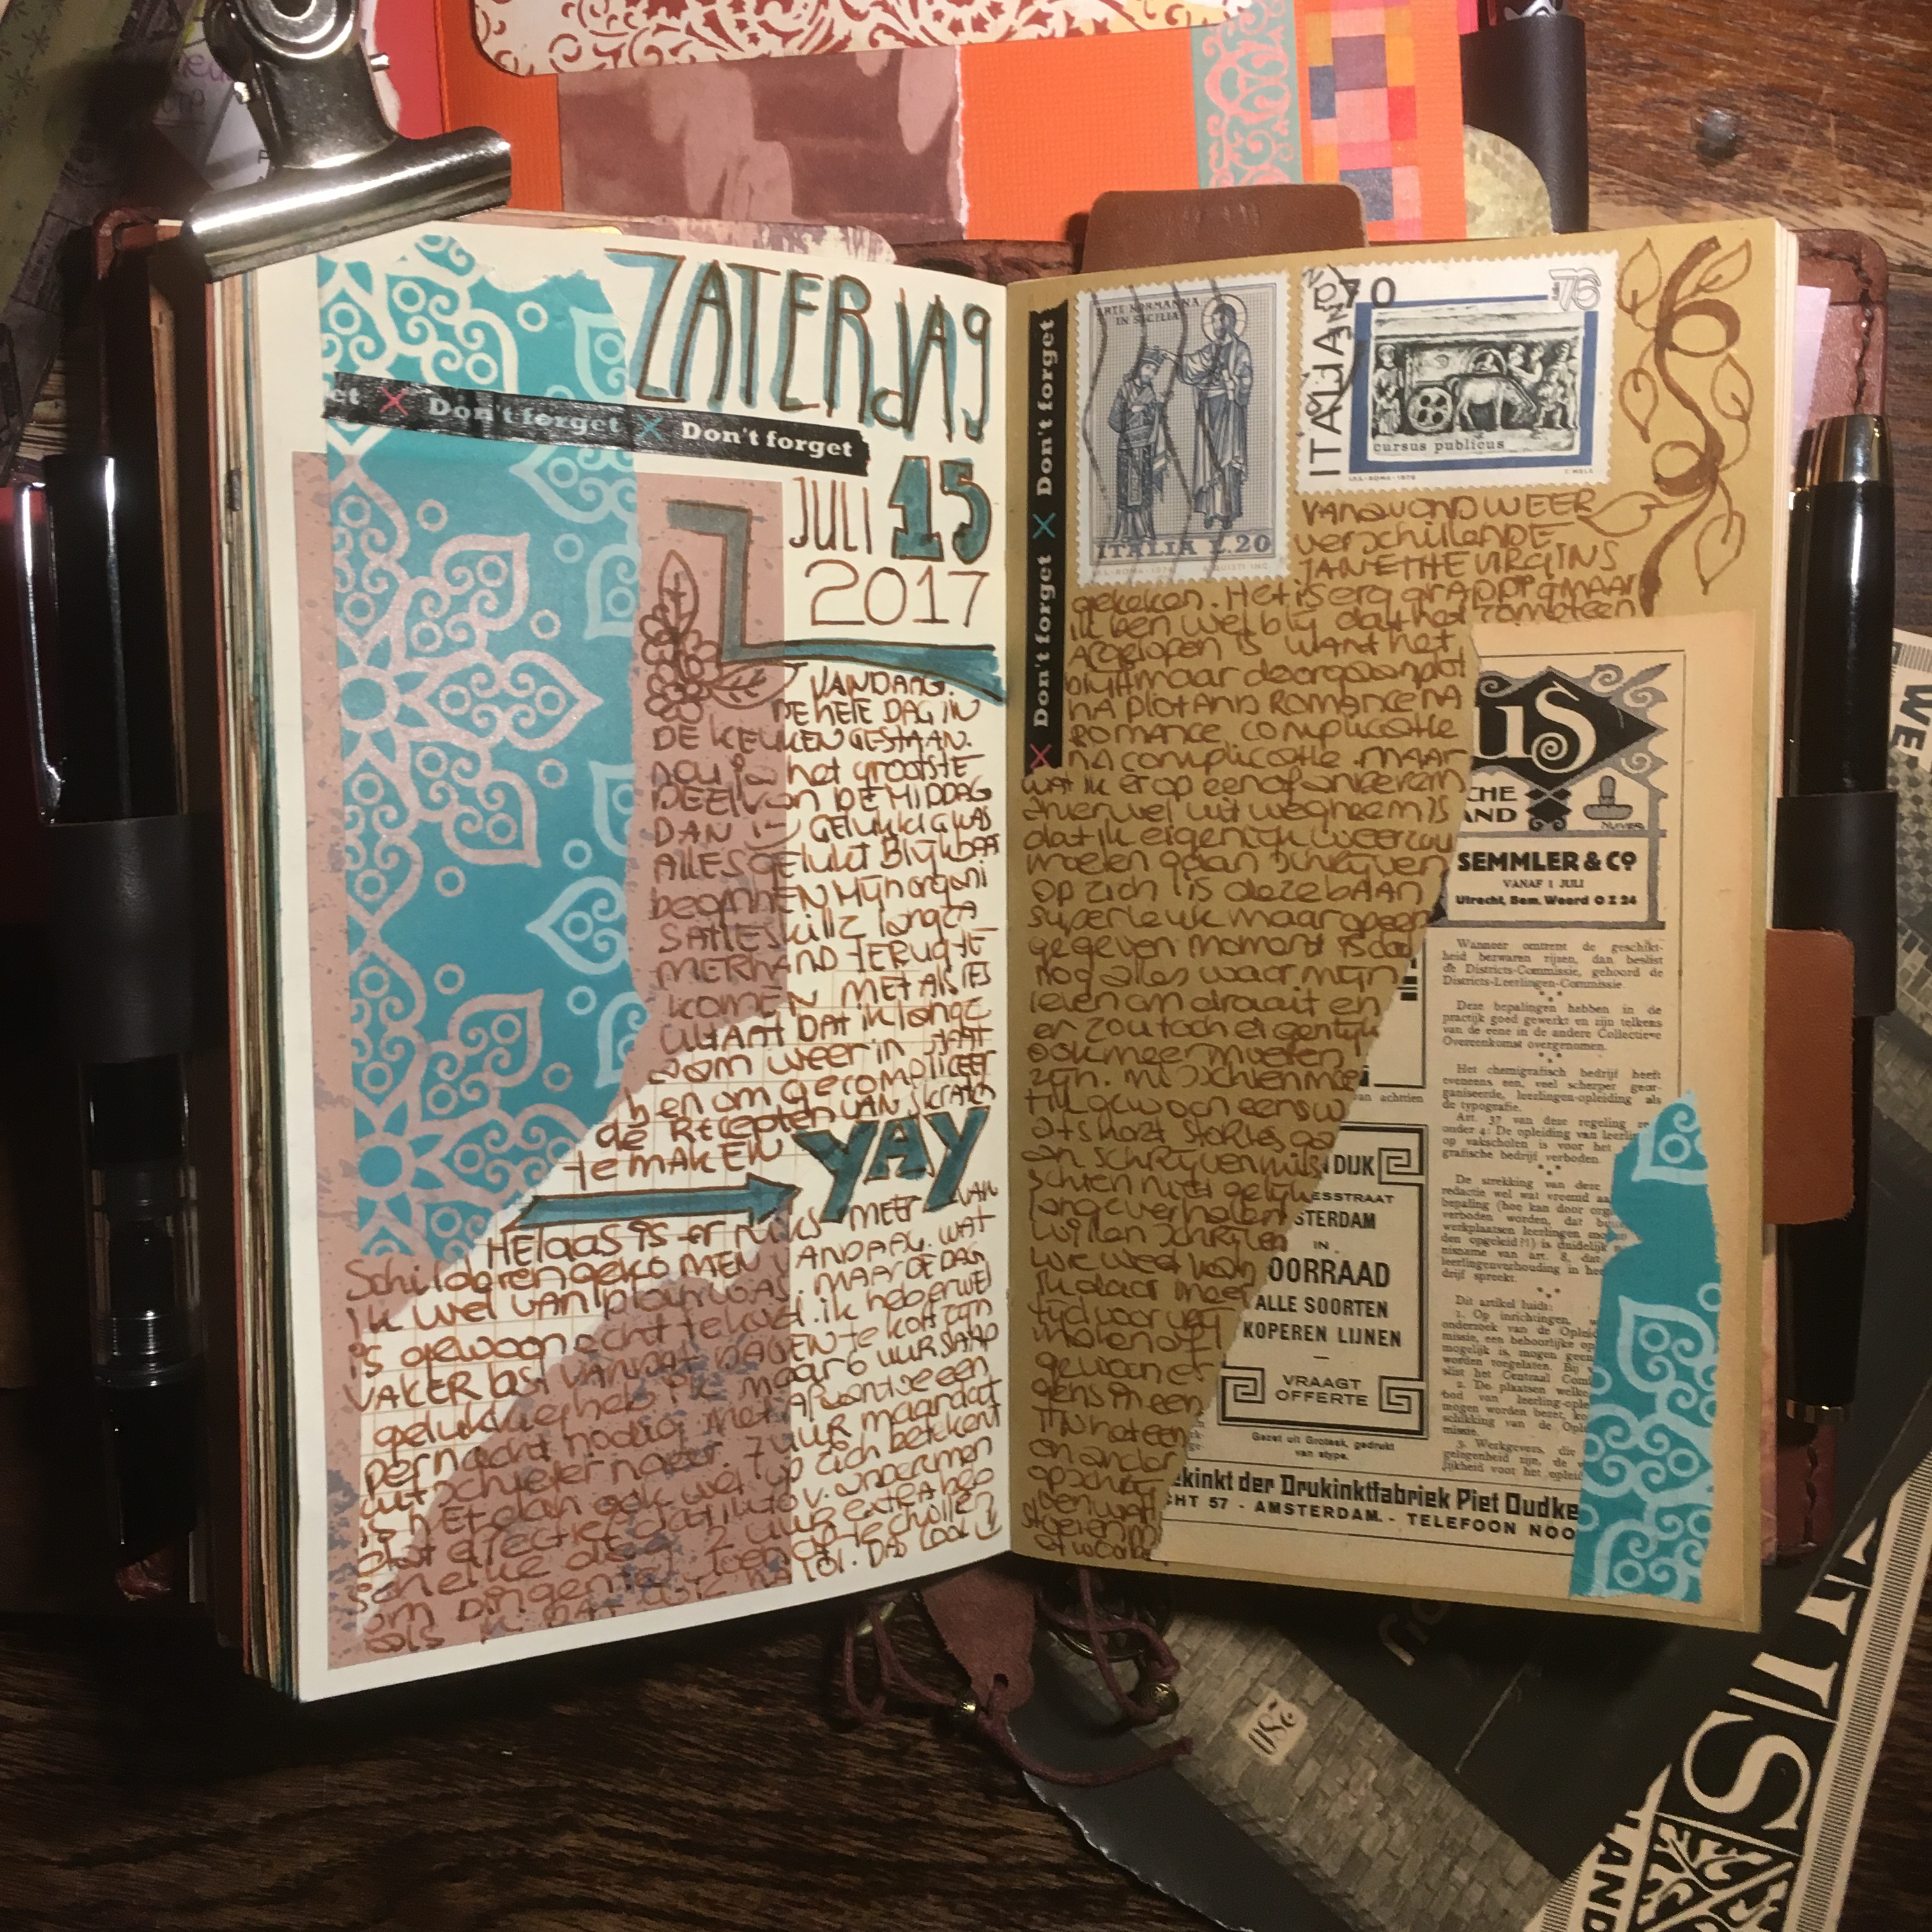
Here's my MOTP spead from July, just a few notes and mostly just doodles. I really enjoy making them to look like this, adding bits and pieces every day.
My weekly's usually contain a bit more text, but I tend to use those mostly as a memory booklet, since my planning with tasks and projects is done in my Bullet journal section.

I start with a bit of decoration and add stuff along the way during the week, mostly at the end of the day.

And although messy, I like the way it ens up and think it looks pretty.

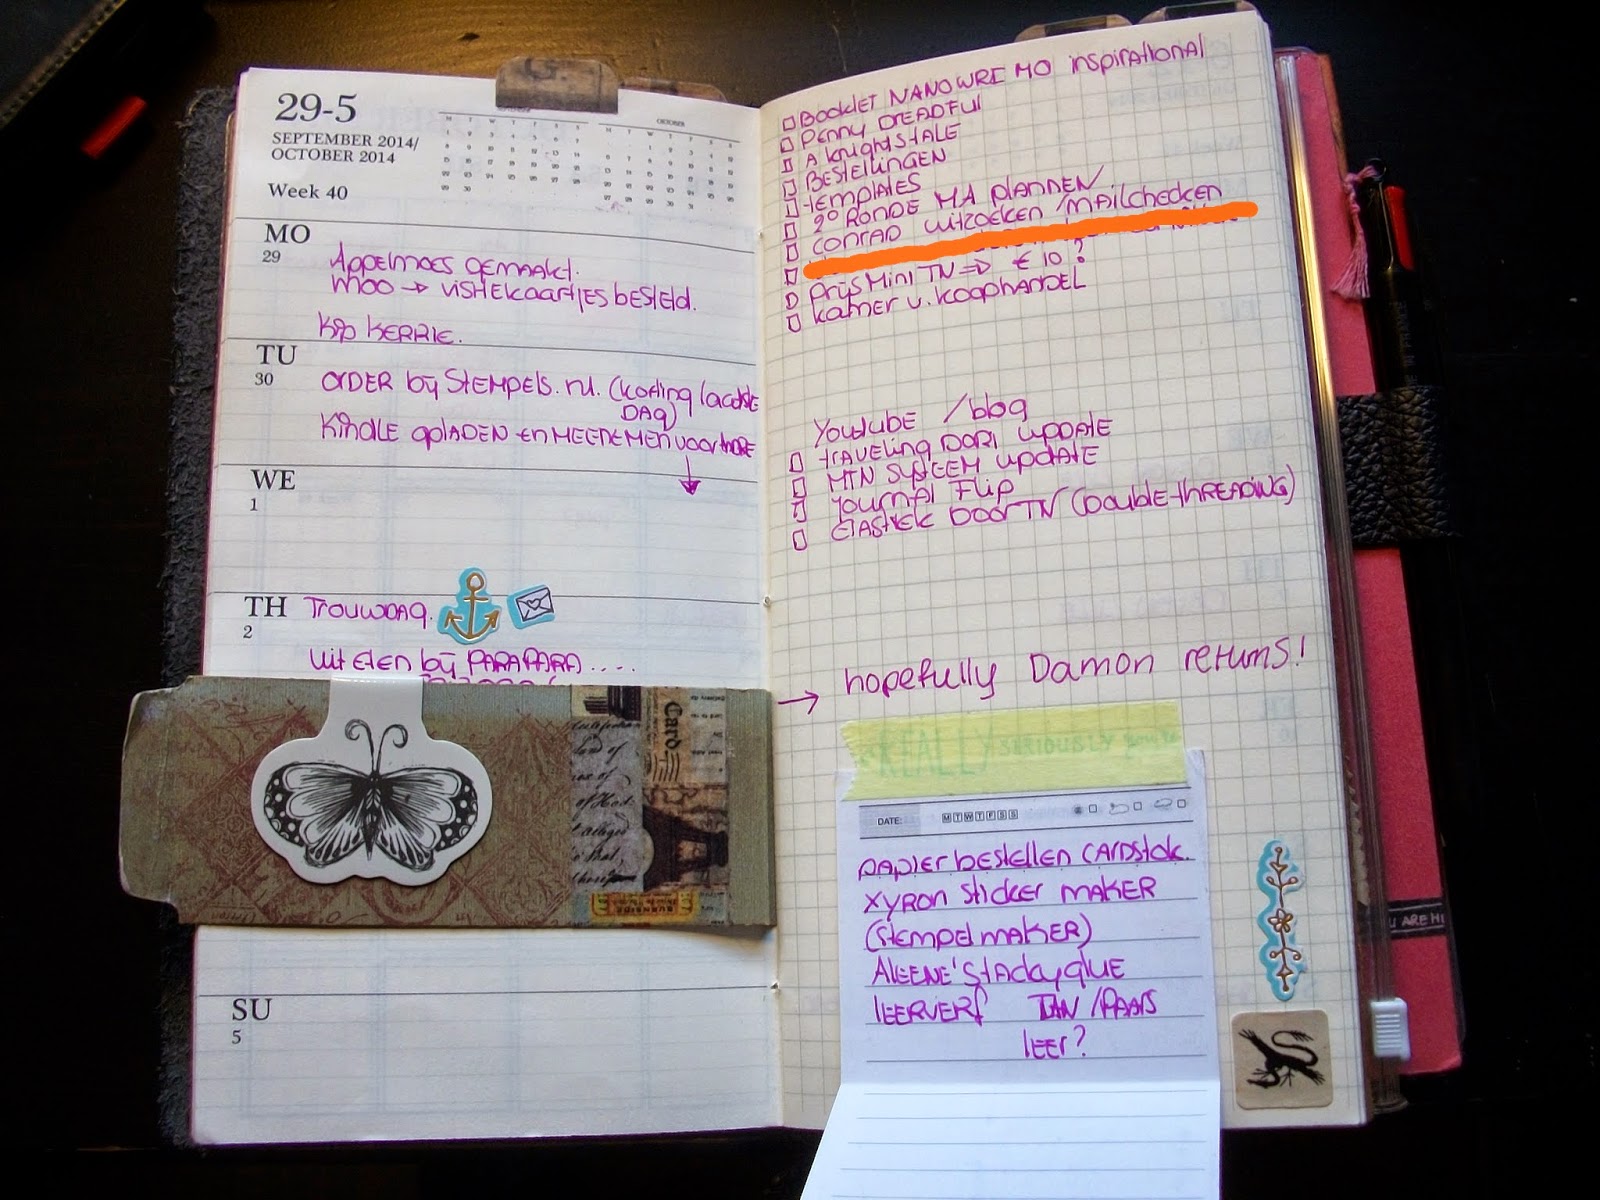
Now my Bullet journal is an entirely different story, because that is all about functionality and keeping track of what needs to get done.
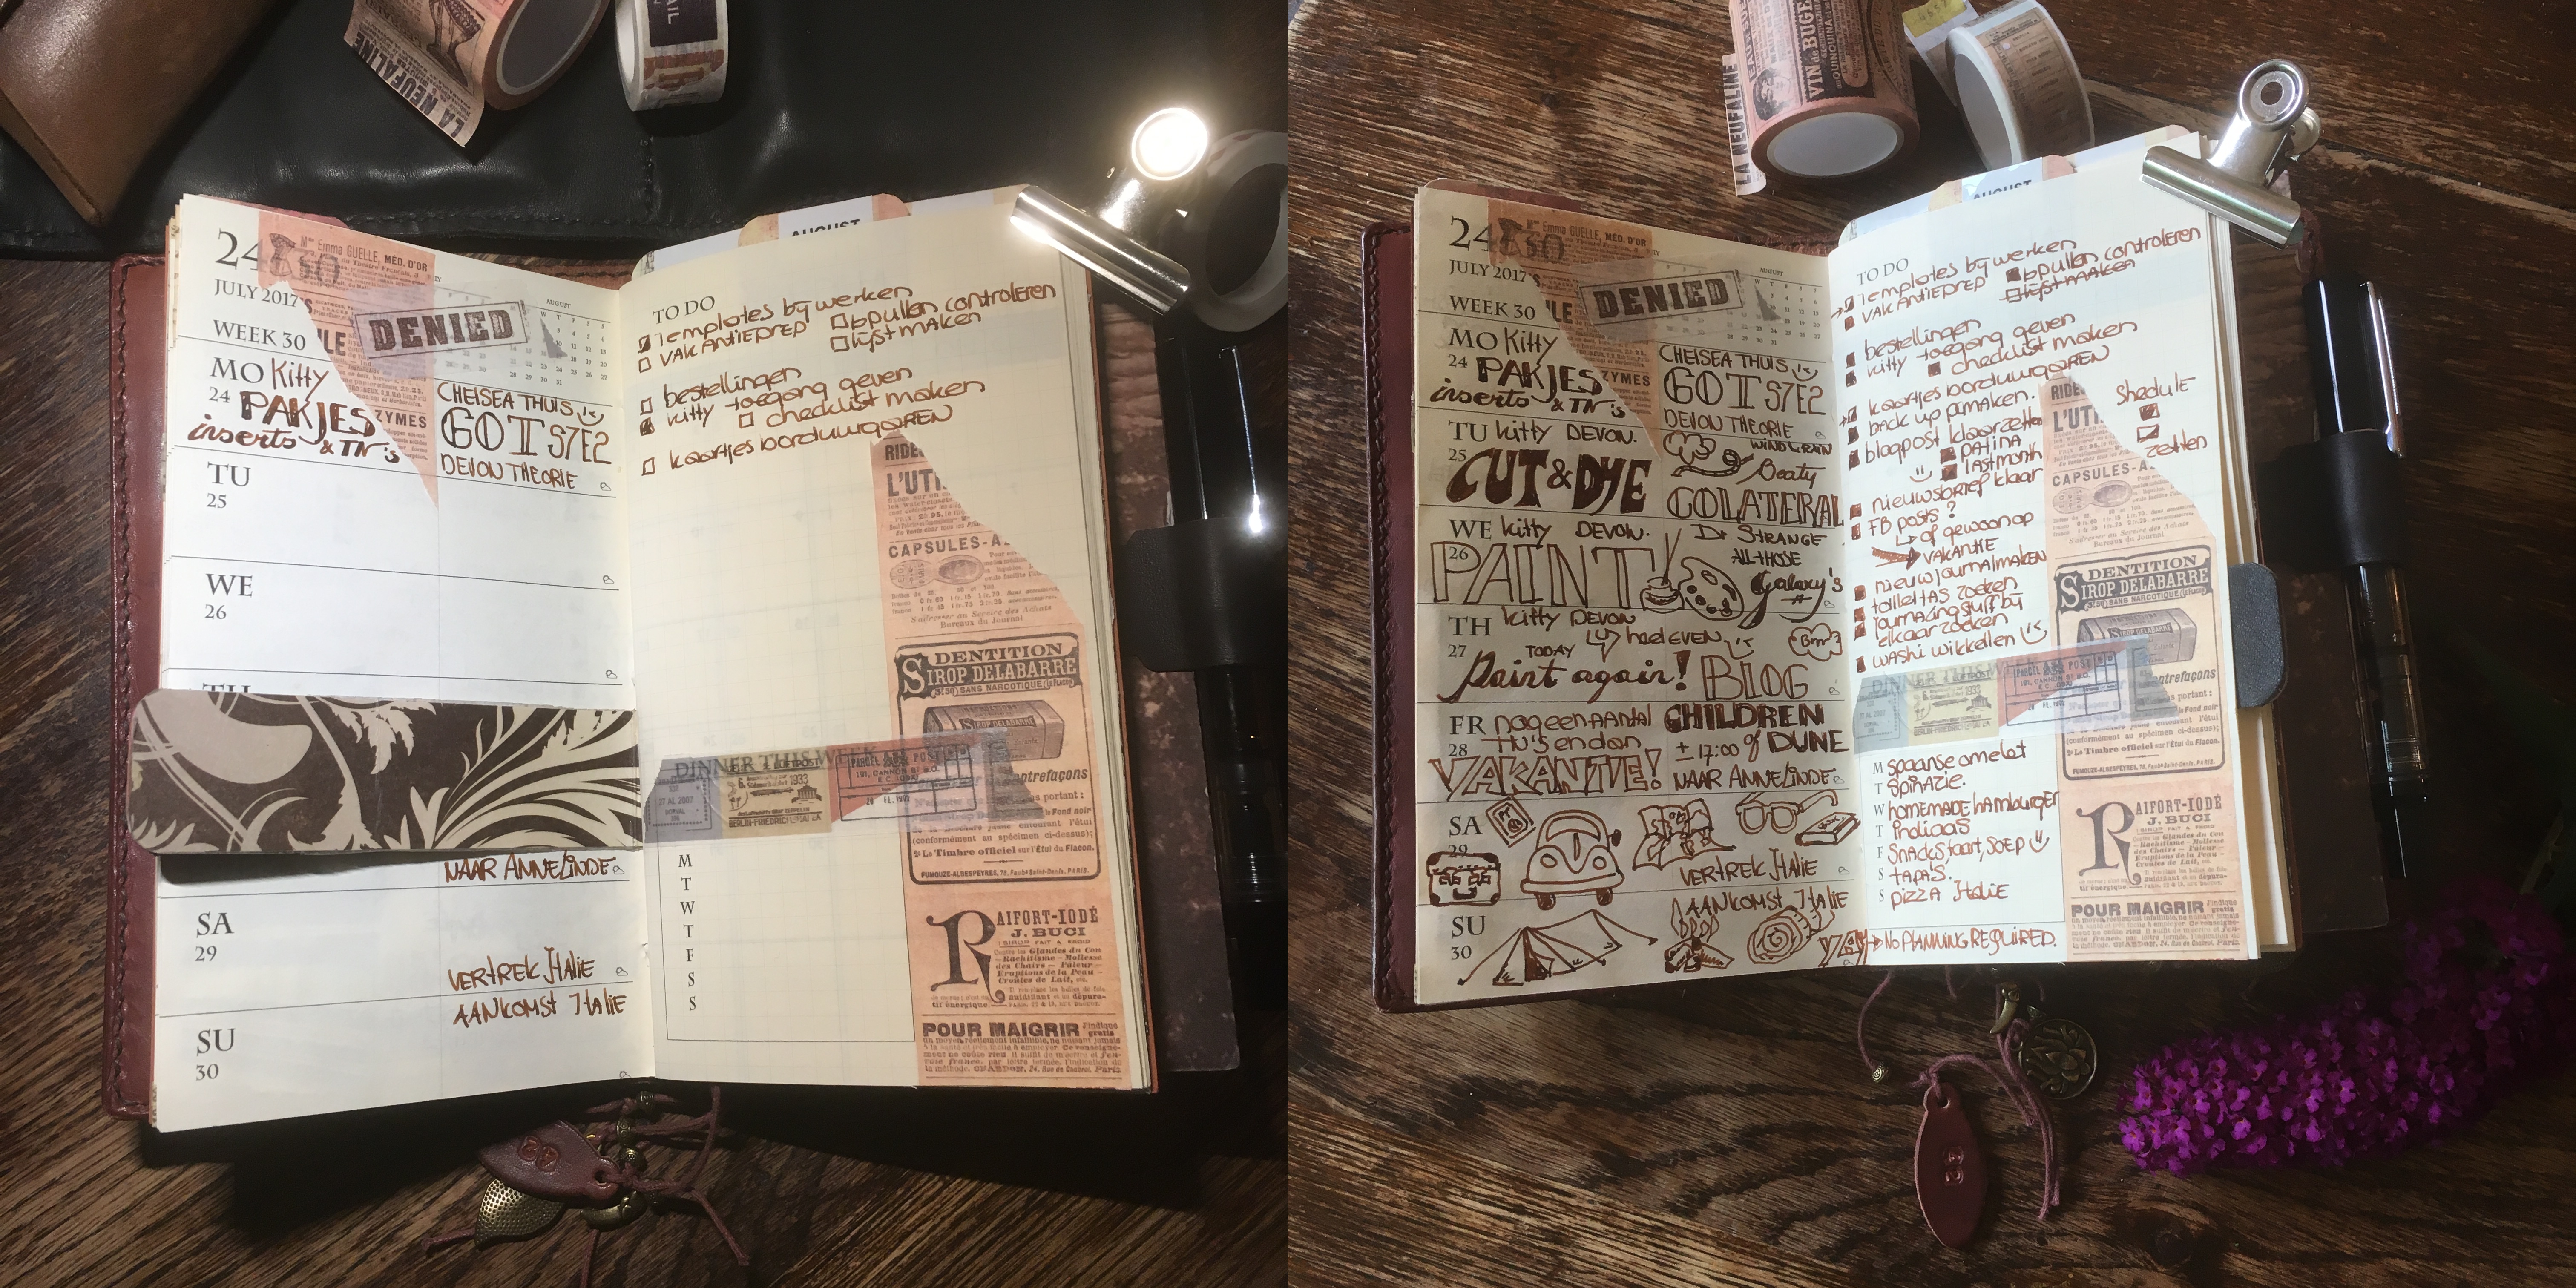
So mostly no pretty washi, or stickers there, no weekly lay-outs, because I can't handle having to draw those out every time. Just my to-do, to-don'ts, my to research and a few trackers...

lol, not pretty trackers, but quickly scratched functional trackers that get the job done and I don't get lost in the endless list of things that need to get done.

My Bullet journal is like that as well. Probably because I want to write quickly to get it all out of my head and onto the paper... preferably before it disappears out of my head forever.
The #onebookjuly also entailed a switch to a new daily journal and I made a junk journal type insert for it, with 5 different papers and have been really enjoying using that. So much so that I made a new one for August and our holiday.
Here's a quick peek at a few pages, but I'll make separate post and a flip-through later in August.
Have a lovely summer everyone,
xoxo Monique
January 2016 setup update...
 I hope I made the ordering process easier, by removing the separate listings for each size and style and have condensed the insert listings to:
- MOTP-WOTP combo insert, with either a listing for a design cover or a listing for a plain card-stock
- WOTP or MOTP insert, with either a listing for a design cover or a listing for a plain card-stock
- Bullet journal insert, with either a listing for a design cover or a listing for a plain card-stock
- Notes Insert, plain/grid/lined/dot-grid/cross-grid, with either a listing for a design cover or a listing for a plain card-stock


 Aren't they pretty... a true spring collection. Now you can still get them in the plain card-stock covers. I updated those colors as well, so there are more options available.
 Hope you enjoyed the video and if you have any questions, please let me know.
Have a great day
xx Monique
Hope you enjoyed the video and if you have any questions, please let me know.
Have a great day
xx Monique
New diary style... I'm calling it Grunge..
 So I made myself a new lay-out. Building on the modern style I already offer, changed a bit, added a bit, went for a bit of color and now I have a super cute Grunge style diary
...and combined with my new paper... I'm so loving it
So I made myself a new lay-out. Building on the modern style I already offer, changed a bit, added a bit, went for a bit of color and now I have a super cute Grunge style diary
...and combined with my new paper... I'm so loving it
 I glued a little owl to the inside of the cover, just to get me started...
 I really like this style diary and will definitely develop the design a bit further
 and make it in all other sizes as well
 But for now I'm quite happy with how it looks.
 This diary template, for oct-dec in personal size is availabe in the Lady Falcon Box folder, which you can find via the free printable templates page.
I also added a page to this blog with information about my diaries and the different styles there are. This to make purchasing the right diary for you easier. I also have new listings in my Etsy shop where you can choose your diary template, size and cover. This way I won't need to add a listing for every template I have (listed and non-listed), to the shop and the shop won't get too crowded with loads of listings where you would never be able to find what it is you want...
I hope you enjoyed this and do check out the templates explained page =)
Have a wonderful weekend
xoxo Monique
Here are a few of the new listings for printed inserts. Choose your size and cover and leave me a note with the appropriate template:
Week on two pages:
WOTP Diary inserts, Printed template of your choosing, Traveler's Notebook Insert, Several sizes
WOTP Diary inserts, Printed template of your choosing, Traveler's Notebook Insert, Several sizes, designer cover
Bullet journal inserts, cross-grid, dot-grid, grid or lined:
Bullet Journal inserts, Printed template of your choosing, Traveler's Notebook Insert, Several sizes, Designer cover
Notes inserts, cross-grid, dot-grid, grid, lined, or plain:
Notes inserts, Printed template of your choosing, Traveler's Notebook Insert, Several sizes, Designer cover
This diary template, for oct-dec in personal size is availabe in the Lady Falcon Box folder, which you can find via the free printable templates page.
I also added a page to this blog with information about my diaries and the different styles there are. This to make purchasing the right diary for you easier. I also have new listings in my Etsy shop where you can choose your diary template, size and cover. This way I won't need to add a listing for every template I have (listed and non-listed), to the shop and the shop won't get too crowded with loads of listings where you would never be able to find what it is you want...
I hope you enjoyed this and do check out the templates explained page =)
Have a wonderful weekend
xoxo Monique
Here are a few of the new listings for printed inserts. Choose your size and cover and leave me a note with the appropriate template:
Week on two pages:
WOTP Diary inserts, Printed template of your choosing, Traveler's Notebook Insert, Several sizes
WOTP Diary inserts, Printed template of your choosing, Traveler's Notebook Insert, Several sizes, designer cover
Bullet journal inserts, cross-grid, dot-grid, grid or lined:
Bullet Journal inserts, Printed template of your choosing, Traveler's Notebook Insert, Several sizes, Designer cover
Notes inserts, cross-grid, dot-grid, grid, lined, or plain:
Notes inserts, Printed template of your choosing, Traveler's Notebook Insert, Several sizes, Designer cover
How I'm using my Traveler's Notebooks at the moment
I've been making my own diaries and inserts right from the start and have adapted the system to suit my needs. I've used several different lay-outs and setups through-out this period, but I think I have now found a setup that works exactly how I like it.

I have 4 RS TN's for different purposes, one for work, one for art journaling, one for my Etsy store and one personal journal and diary/agenda. I also have a Fieldnotes sized TN for lists and keeping track of online orders and a small Passport sized one that I use as a wallet.
At first I used a setup with a MOTP, a WOTP and a daily diary with a chronodex adaptation to fit a 24 hr day. As time progressed and I was slowly overcoming the symptoms of my burn-out, I found I didn't need a full daily page to keep track of what I was doing. I did however want to keep at least a page per week.
___Warning, picture heavy post___
I didn't like how everything was in seperate booklets and wanted to contain it all into one. So I designed a diary that would do all that, the MOTP, the weekly and a page per week for tasks and stuff.

This month I tried this setup out after having tested it for my work diary.

Here's the MOTP, which is followed by the weekly pages.
I felt the boxes were to dark, so for the new template I made the boxes thinner/lighter...but I'll have to wait till the new year comes around to use the new template...no sense wasting a perfectly good diary, right?

The first week I kept fairly simpel. Used a fountain pen with pink ink, bought originally for my daughter, but I think I'm going to keep it =)

Now I'm pretty sure these pictures are not very interesting for anyone who isn't interrested in diaries and planning and such.

Still, I thought I'd add them, just to give the complete picture ;-)

And who knows you might like this setup, in which case these pictures may give you an impression about how this can be used.

Now we've come to the next month and a few things are already entered in there, among other things, my 22nd wedding anniversary ;-)

As you can see, the monthly pages go before the weekly.
To keep the weeks from splitting I decided to place the monthly pages in front of the week where the thursday was in the new month. Like the way we decide wether the first day of the new year is also in the first week of the new year...

When I feel I don't have enough space or, like in this case, I want something I can move to another page/week, I use tip-ins with washi.
At the end of the booklet I pasted a list with tried and tested menu ideas...in case we run out of things to think of for dinner.

to the right I pasted a list with dutch holidays.
I mark those on the last pages as well, since these are yearly overviews.

In this TN I also have a Midori zipper pouch.

A home made file folder with pen-loops.

A Midori card file.

And a journaling booklet.

Which will be full tonight...

I won't show pictures of the journaling booklet in this blogpost, since this one is picture heavy enough as it is.

I like decorating my booklets, but I'm not prone to using any one style...

I just use whatever I feel like.

Or even whatever I bump into at the time on my desk...


There's a little elephant, an oister I bought from a friend's shop and the remaining wings of a fairy I got in a swap last year...honestly, it was a fairy. It broke off, but as a reminder of the kindness of the person who sent it, I keep the wings on there ;-)
I hope you liked my boring diary pages anyhow and I wish you a lovely week.