

Lady Falcon Travelers

Hiragana Practice insert
I used it to test saddle soap and am now using it as my series tracker but most importantly to learn Japanese writing.

I started about a week ago with learning Japanese through Duolingo, but was getting nowhere. Learning both new words and new letters proved to be too much for my brain and I wasn't getting any of it.

So I made a practice insert for Hiragana letters. With a few overview sheets.

and some general practice sheets.

But mostly with letters practice sheets... 2 pages per letter. Or should I say sign, I'm not sure...I'm that much of a beginner =)

I made it available with the free inserts for anyone who would like to practice Hiragana.
I'm quite happy with how my little A6 is looking so far.

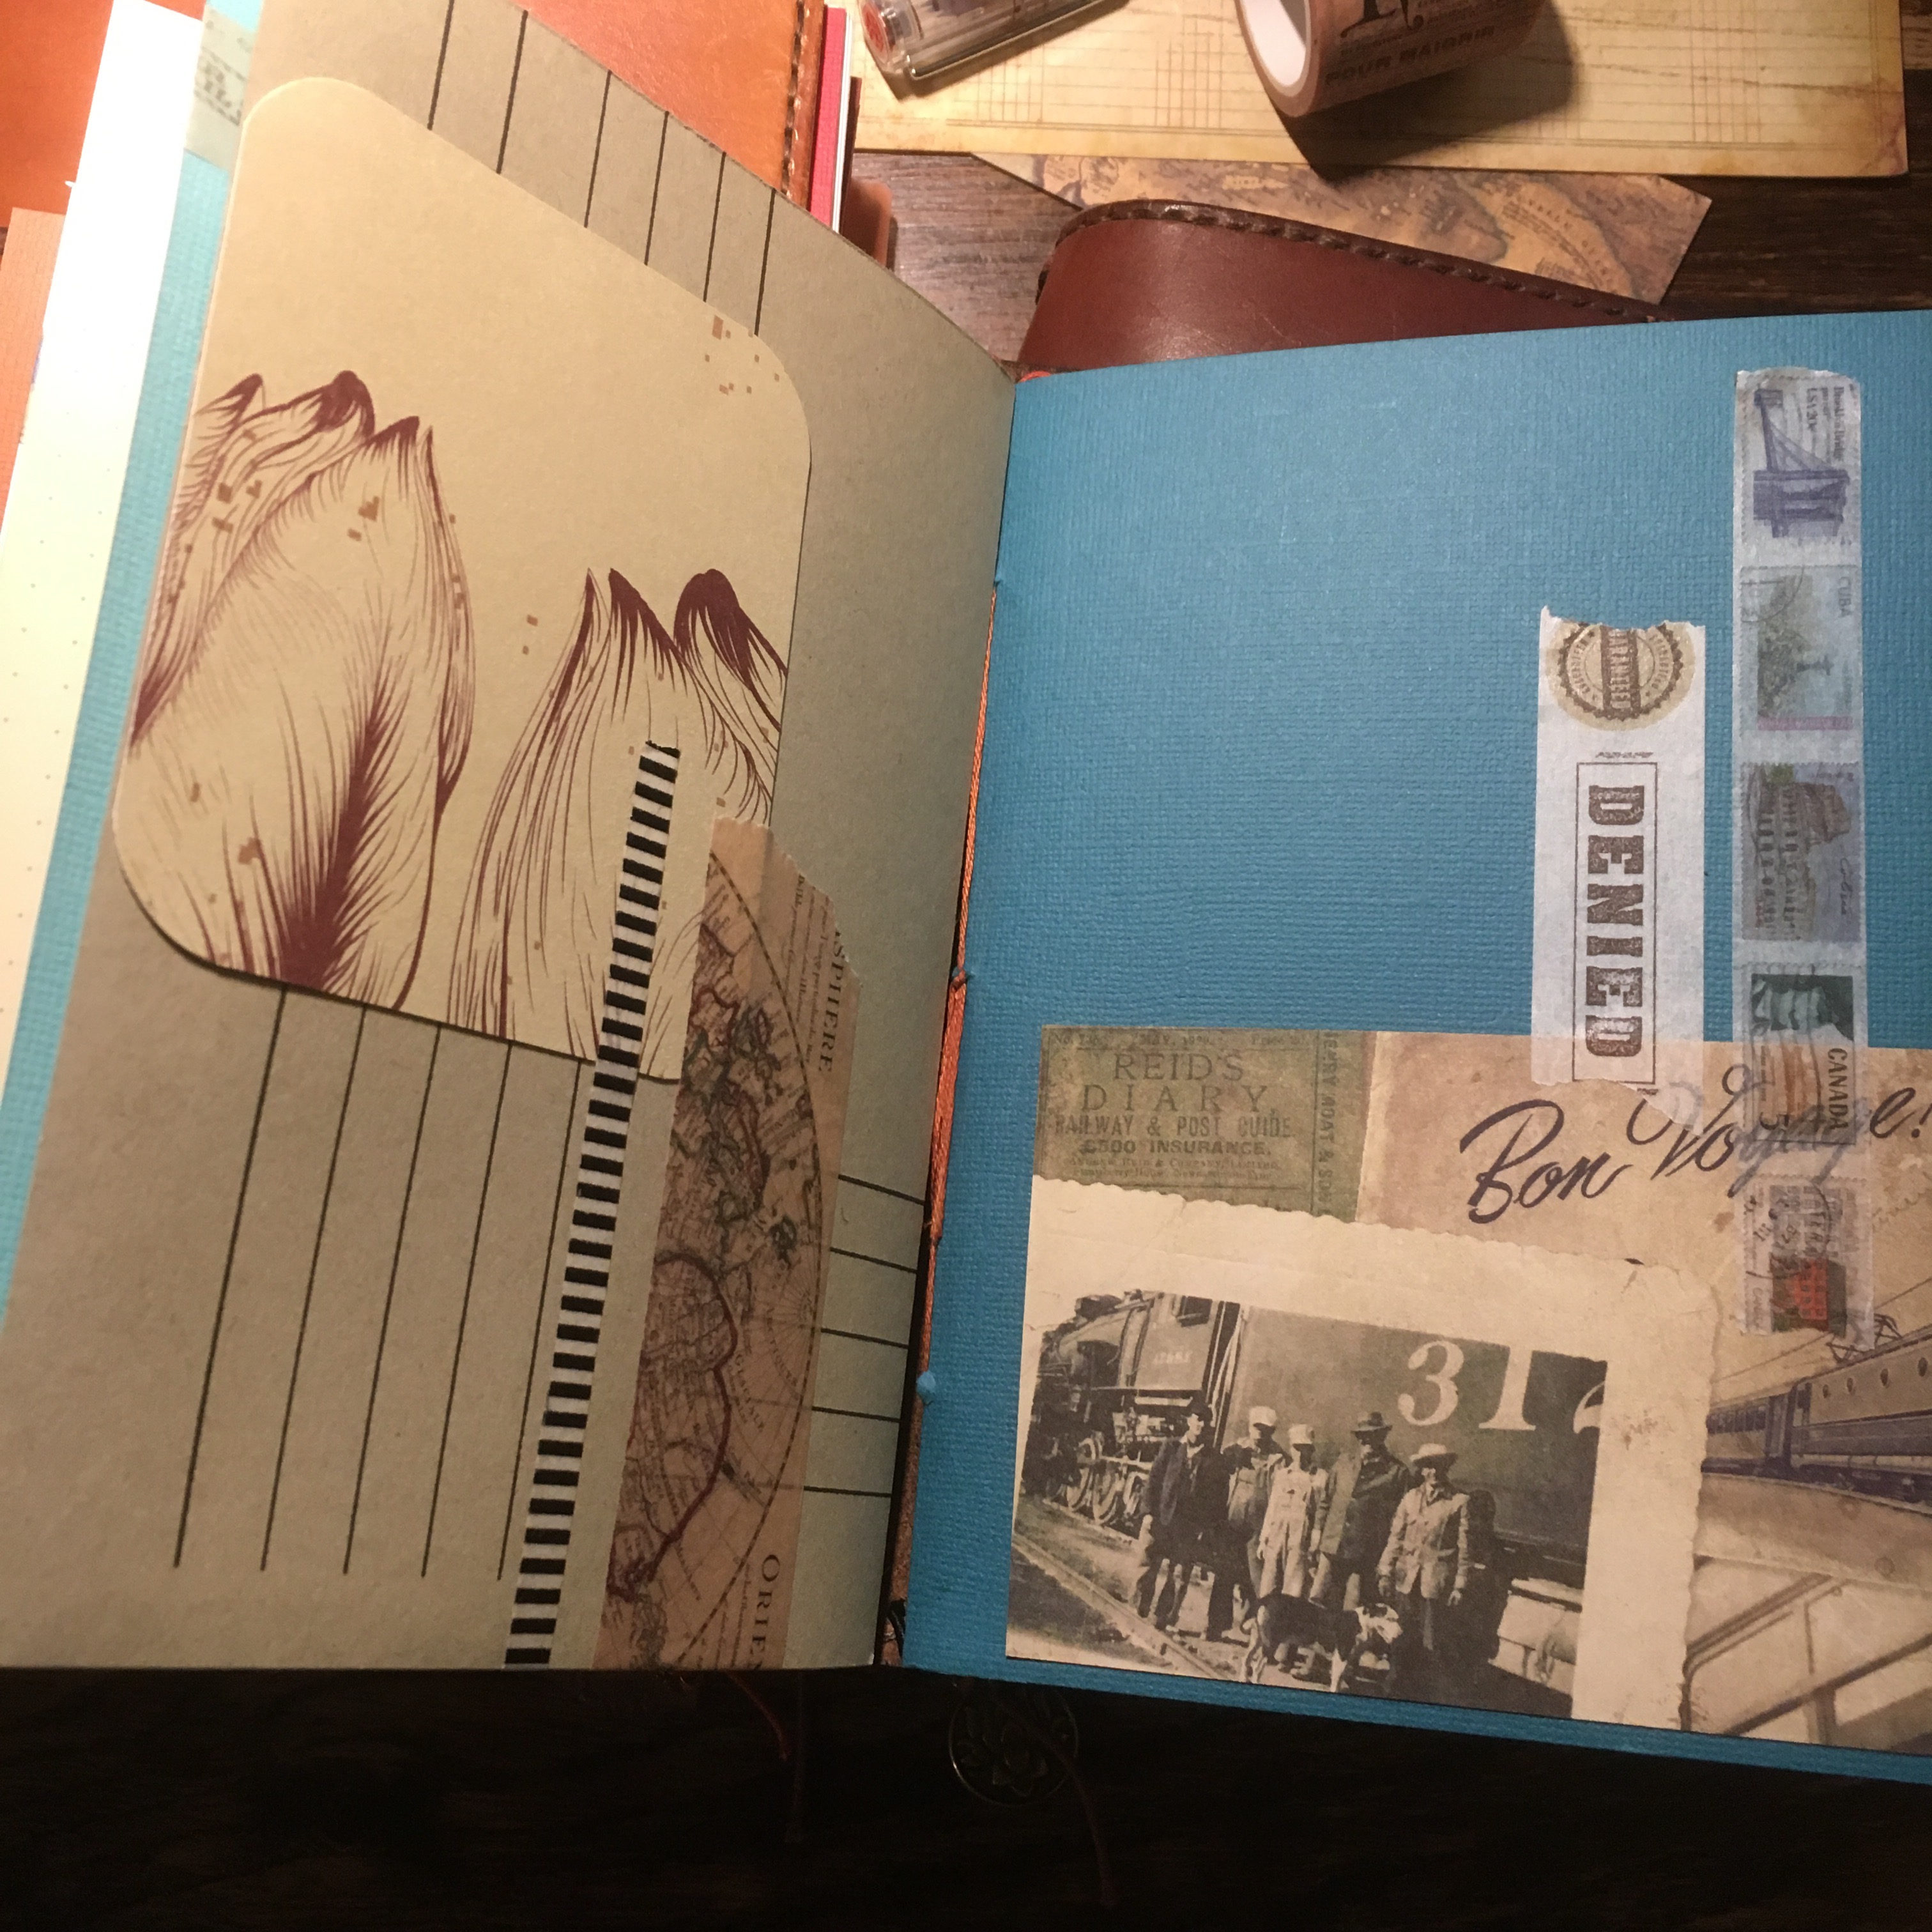
Still need to add lots of bits in the folders. Here's the first folder I made with the new paper line we have for inserts and folders.


My Planner Last Month, October
Last month I didn't feel like overly decorating my diary much. Maybe it's because I've been doing a lot of painting, like the below mermaid.
Whatever it is, it left my monthly pages rather bare compared to my usual doodles and stuff.
However I still think it turned out nice. I adore the color of those fall leaves. So I had to glue them in. Not sure though what the best way is to do this. So still looking for tips on that.
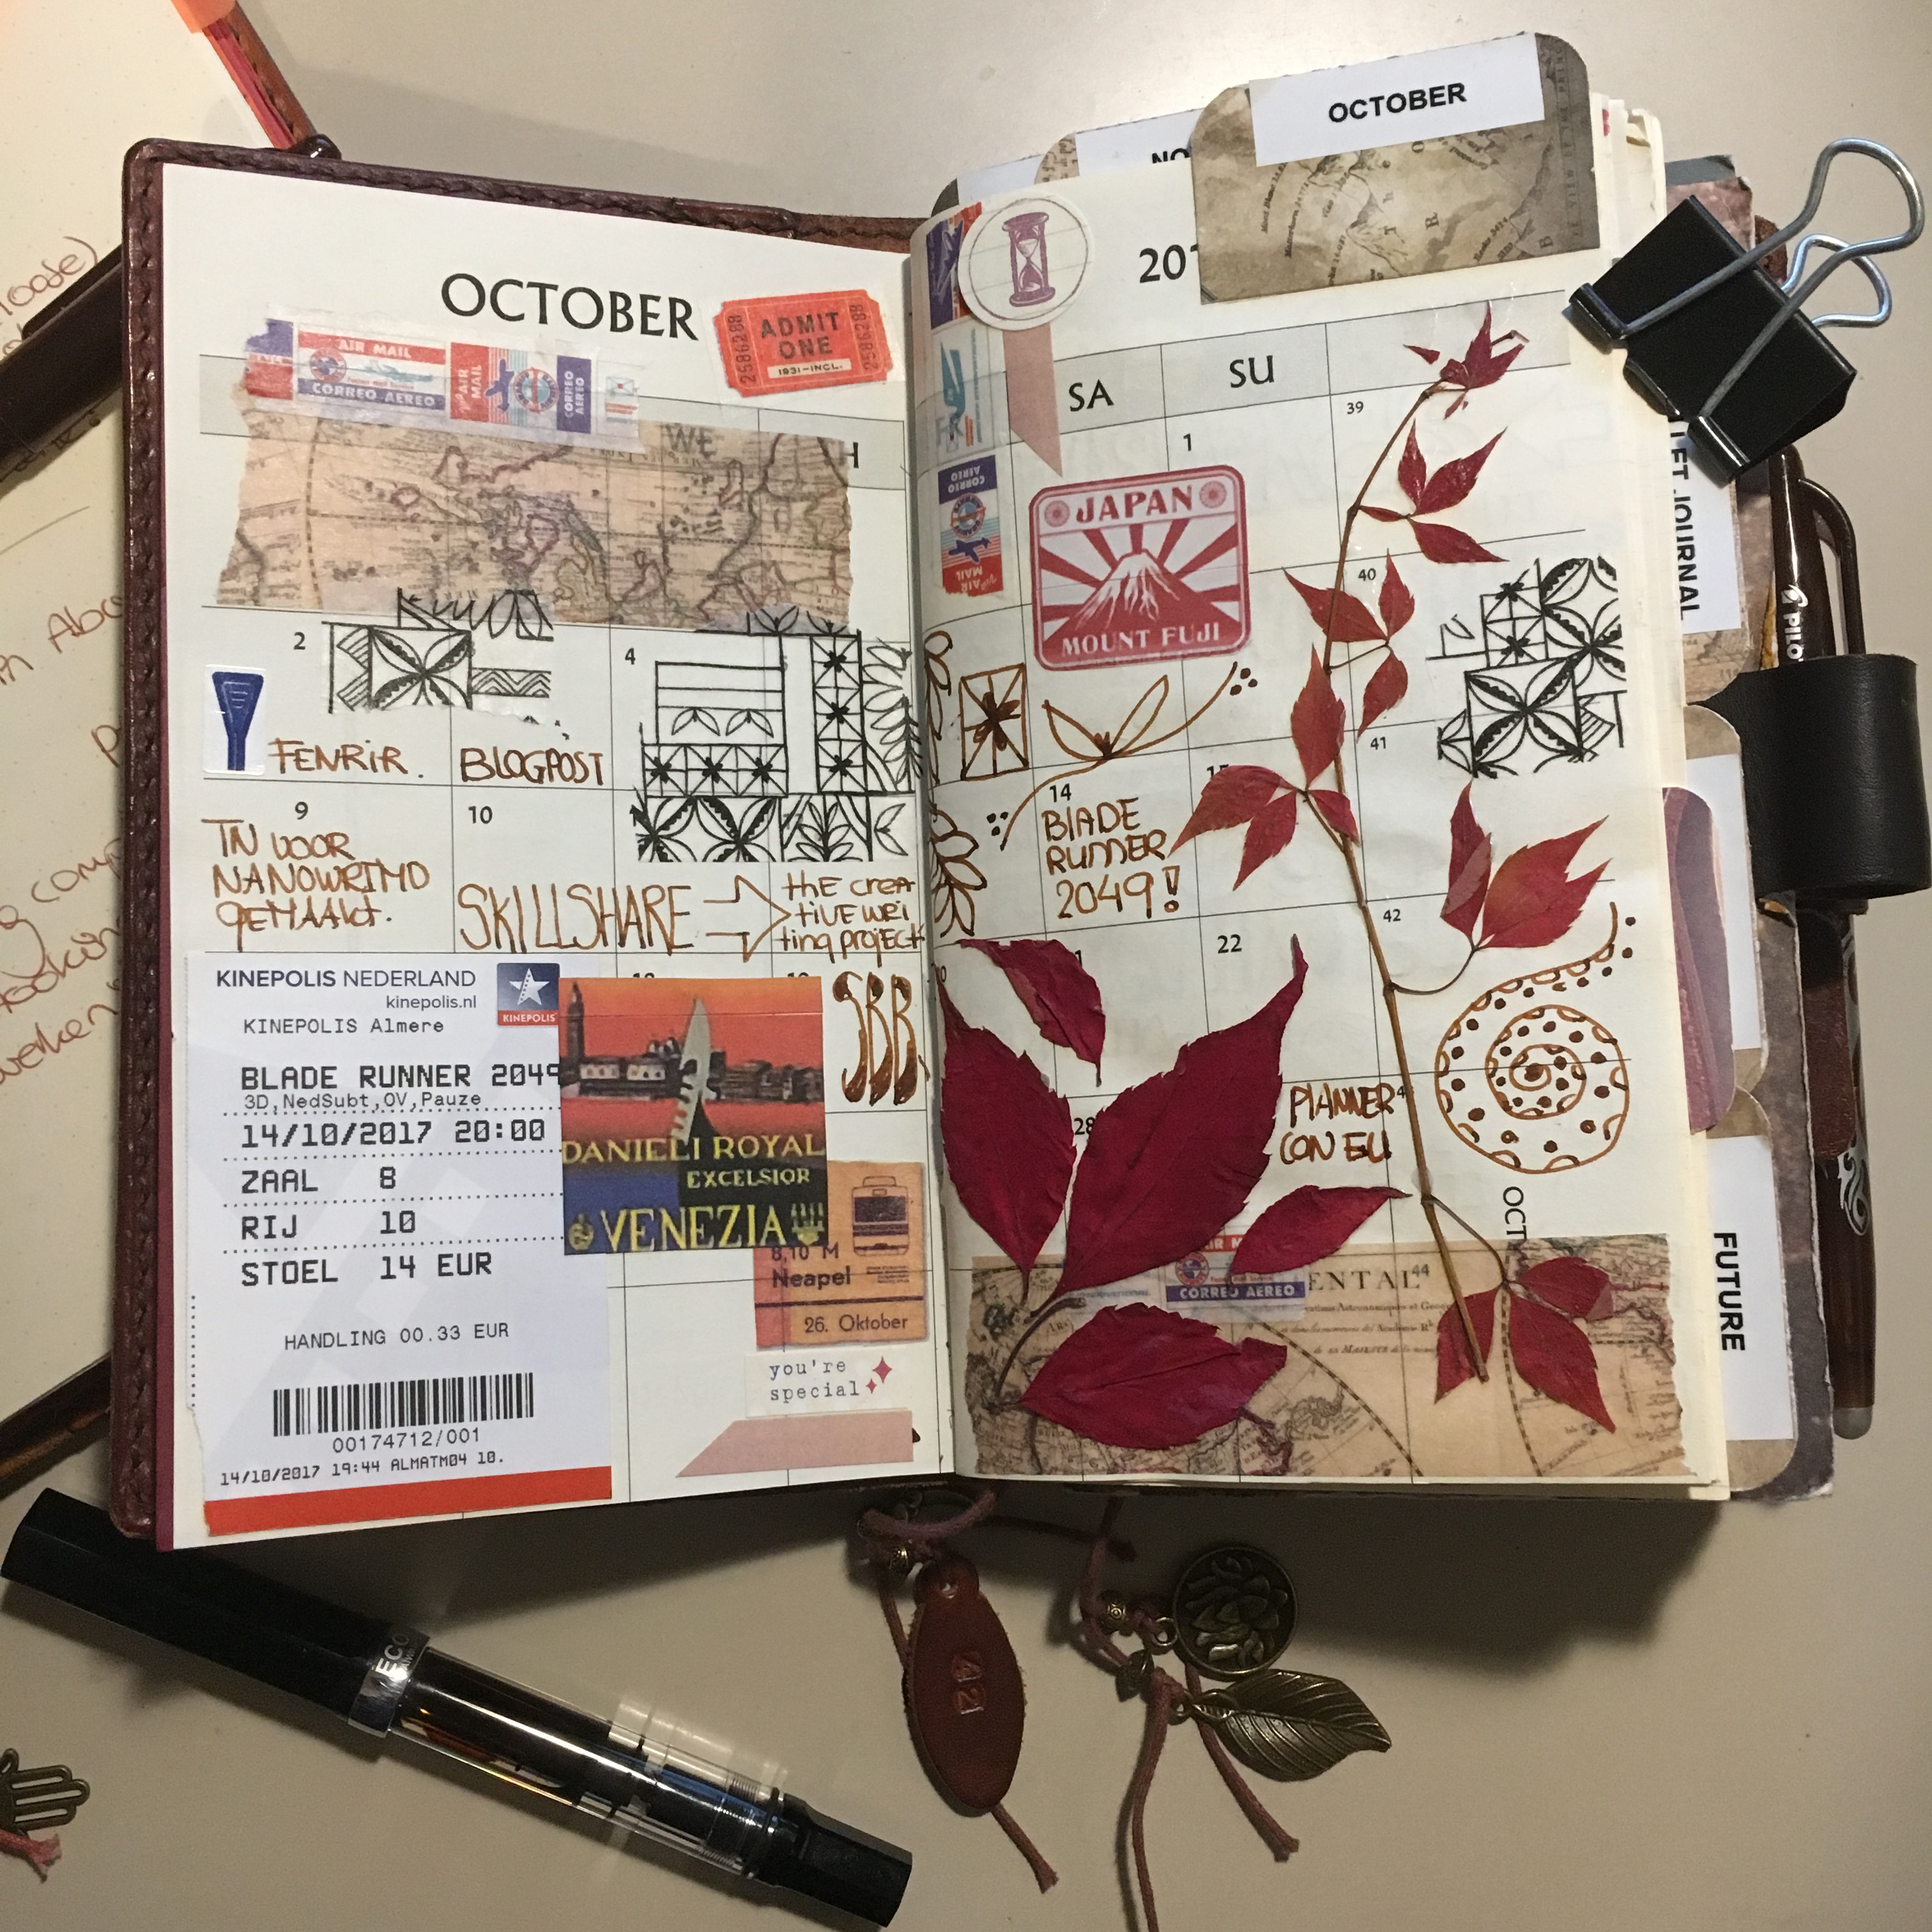
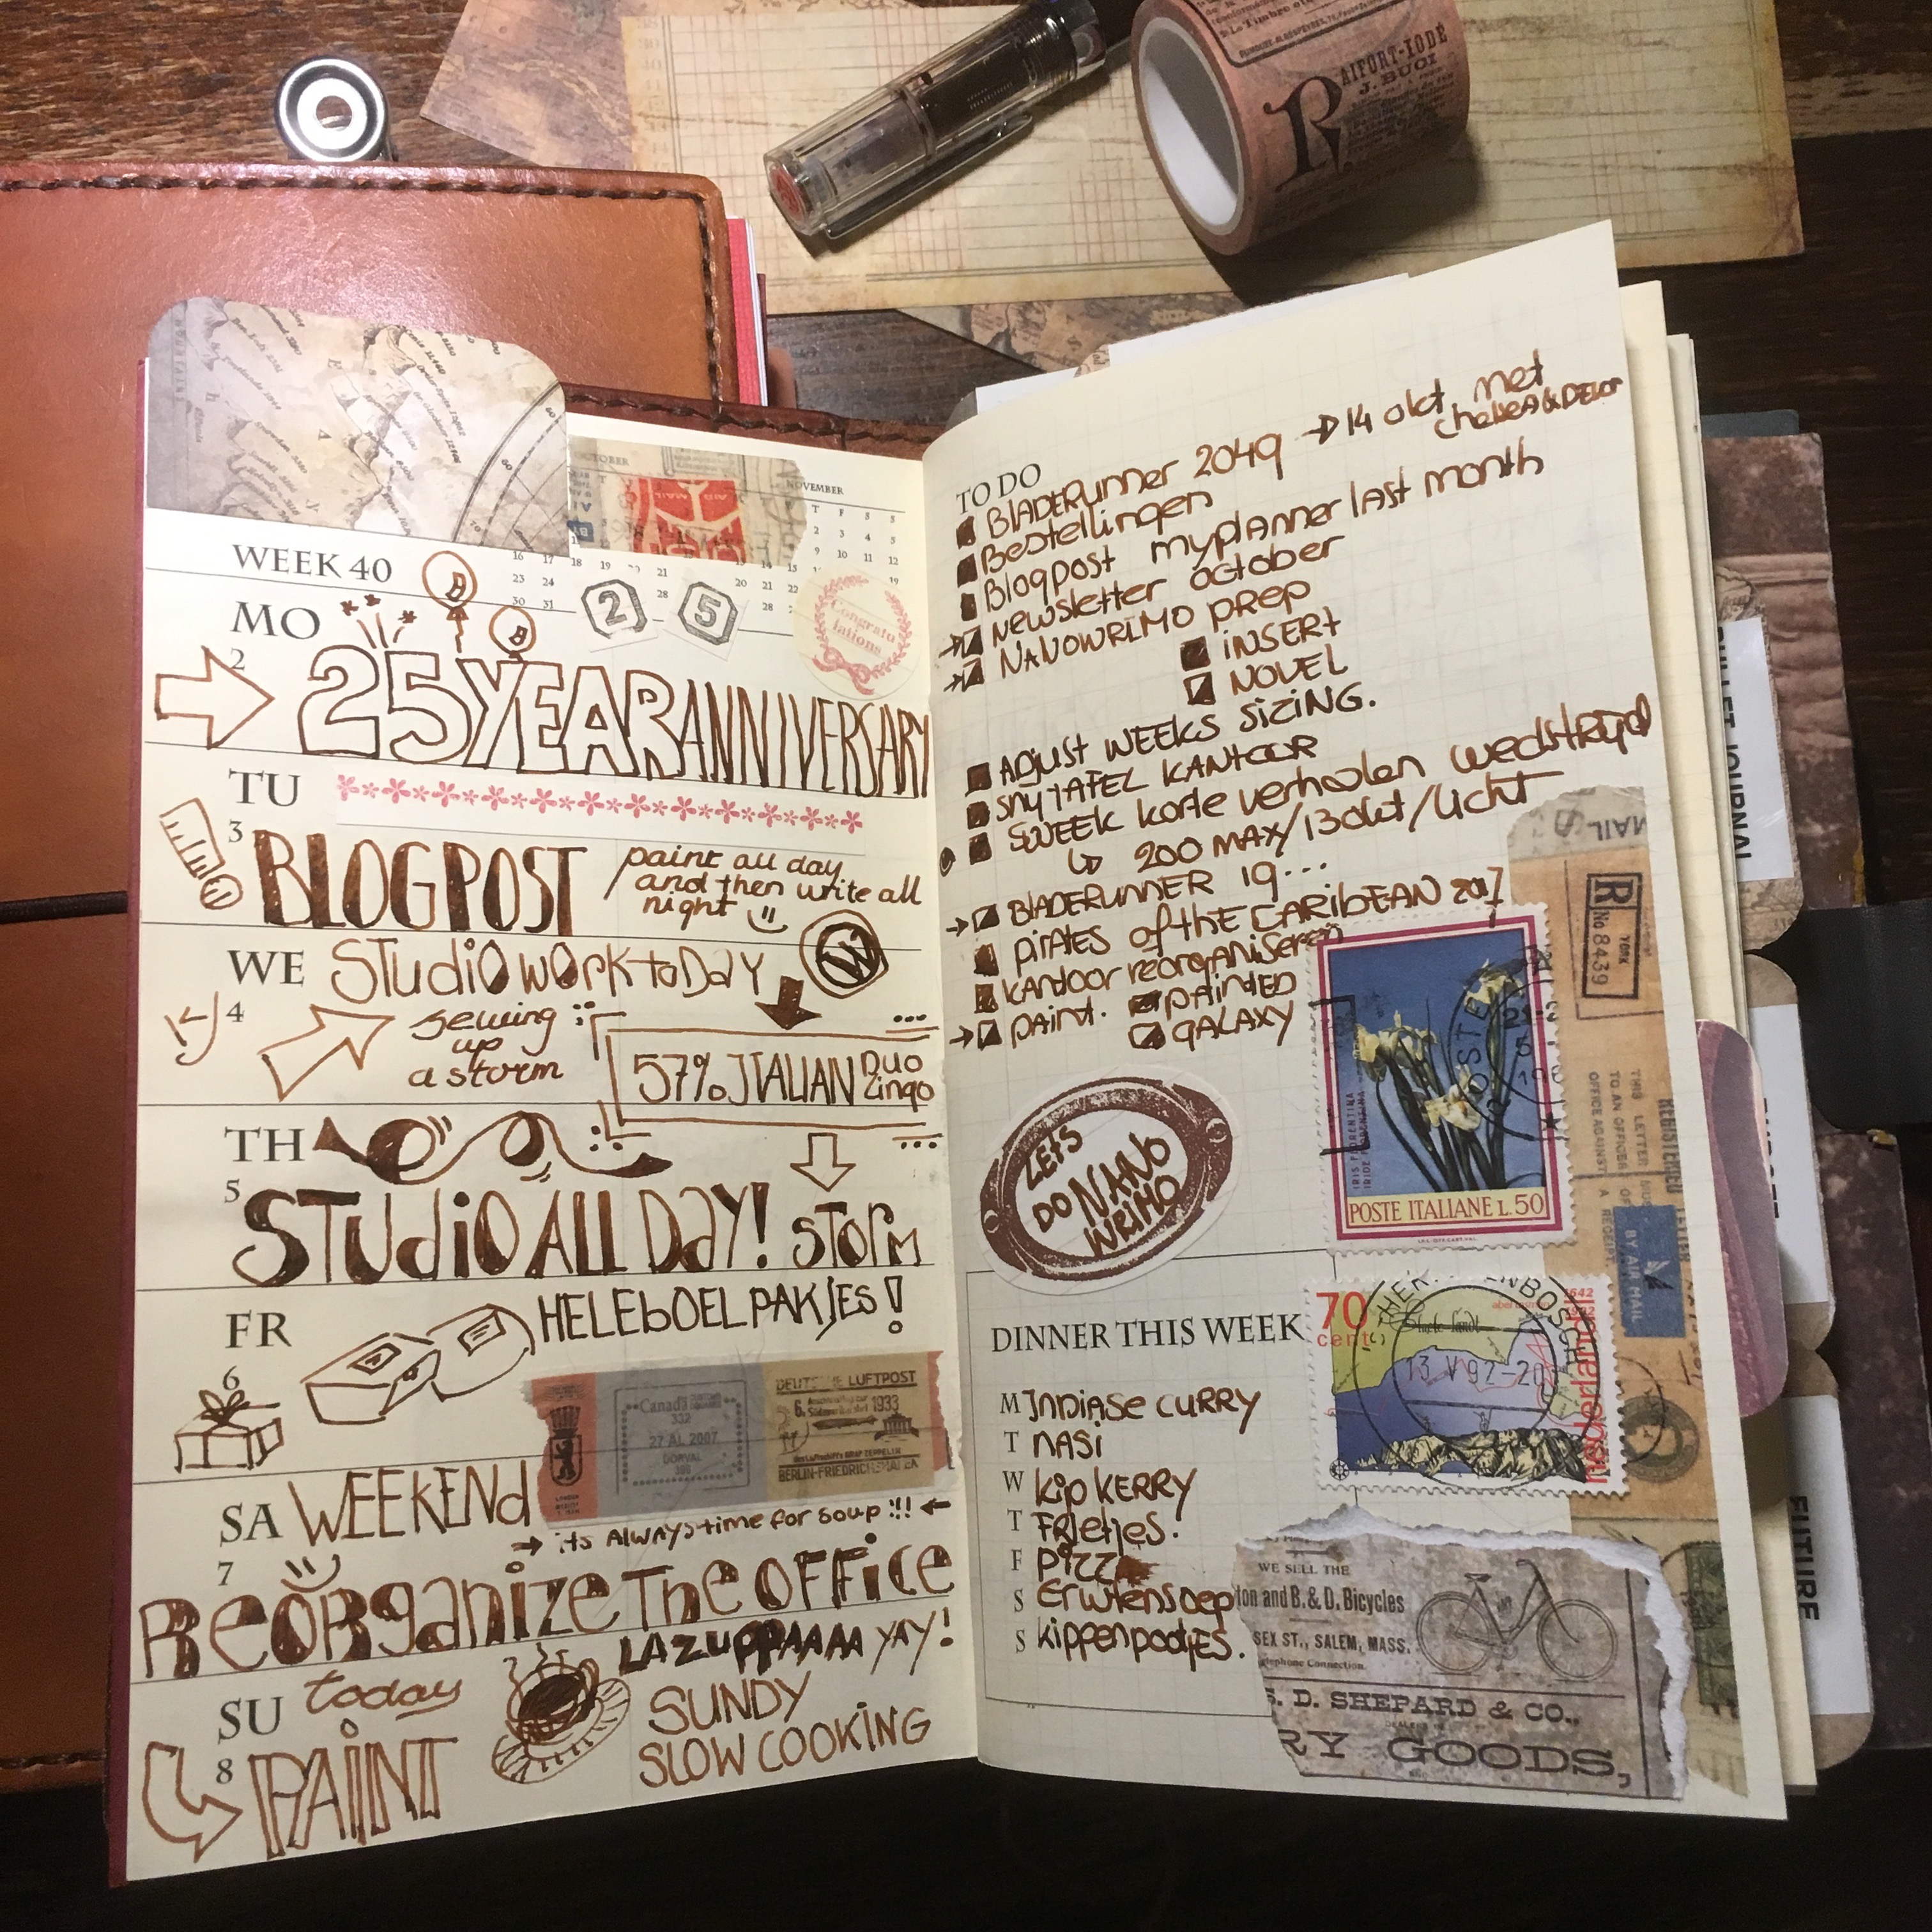
At the start of the month we had our 25 year anniversary, so to celebrate that, we had a nice dinner with the kids and they treated us to a movie. We got to pick which one we wanted to see =)
Which obviously had to Blade runner 2049. It was awesome! Beautiful images and magical atmosphere... and of course Harrison Ford...
Painted another mermaid like I painted at the start of the year, but this time I made her in all happy fall colors.

Here they both are. The same but so very different.
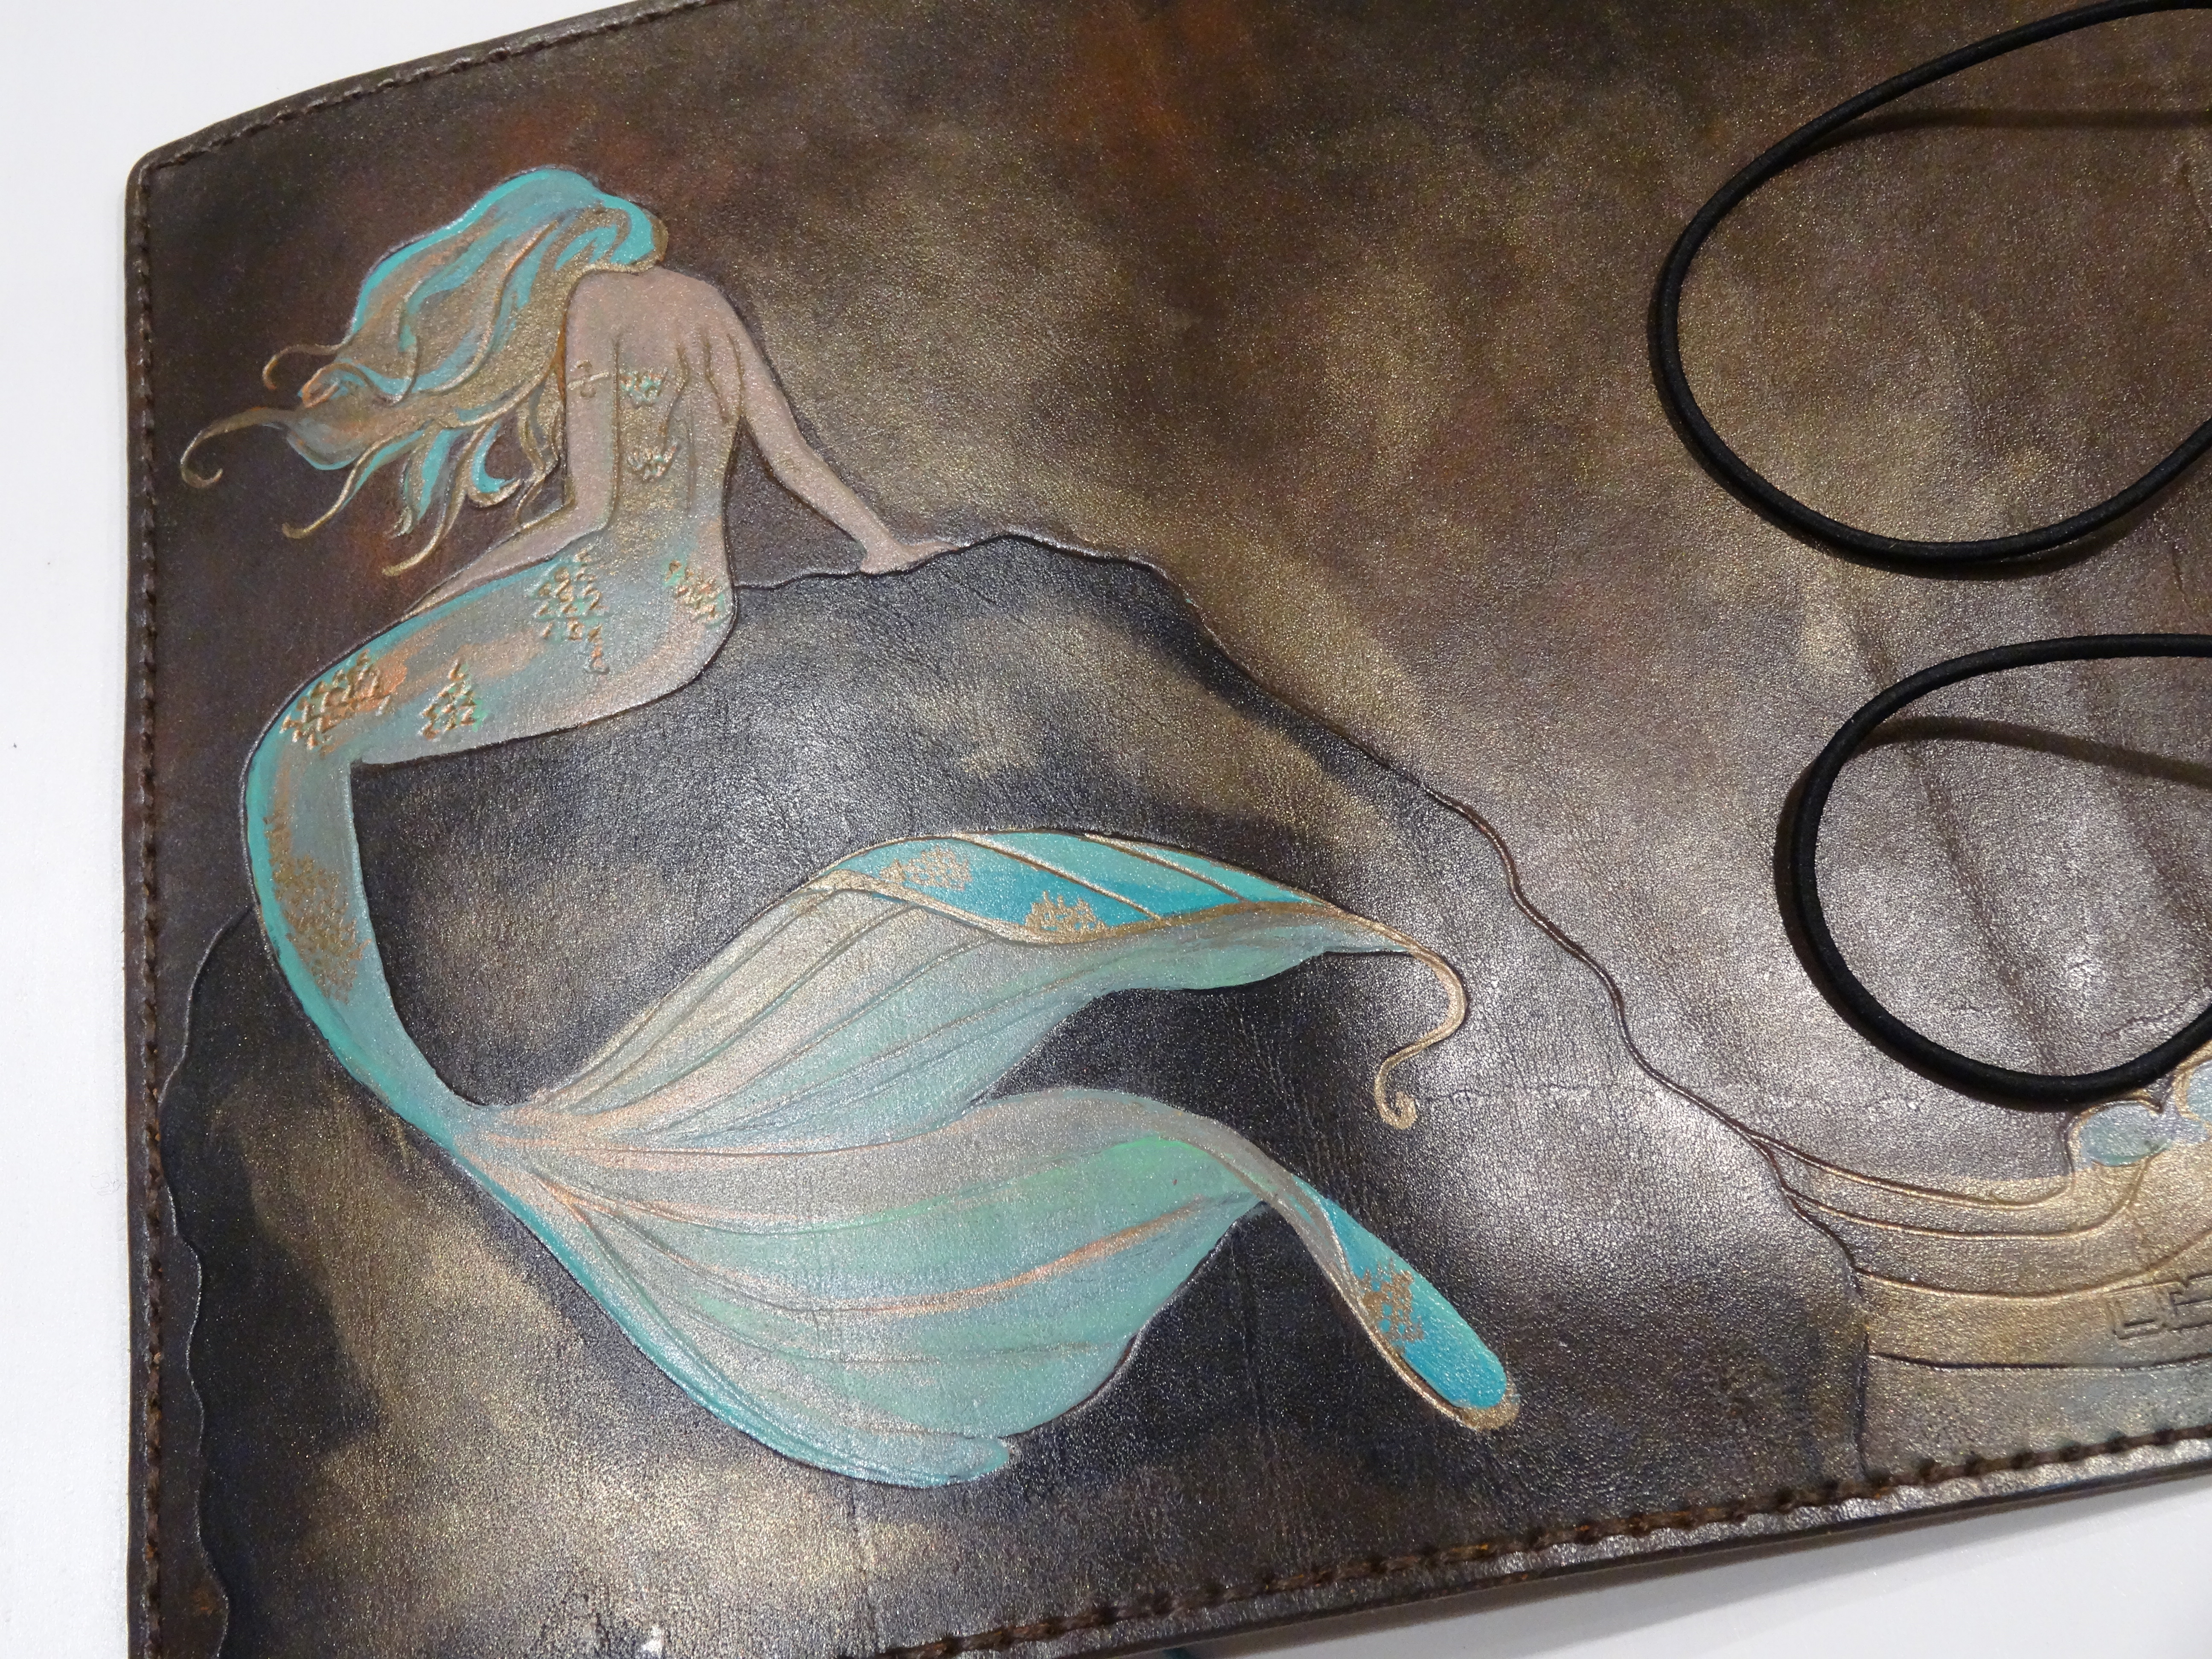
I don't even know which one I like best... too hard to choose.
As you can see the decorating in that week was mostly left out, I think I only added some washi at the last moment.
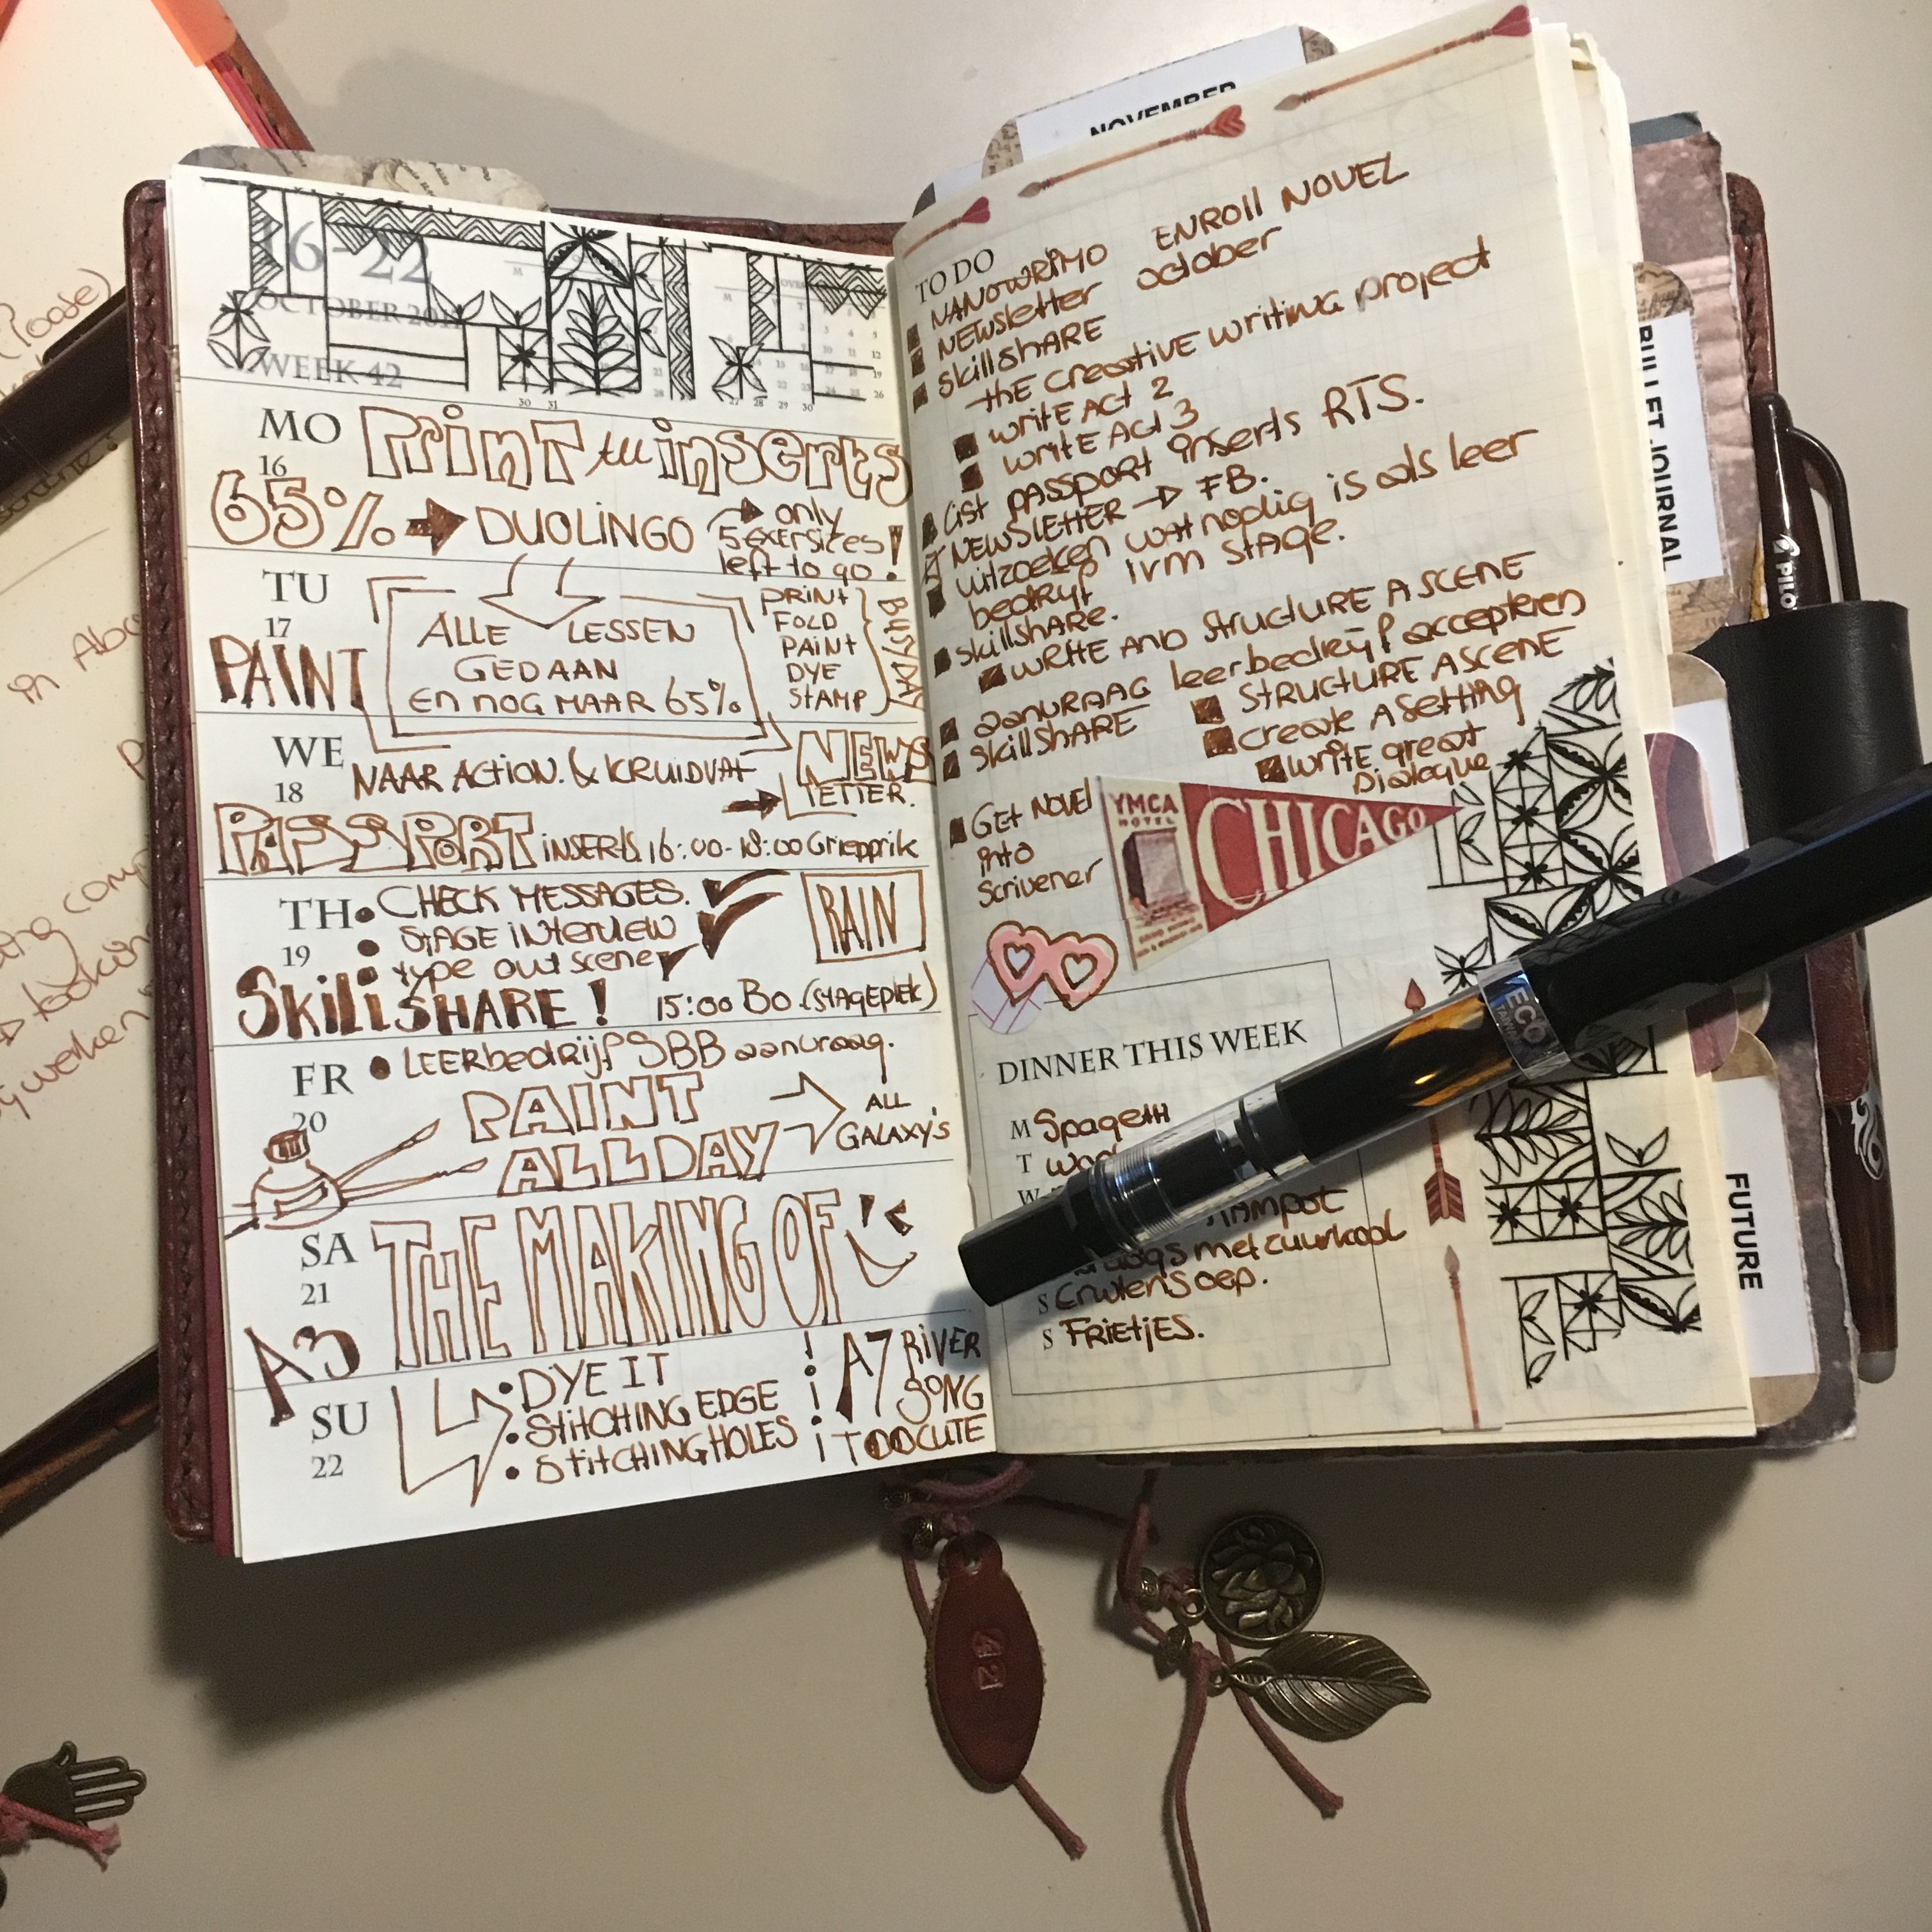
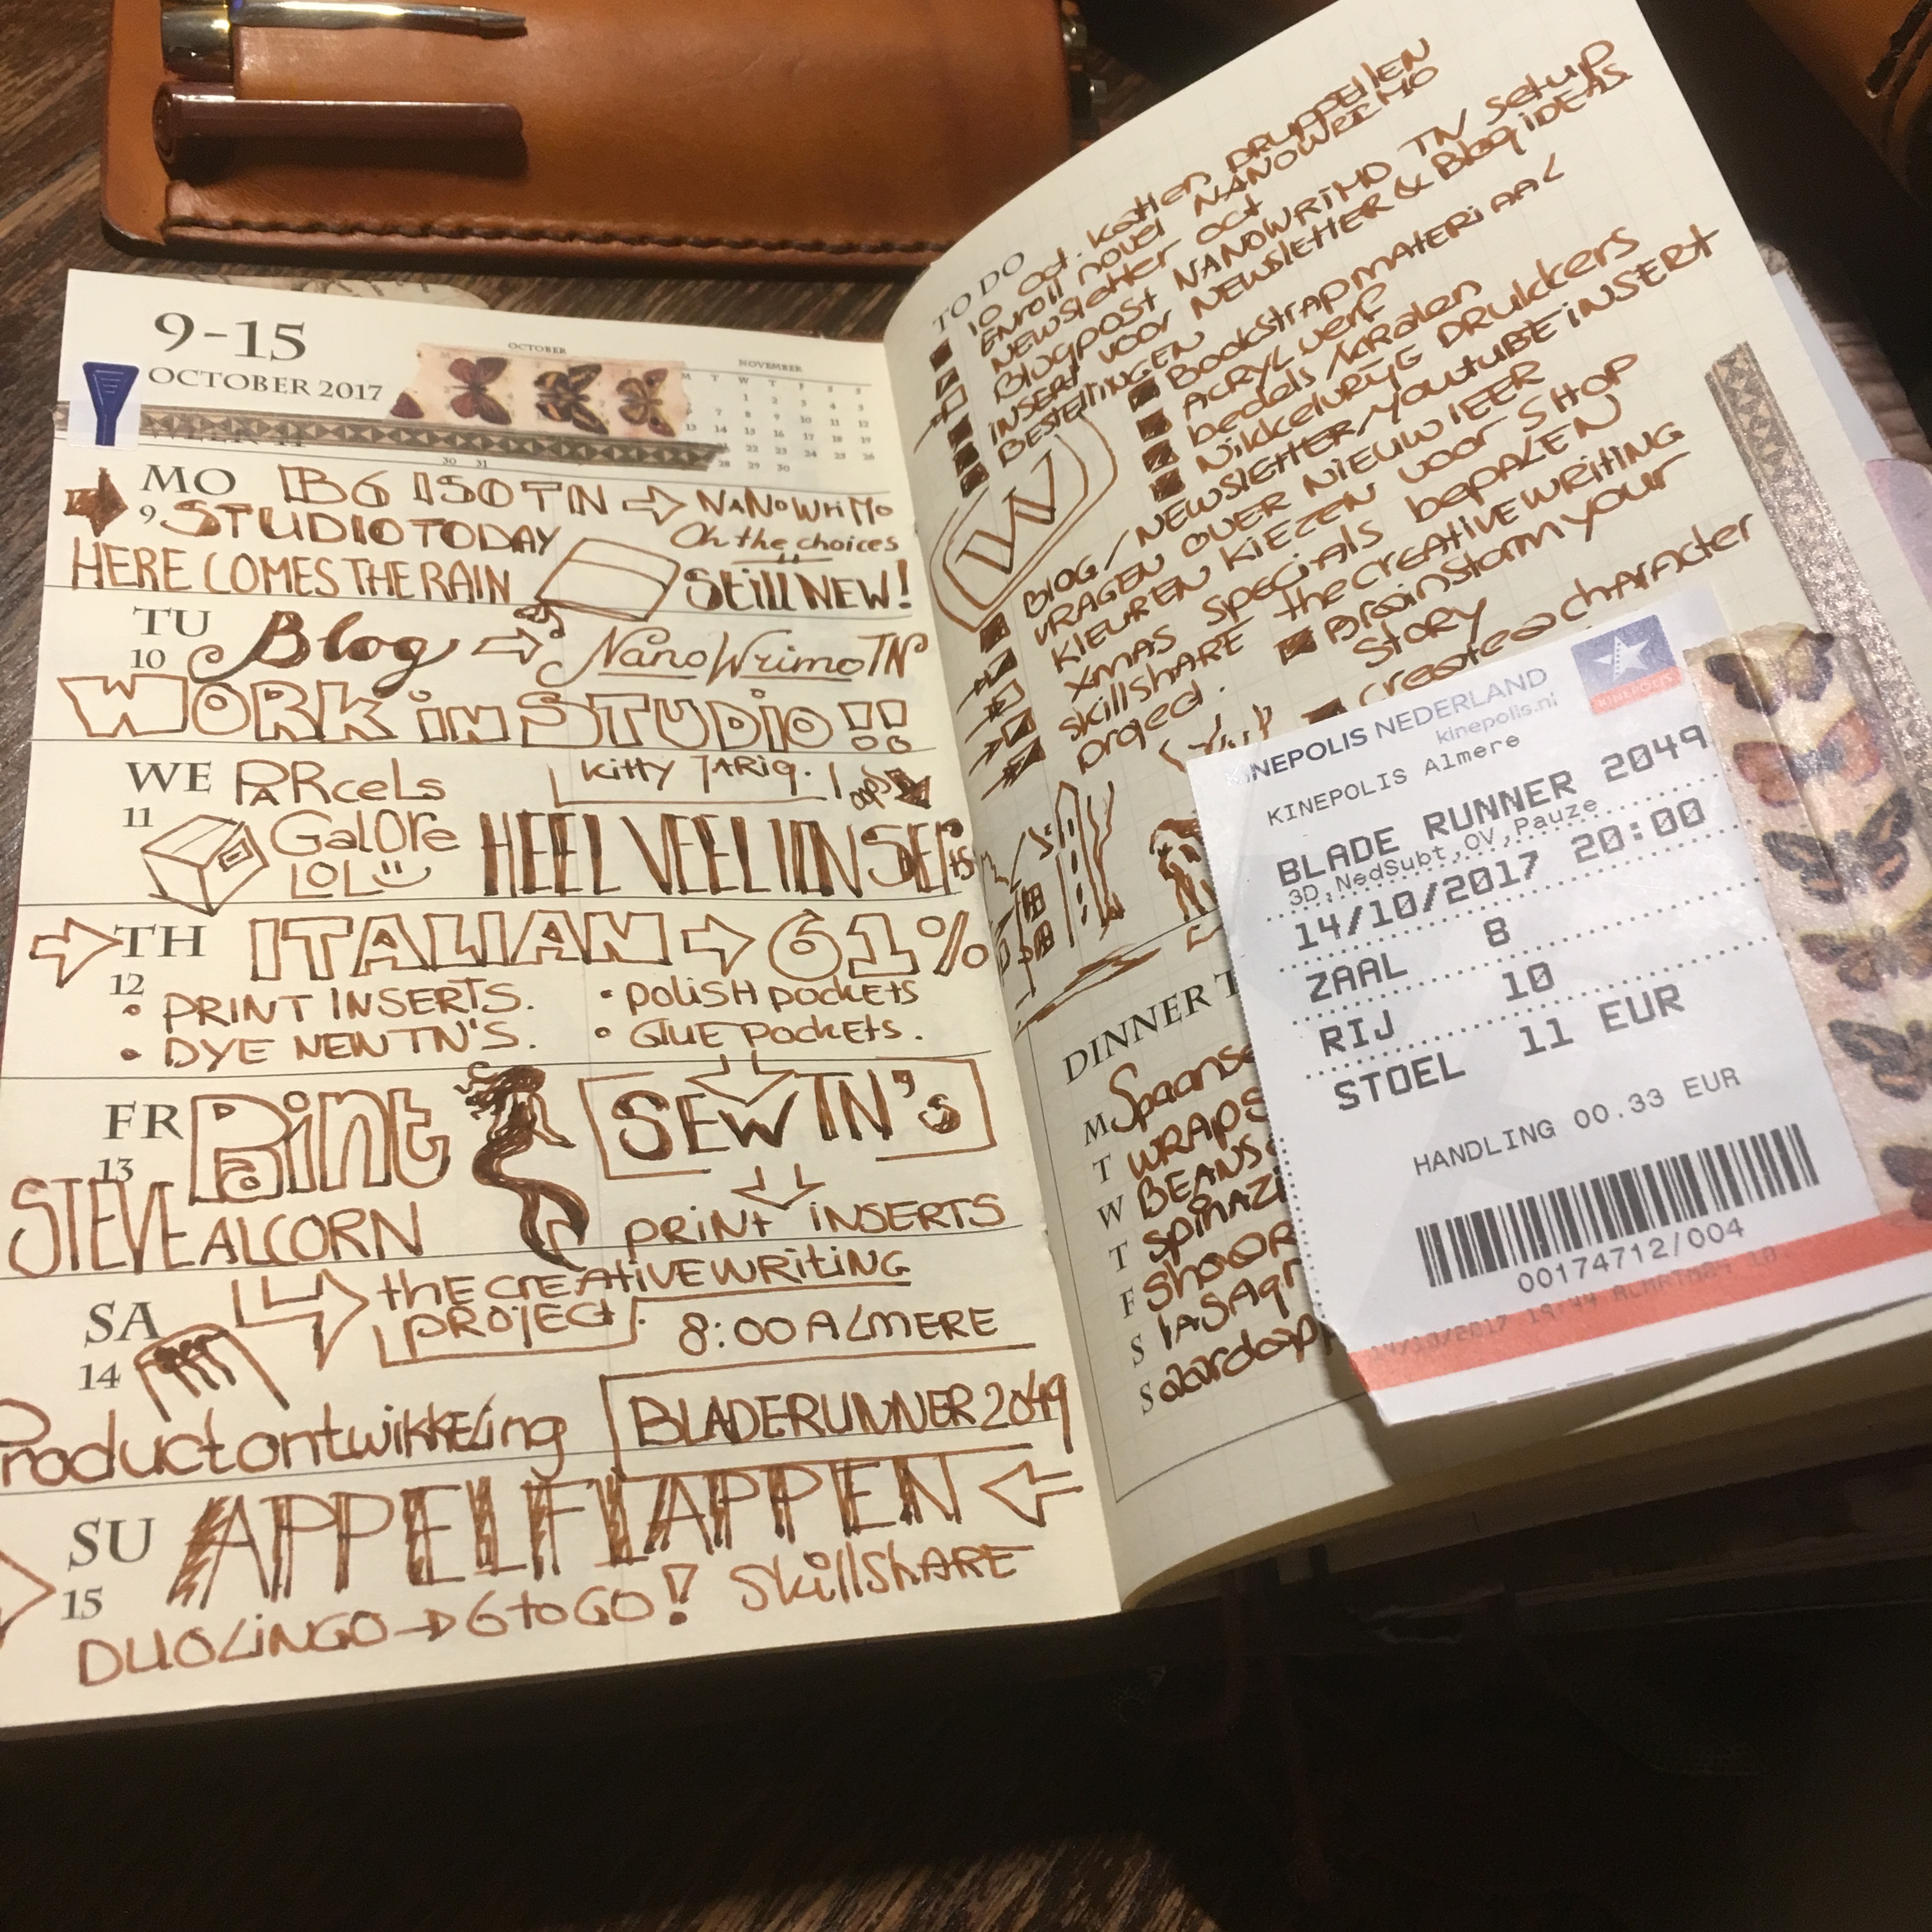
This week I did start out with some decoration, but kept it really plain. I kinda like the way the text starts to get a life of it's own this way.
Still doing my Italian lesson via DuoLingo, although they are all done. I just keep repeating them till I feel I'm able to form a coherent sentence all by myself... but I also started Japanese now, so who knows, I may one day be able to speak Japanese. Although I do think I need an insert just for that, because I just can't remember what sign goes with what.

Recently we got an application by a student for an internship with our company and last week we made it all official and we are now a recognized training company for students learning to be a creative craftsman.
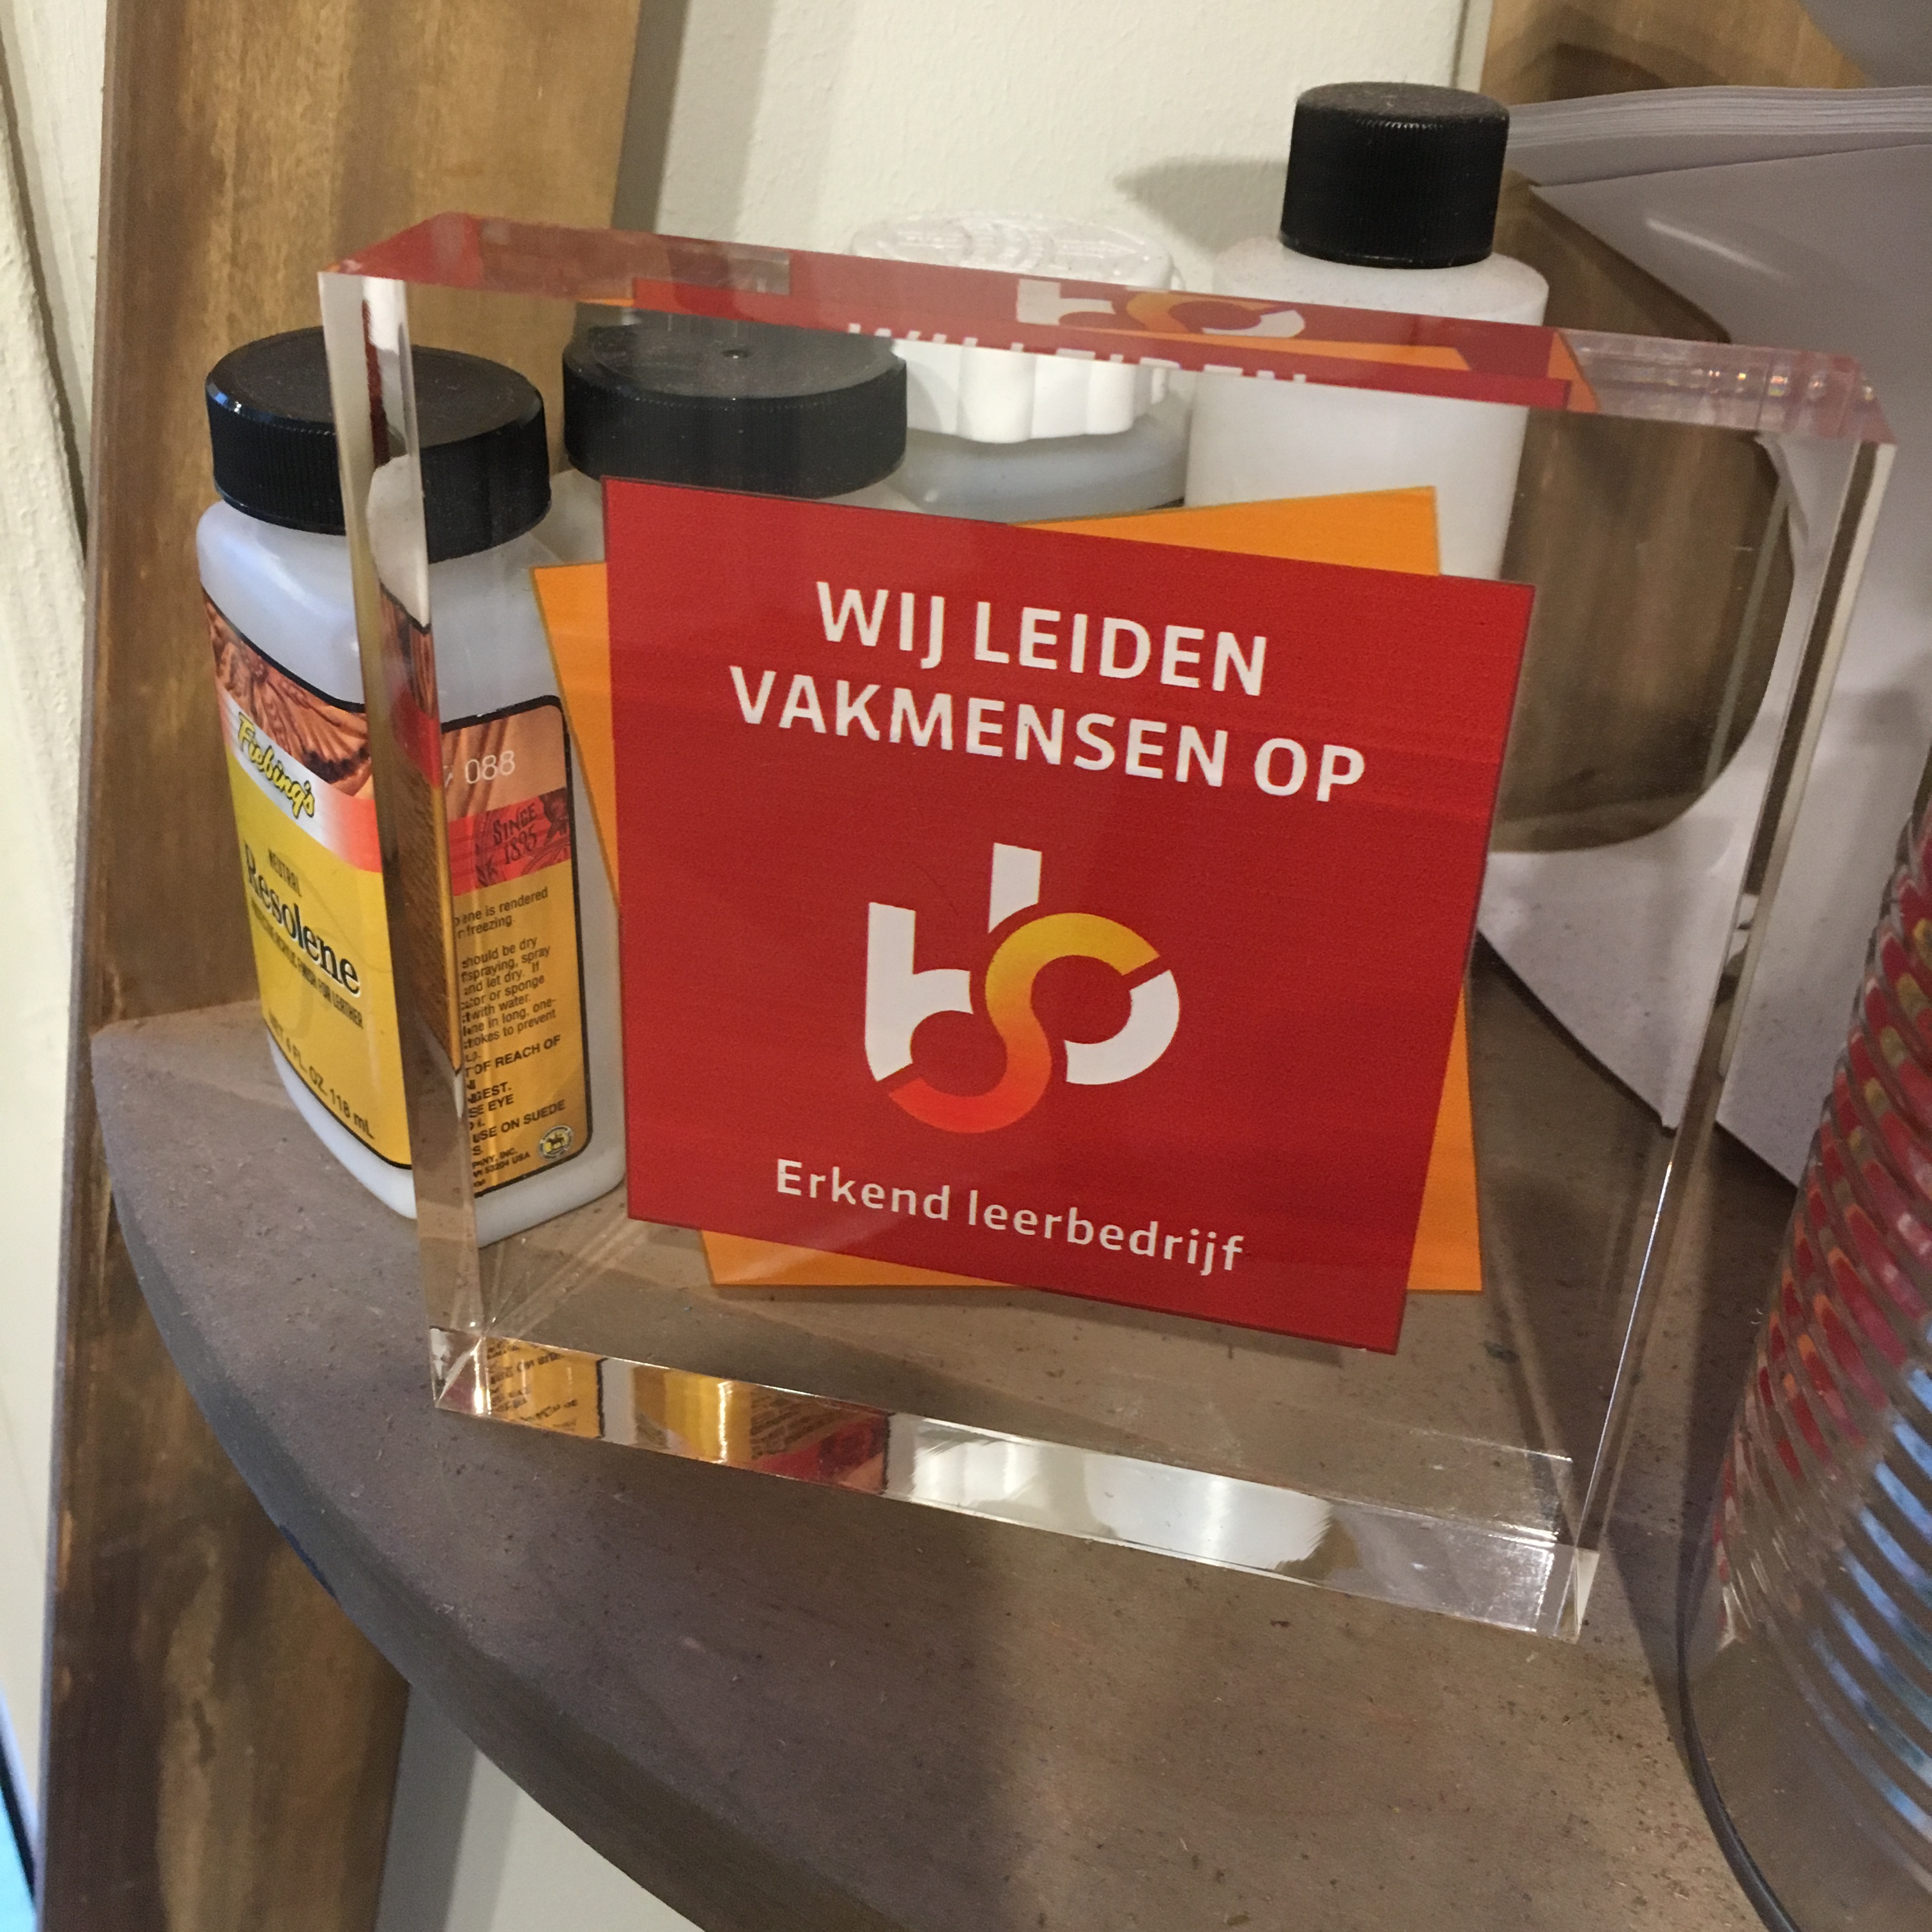
I'm very happy with that. It's always fun to try and teach other people new things and maybe learn a thing or two along the way as well.
This month is going to be NaNoWriMo month, so I'm going to do a lot of writing, probably mostly for my novel. Although I will try and keep you updated about my progress there. Our first intern will start November 13, so all in all it's going to be a very full month and I'm really excited about it.
Signing off for now, have a lovely week,
xoxo Monique

NaNoWriMo, transition to a planner


Setting up for NaNoWriMo 2017
Now that we finally caught up with all our orders and new ones going out the door on schedule, YAY, I decided I would this year have time to participate in NaNoWriMo. Obviously that meant I needed a new notebook. The perfect excuse to finally make the B6 size I've been wanting for quite some time now.
It was so hard to choose a color, because I wanted a color I didn't have yet, but I also wanted it to look a bit rugged and Indiana Jones-y... So I went with #7 Dark Brown. But I'm still a bit on the fence about the color, but that probably has more to do with the fact that it is still new and hasn't come to life yet.
So Yesterday evening I spend my time setting up my writerly notebook. First I needed a NaNoWriMo insert obviously, so I created one for 2017 in B6 ISO. You can find it as a freebee with the free printables.
I also made a tiny tag to represent my attitude towards writing. One that would go well with the tag on my personal planner ... DON'T PANIC

And spend the rest of the evening fussing over it and setting it up. Printed the inserts for it and decorated it all a bit.

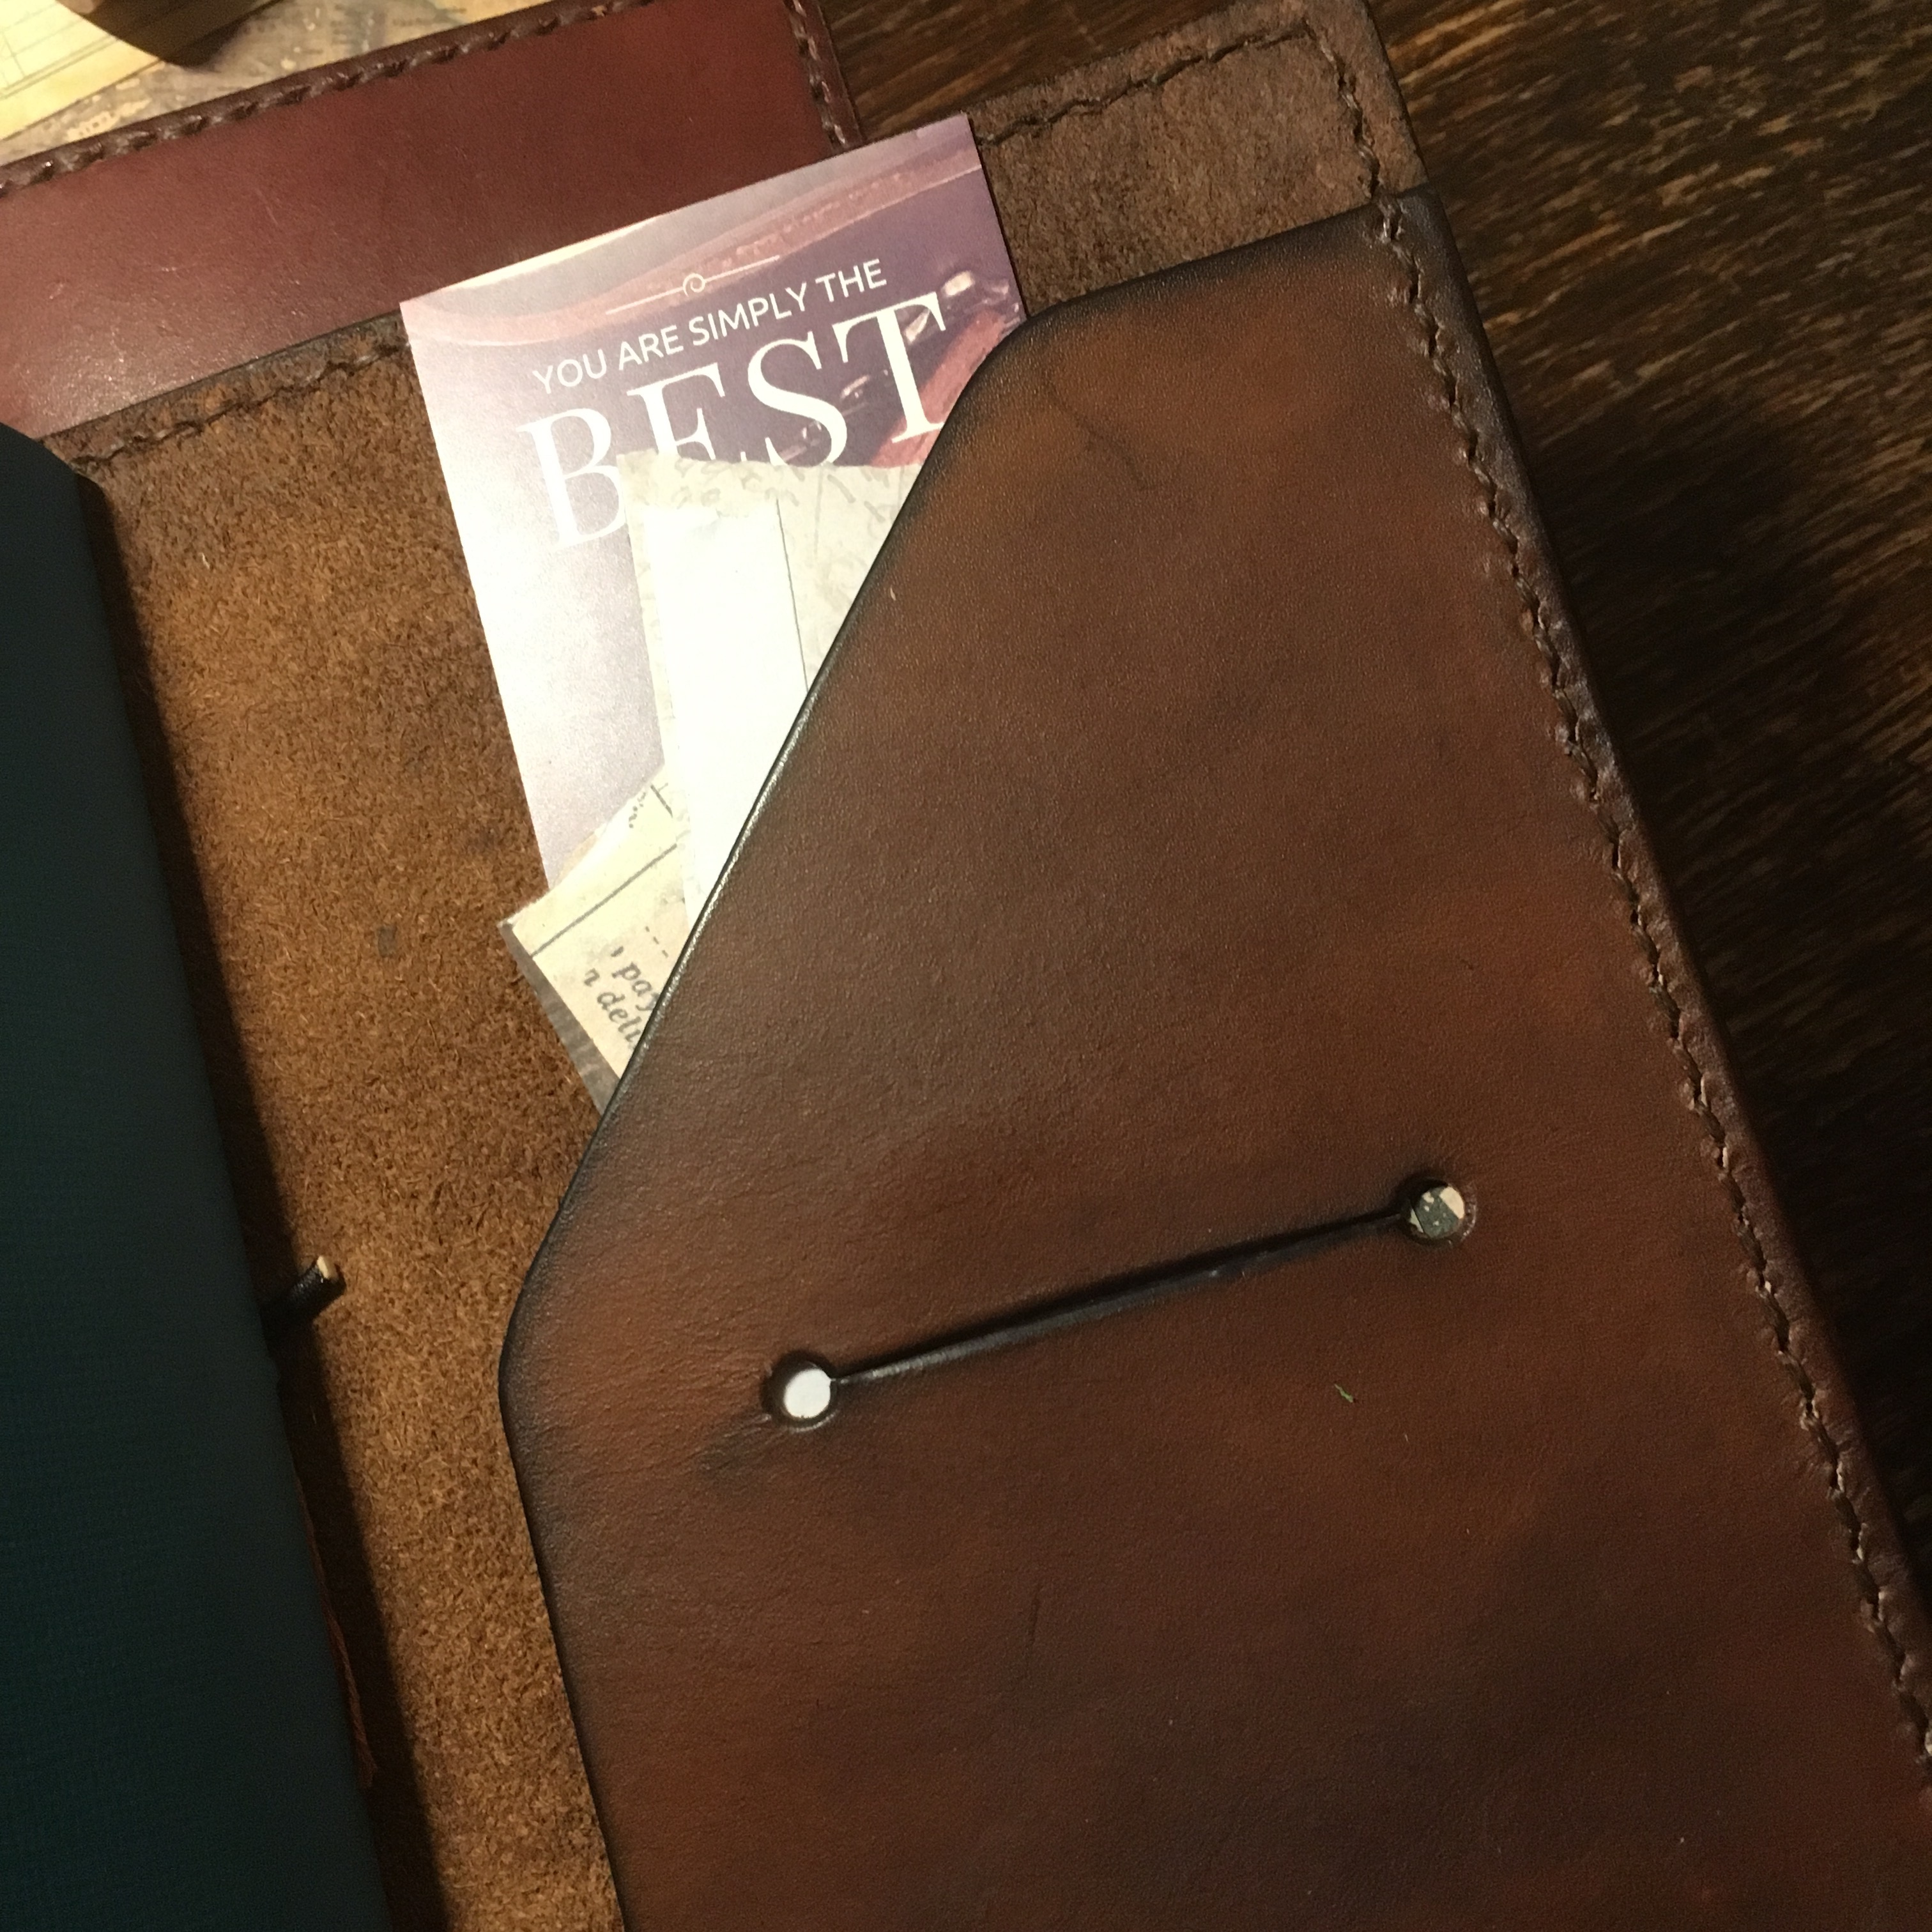
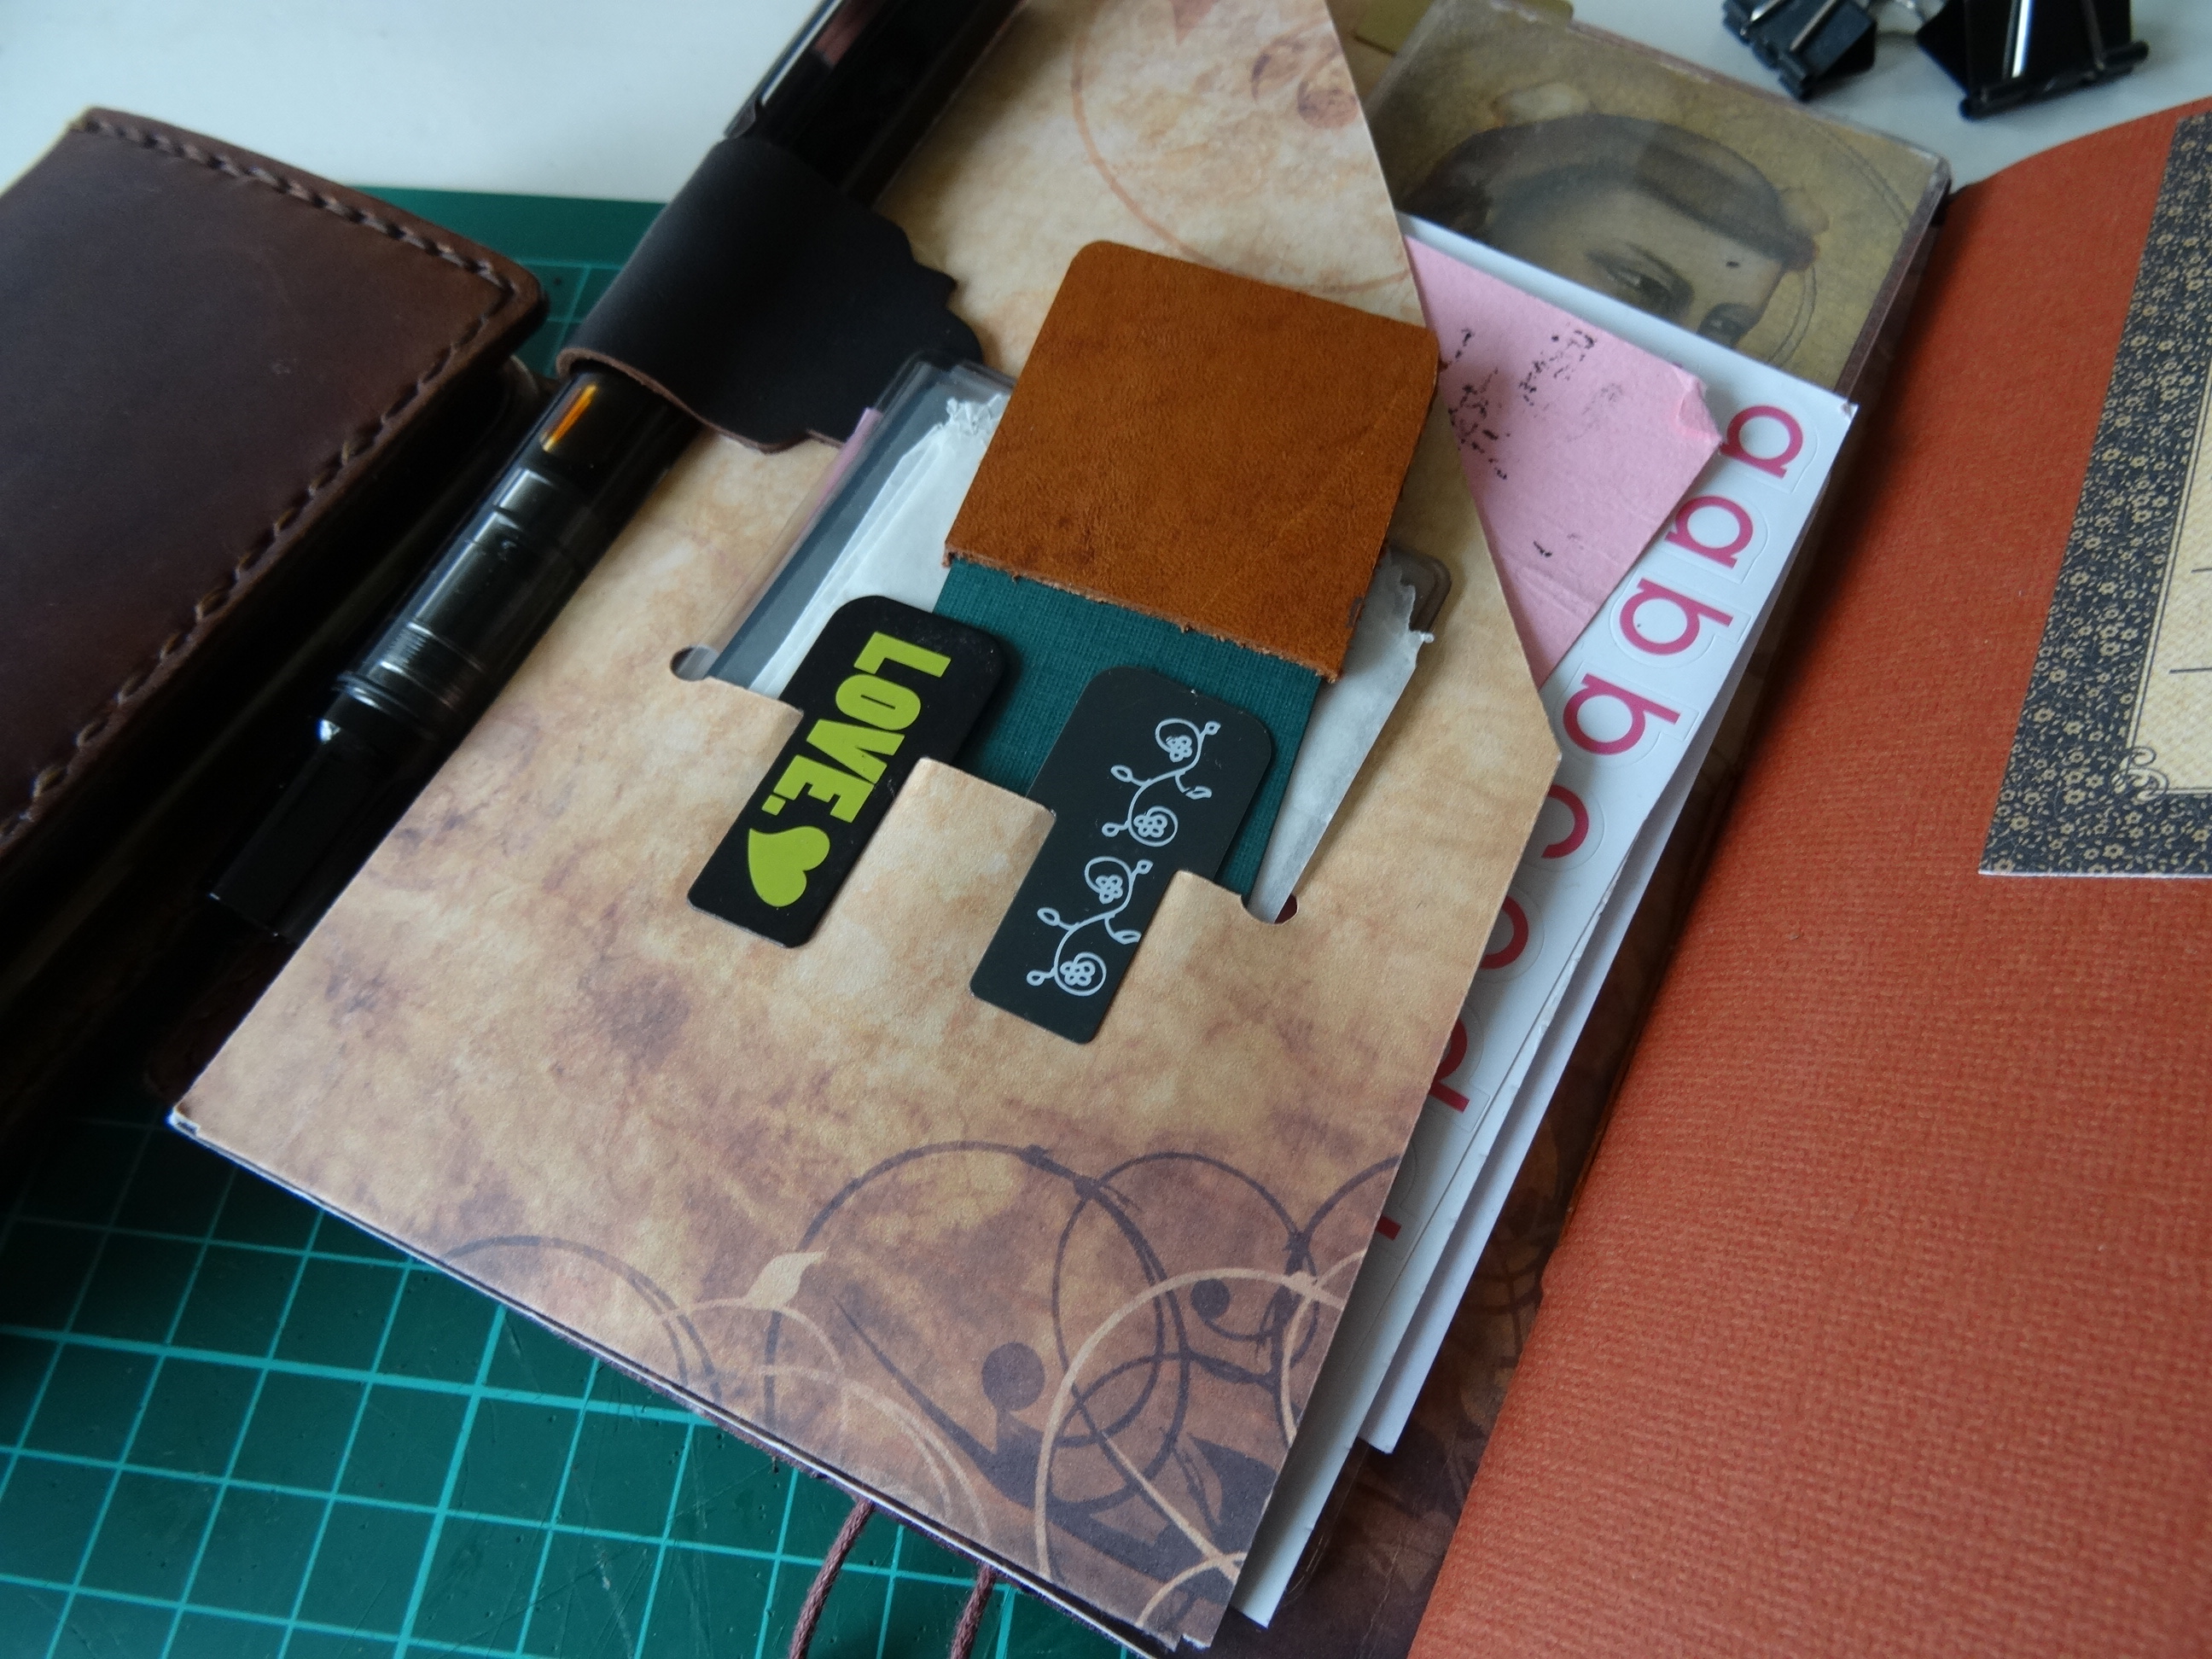
I added a tiny notepad in one of the front pockets and perforated the pages so I can tear them out. I will use this for random notes that pop into my mind.
 Not sure how that'll work yet, but I'm sure it'll come in handy.

Next up is my NaNoWriMo insert, which I printed on lightweight paper.

Which does have a bit of ghosting as you can see here on the monthly overview page. I've left lot's of room to write down events and tasks for this month.

The rest of the insert is filled with grid pages and an inspirational quote on the right hand page. Here I can write the story, or ideas about the story, or draw diagrams with the story line. I think the grid is versatile enough to support all that.

The last page. of course, should be a word count tracker and the NaNoWriMo pledge, looking forward to filling that page =)
Obviously 1 insert is never enough, so I added a folder and 2 more inserts.

The folder is still empty, but I expect it'll fill up over the course of the next few weeks of October and November. I'm not sure yet if I will add pen-loops or not, so I left those off for the time being.

I added a dot-grid bullet journal, because I plan on taking a few writing classes online and I think this will be the perfect insert to keep all my notes about writing in one place.
The last insert is a lined 120 page lightweight insert, which really is there in case my NaNoWriMo insert flows over, so story and story ideas. Still need to work that out, but I'm sure everything will find a place in the next few weeks and it'll be fully setup by the time November comes around.
I haven't written a word in it yet, but I'm already in love. The size is just perfect for writing.
I hope you enjoyed this. If you participate in NaNoWriMo, good luck to you on writing those 50,000 words =)
xoxo Monique

My Planner Last Month, September
Since I decided to join the #onebookjuly challenge, be it in a somewhat adapted format, I've been in my B6 slim planner with all my personal planning and journaling. I've got all my work stuff in my, ever growing, A5 Lady Falcon Business. Making it effectively one book for personal and one book for work.
I'm still loving the way this works, although I must admit that my work TN is getting bigger all the time. I keep adding new sections to the notebook. With now 6 inserts in there and a folder with pen-loops, I think maybe it needs some reorganizing.
My Personal B6 slim however is still in it's original format, with a planner insert, a journaling insert and a folder.
and maybe a pocket here and there.

Here they are together, with my July, August, September diary on top. Which is now full and will be filed away.

I like doodling my way through the monthly pages, with here and there some things to remember.

Which in a way is what I also do in the weekly view, with a small list to the right side and keeping track of what we had for dinner. However I did make a change to the new diary this time.

Not directly to the monthly-weekly combination, but to the last pages in the diary. With 3 months in there, there's plenty of room to add a bullet journal in the back. which is what I used to do. Before I started using my A5 for work, this bullet journal section would fill up pretty quickly.

However it turns out that I'm now using my A5 more and more for bullet journaling and my personal bullet journal doesn't really fill up anymore.
I hate having empty pages in my booklets, so I thought I'd try something different. I added some future log pages for 2018 to the file, a dated budget tracking section followed by some extra pages for my bullet journal.

This way I still have room for my personal bullet journal pages, but I can also keep track of our expenses in the same diary and won't need an extra TN for that... You can find the file for this B6 slim diary in my Free Files folder. You can find the current link for that here.
Still making a mess as you can see, but I'm guessing that won't change, that's just me sitting on the couch chillin' and fussin' around with my planner. I doubt that I will ever plan or think out my lay-outs beforehand. I'm having too much fun doing it like this.

I did try another new thing with the current planner, fixed side tabs. Since I now have 3 extra sections in the planner, I thought it was nice to have tabs to the side, so I can flip to them quickly. I like how it looks, but I'm still a bit on the fence about them sticking out the way they do. We'll see how they fare.
As you can see, my work planner has all kinds of tabs sticking out as well. Those however are removable tabs and constantly get moved to the current page. They are quite plain, but they do the job and get me where I need to go fast.
I did make a note to do a blogpost on my work TN's setup with the timetracking insert and bullet journal and all work related stuff, however there won't be many pretty pictures, because that is pure and straightforward tracking, list-keeping and lots of fast writing, lol.
I also made the timetracking insert for a smaller size though, personal size, just to see if that was possible. I made it available as a freebee. If you would like to try it out these last 3 months of the year, feel free to download the file and please do let me know what you think of it.
So there we have it, another month has passed, we had a winner last week for the Instagram Fall Setup photo contest, our Fall Special is still running and we're all on track with our orders, I might even have time to join NaNoWriMo this coming November... who knows... I may need a new TN for that though... ;-)
Hope you're having a great time as well.
xoxo Monique

Fall contest and special colors
To celebrate reaching 2500 followers on Instagram and having over 2500 members in our Facebook group we are having an Instagram photo contest.
Share your Fall planner setup photo's on IG with the tag #LFTFALLSETUP and enter your photo in the contest to win this gorgeous Lady Falcon Hobo cover, completely setup for 2018.

Share the contest with your friends to gain as much as possible votes!
We, the team at Lady Falcon Travelers, will choose the winner from the top 3 with the most votes a week from today, September 28 at the end of the day (CET)
Go here to enter the contest.
We also added our new Special listings to the shop with 3 lovely Fall colors.
We selected the colors Maroon, Walnut and Light Tan as the Fall colors and these are now 10% off, before any coupon, during the course of the Fall special.
They will only be available through the Fall listings for the duration and will return to the regular listings and regular price after we close it. You can find them here.
Here are a few examples of the colors and of the prize for the Fall contest. Starting with the prize, a lovely Oxblood Lady Falcon Hobo with snap.

All setup with 2 Lightweight diaries for 2018 (Monthly and Weekly combination in the modern style)
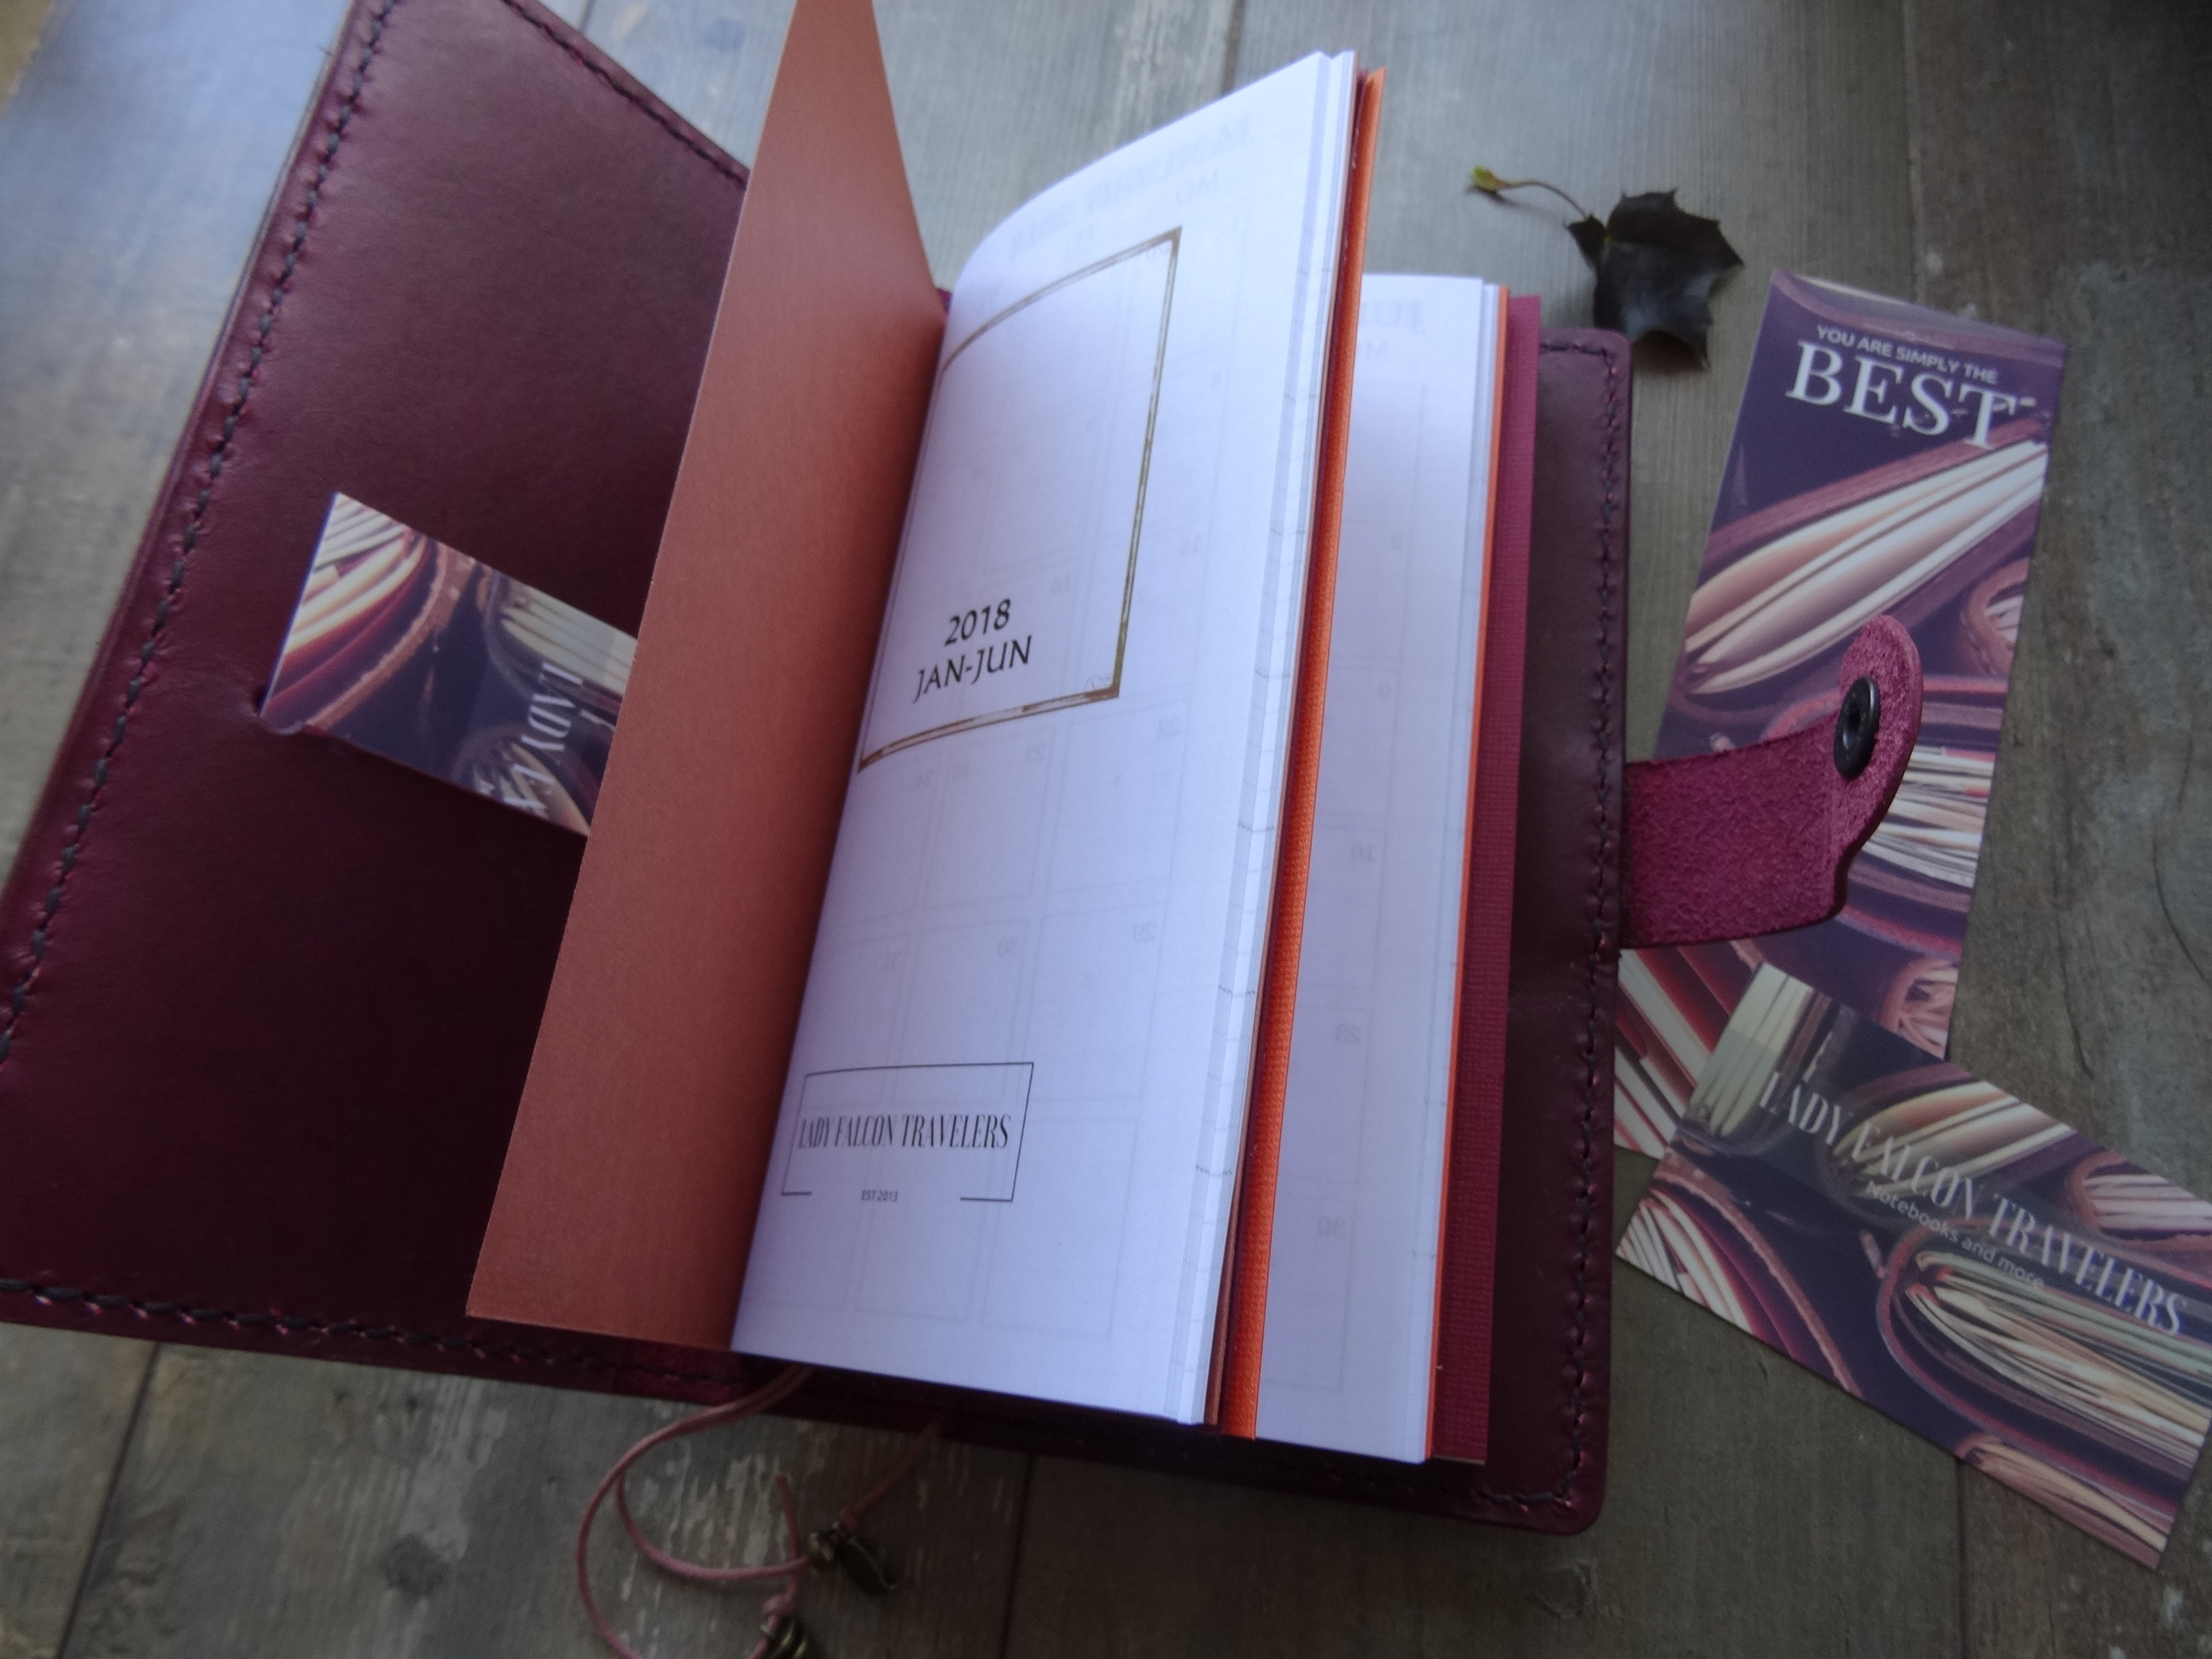
An ivory dot-grid bullet journal and a folder.
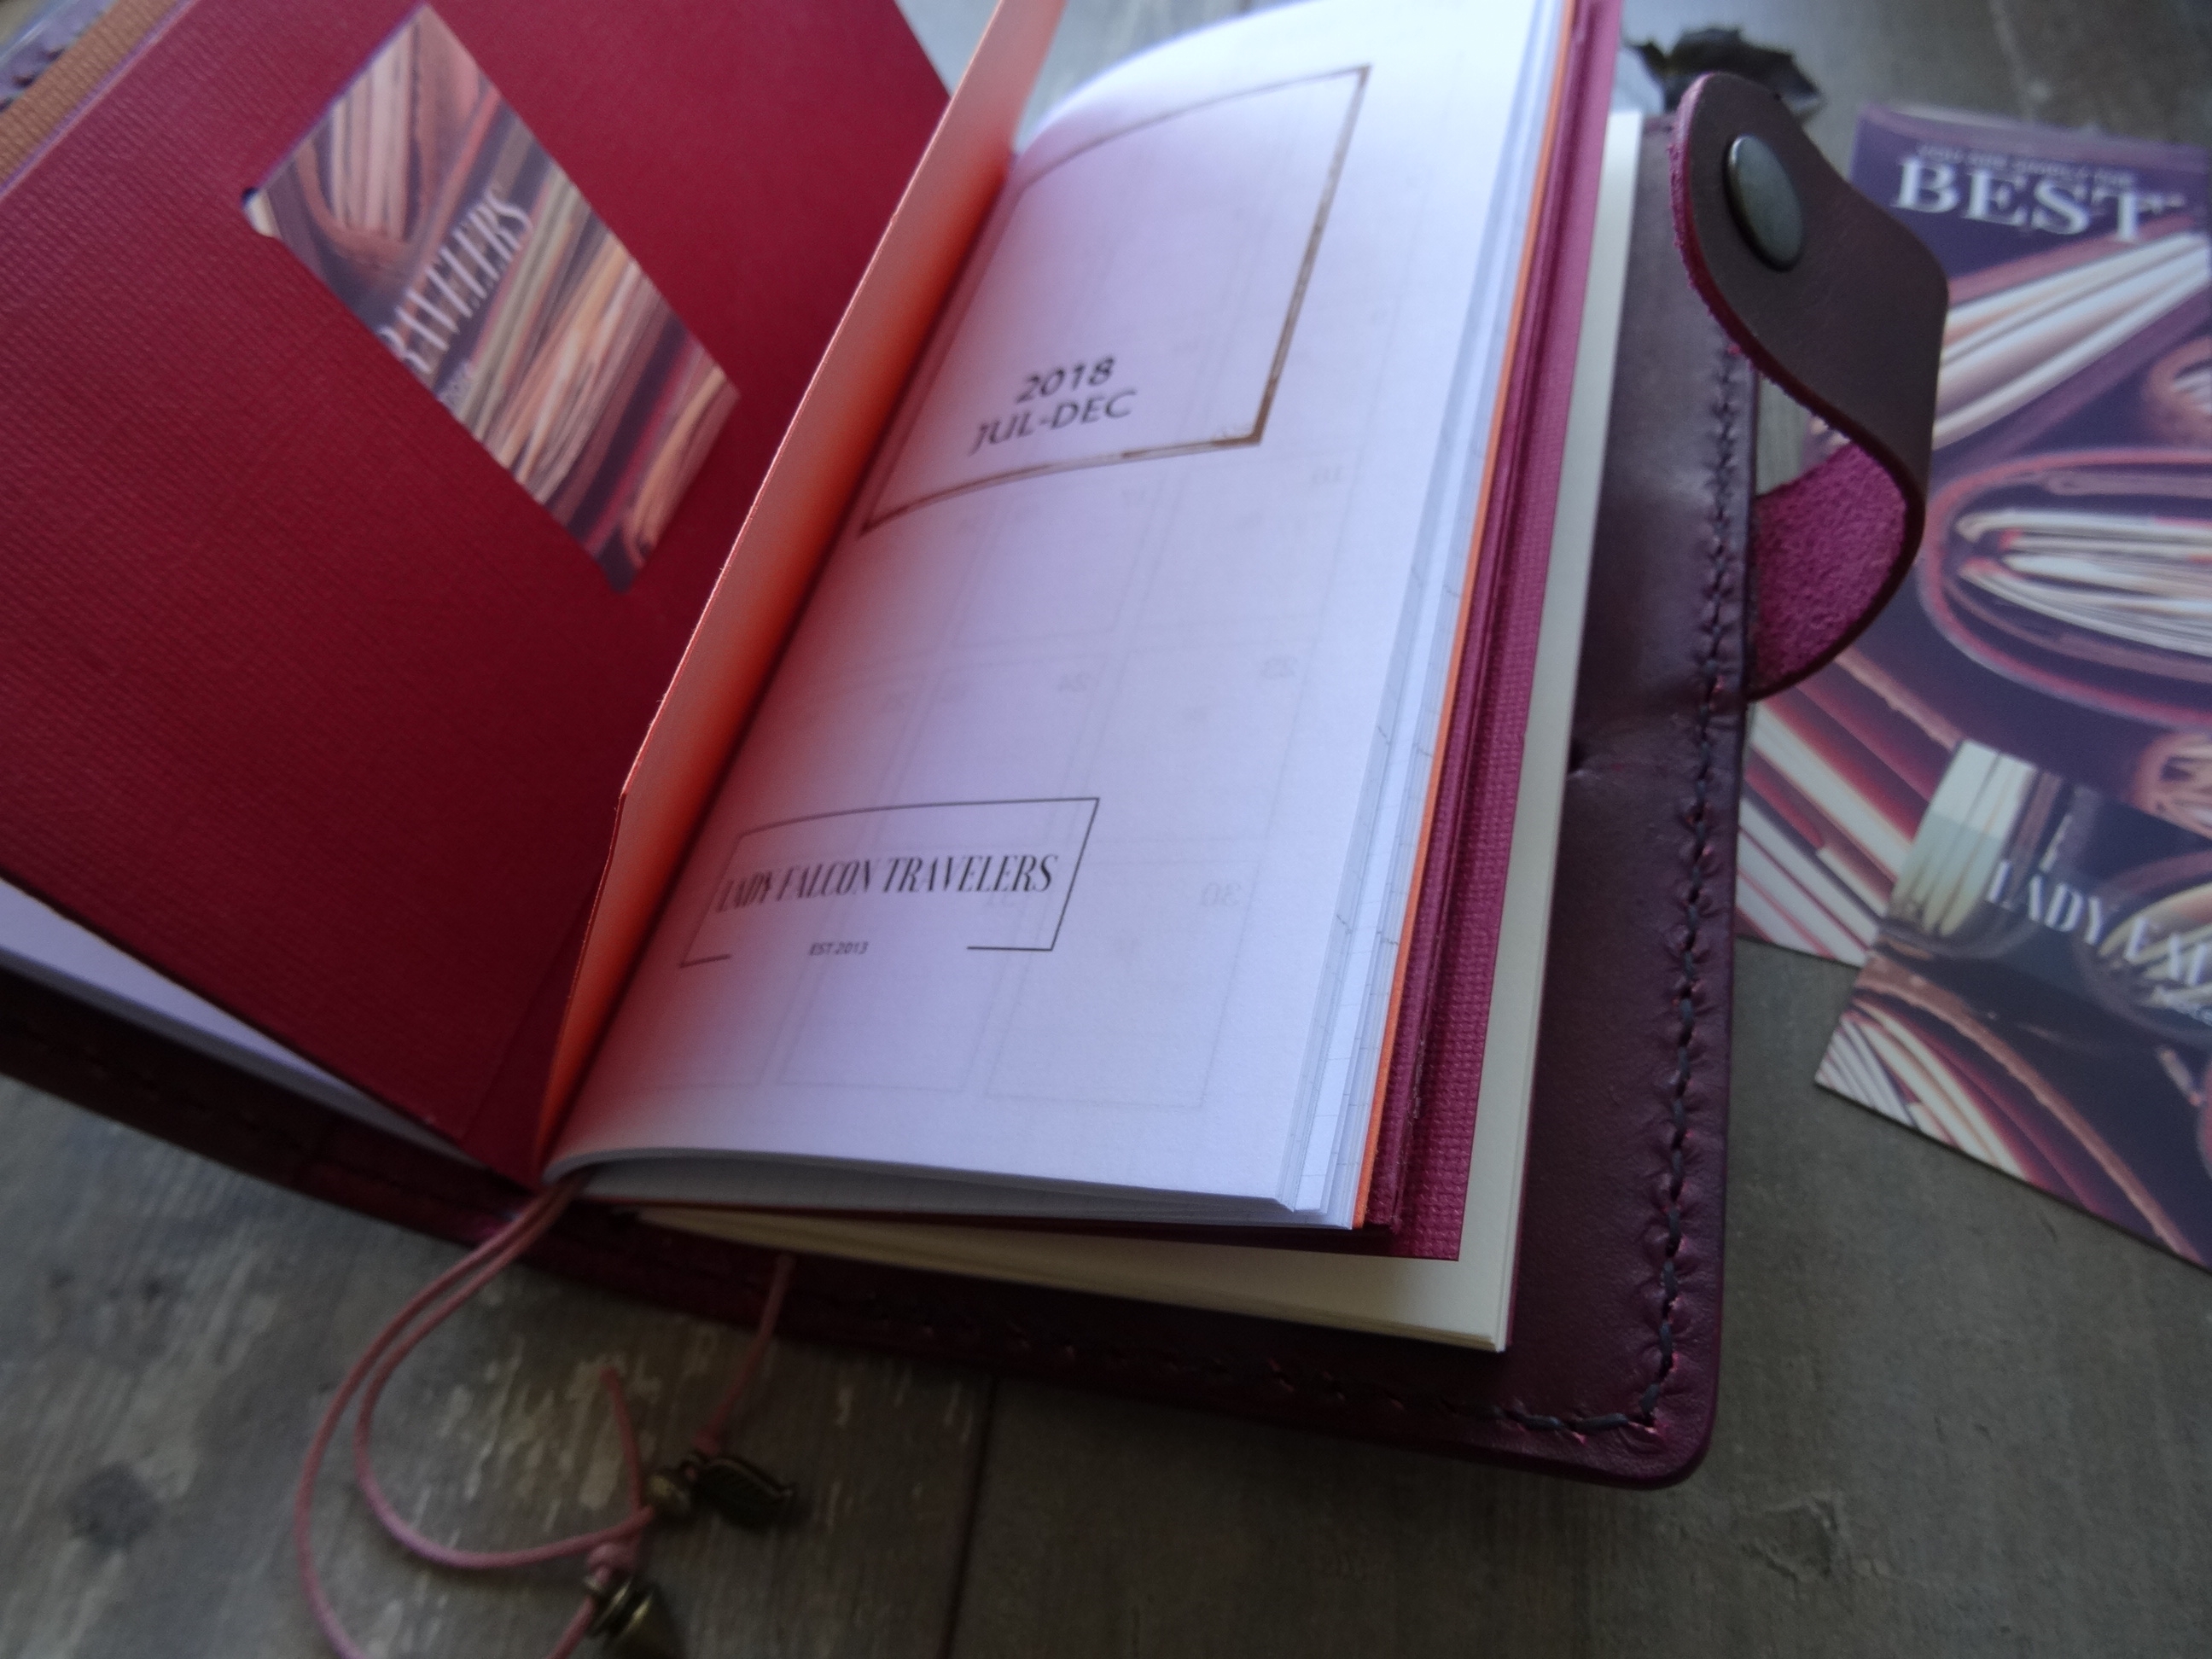
It has Full pockets in the front and the back. with cardslots.

You can use it like a Travelers notebook, because it has the elastics, but you can also slide your hardcover insert into the pockets to use it as a cover for that.
Although we do think that the oxblood would've been a great choice for the Fall special listings, we went with the Maroon instead. Both colors are alike, but the Maroon is slightly warmer in tone.

What do you think, do those colors make you think about the fall?
I hope you join in the fun for the Fall contest and show us your fall planner setup pictures.
Have fun and good luck from all of us at Lady Falcon travelers.
xoxo Monique

My Planner Last Month, August
The first half of last month we were on holiday, so I didn't get round to taking any before pics. Besides, not a lot of planning was done during the holiday. Which really is not a problem, since I use my personal planner more as a kind of memory keeper. With snippets of every day stuff. Which is sometimes hard, because when you work from home and work all day every day and your idea of a holiday is to snuggle up somewhere with a book, there's not a lot to tell.
 However I do try to keep up with it and think of something to add every day, because I like the way it looks and feels. I doodle my way through the monthly pages, like you see in the above image. Although this time I also felt like adding some pictures. I'm quite happy with how that turned out.
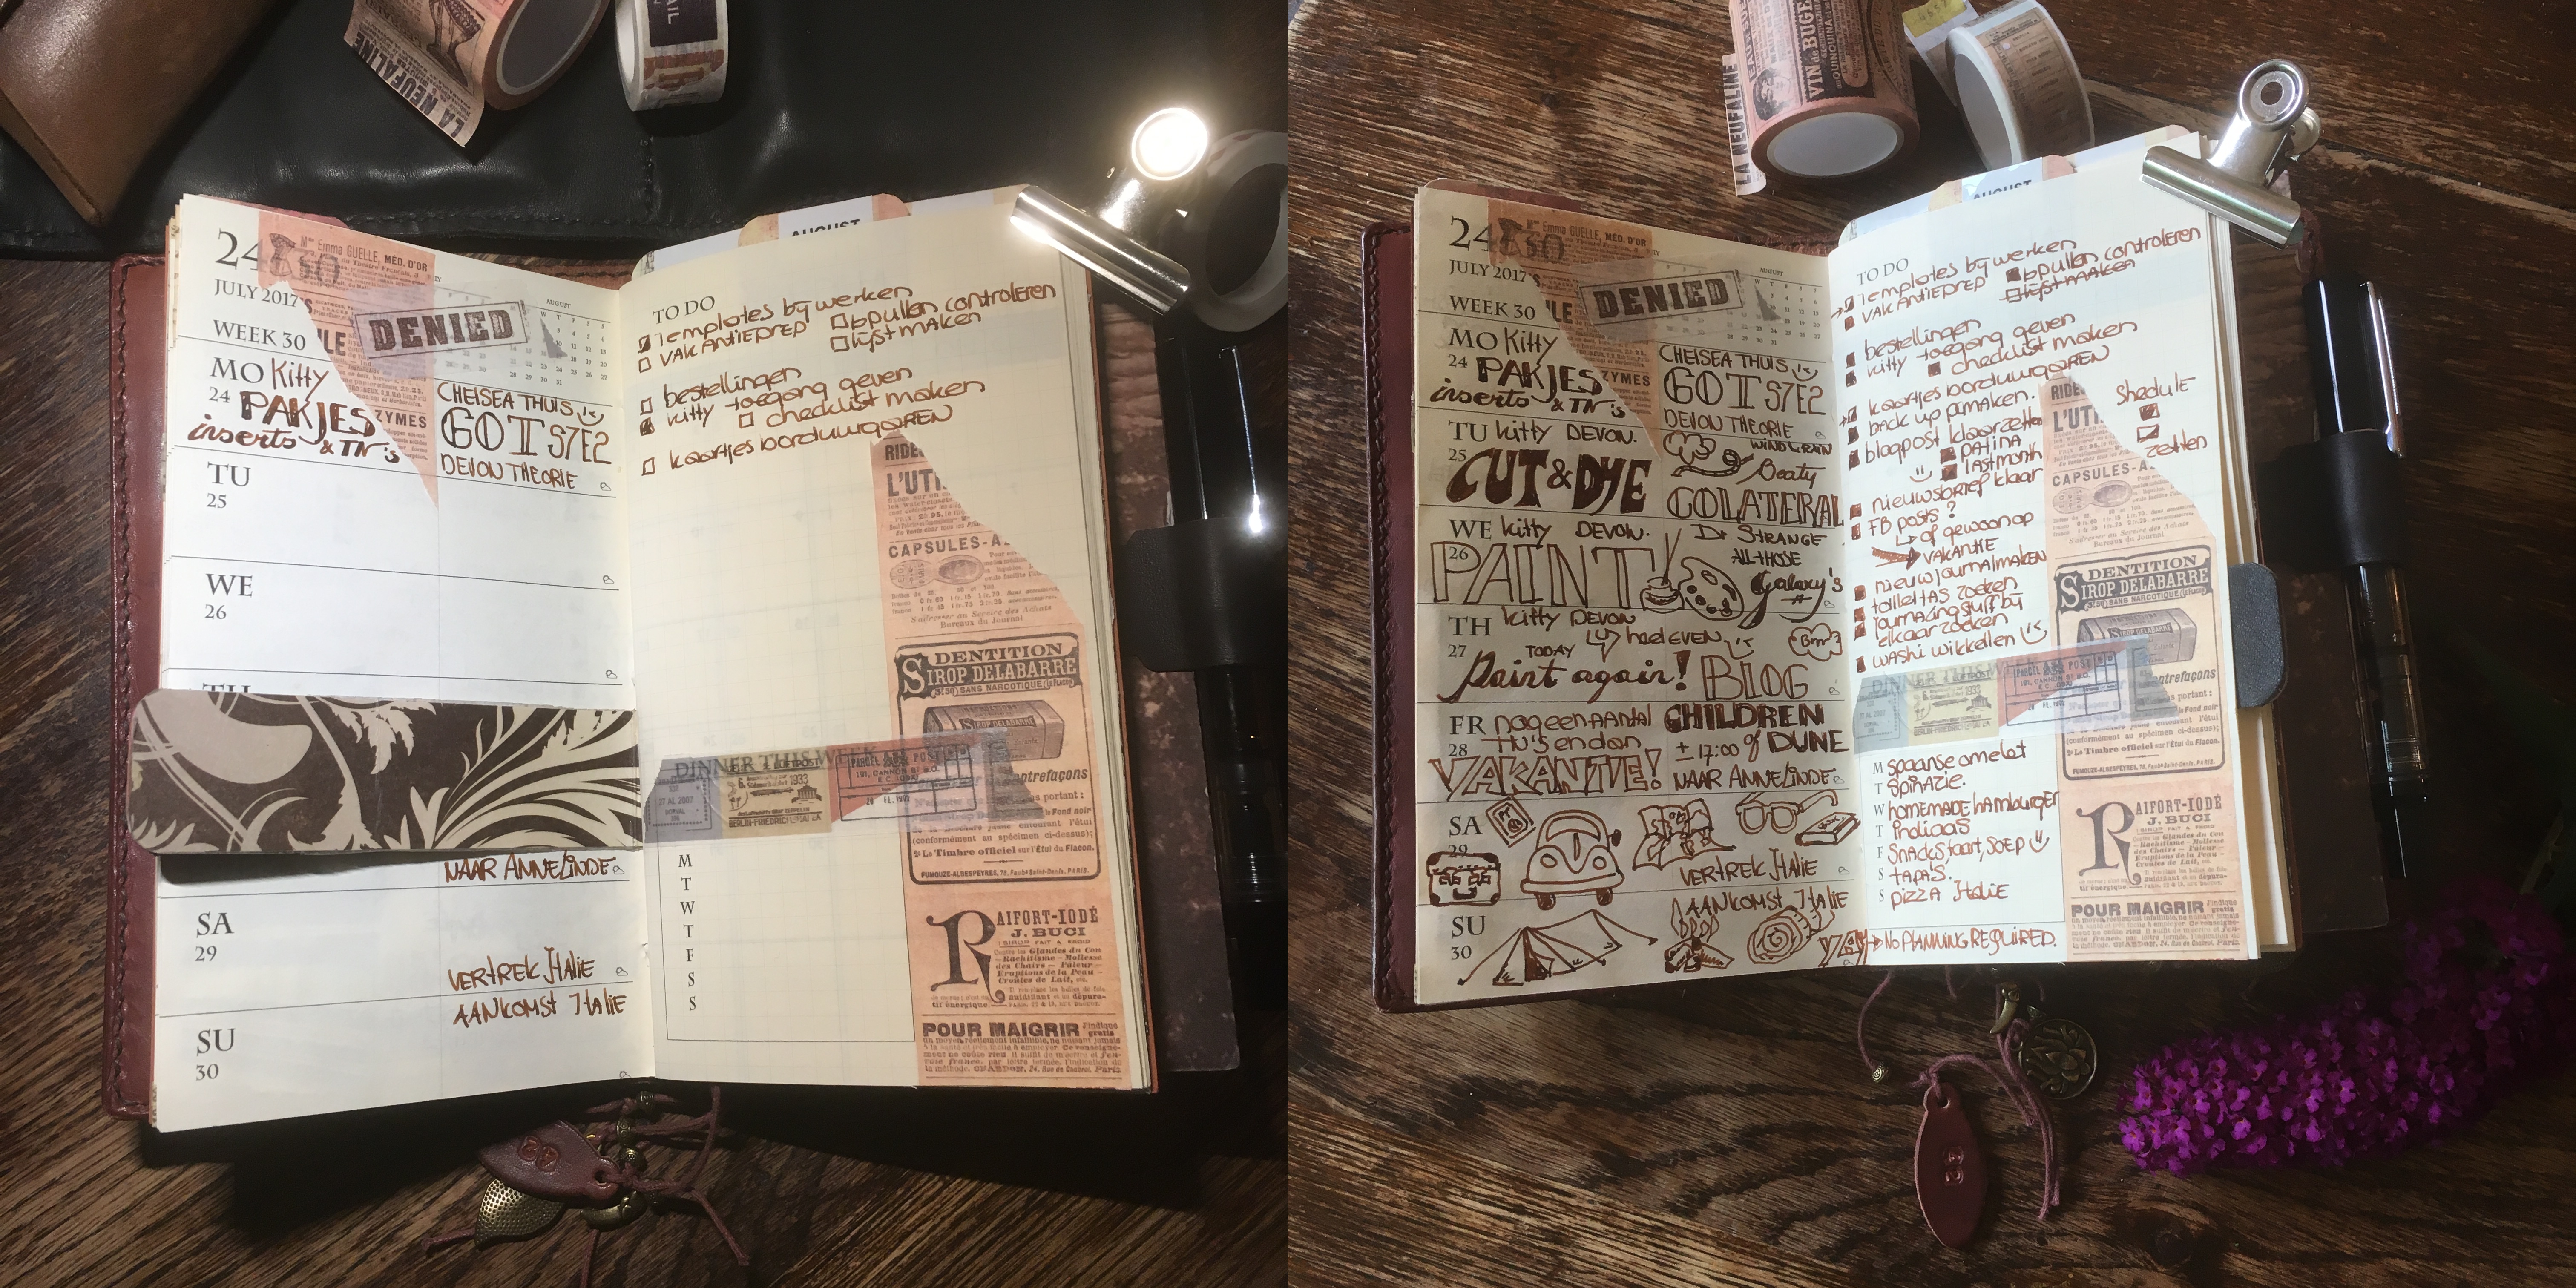
I usually start my weekly's with transferring any tasks that haven't been checked off from last weeks to-do list to their appropriate places and then decorate a little.
Not too much mind you, because I want to leave room to add things as the week progresses.

The above week was done on holiday and since I brought out the mini printer I was able to add some pics right then and there.

I also like to add what we ate each day. Not for memory keeping purposes, at least not for the long run, but so that when we have to decide what to eat each day, I can look back in my diary. That way I know that, no we can't have pizza today, we had pizza 3 days ago... Because I forget, I do, my brain just doesn't have the room to store that information.

I also like to mark which movie's or TV series we watched or what books I'm reading. Although I only read a lot on holiday. When I'm back home I only get to read about 10' or so before bed, so one 800 page book takes me about 2 months to finish. But I do keep track of them.

I have a list/ miscellaneous insert in my Regular size TN, but haven't got one in my B6 slim and I find I am missing it a bit, so maybe I should go and take out my trusty Red Dragon again... If only to keep my lists.

I also started learning the Italian language with an app called Duolingo and am keeping track of that. I find that when I'm trying to create new habits it works great to just have a place to remind me to do it everyday (or however often you like to do it, or not do it ;-) ). Just one tiny little check-box is all it takes. After a while I don't need the check boxes anymore, it will have become a part of my daily routine. At which point I can just leave them out.
Anyway, there you have it, my last months planner pages. Not a lot to tell, but still they all got filled in the end, adding one little bit every day.
Maybe you too, like me feel like there's not much to tell everyday... Just keep in mind that you're the only one that judges what should and shouldn't go in your planner, or journal for that matter. It doesn't matter how big or small the events or thoughts are. You fill the pages for you and by adding one little bit at a time it'll fill up in no time =)
I hope you enjoyed this and wish you all a lovely week,
xoxo Monique

Holiday planning and journaling
my holiday planning and journaling was virtually non existent this year. I had all the right intentions and all the right tools. I even made a new junk journal to take with me in case the old one would run out.... but it was just to hot to do anything except take a few notes along the way so I could catch up when I was back home.
Which is what I did this week in between doing all the holiday laundry and putting away all the camping gear.
It was a bit of a shock to come back from 30+ degrees Celsius to about 20 degrees and rain, but I did get to sit outside with my collected stuff and fill in all the gaps.

Added some pictures...

And of course pretty washi tapes...

I did do some writing while on holiday, but not nearly as much as I am used to.

Nor did I write it all chronologically per day, but rather just wrote what came to mind and tried to remember the day. Also decided to keep a list of the books I was reading and made a note in the diary of start and end date of reading the books.

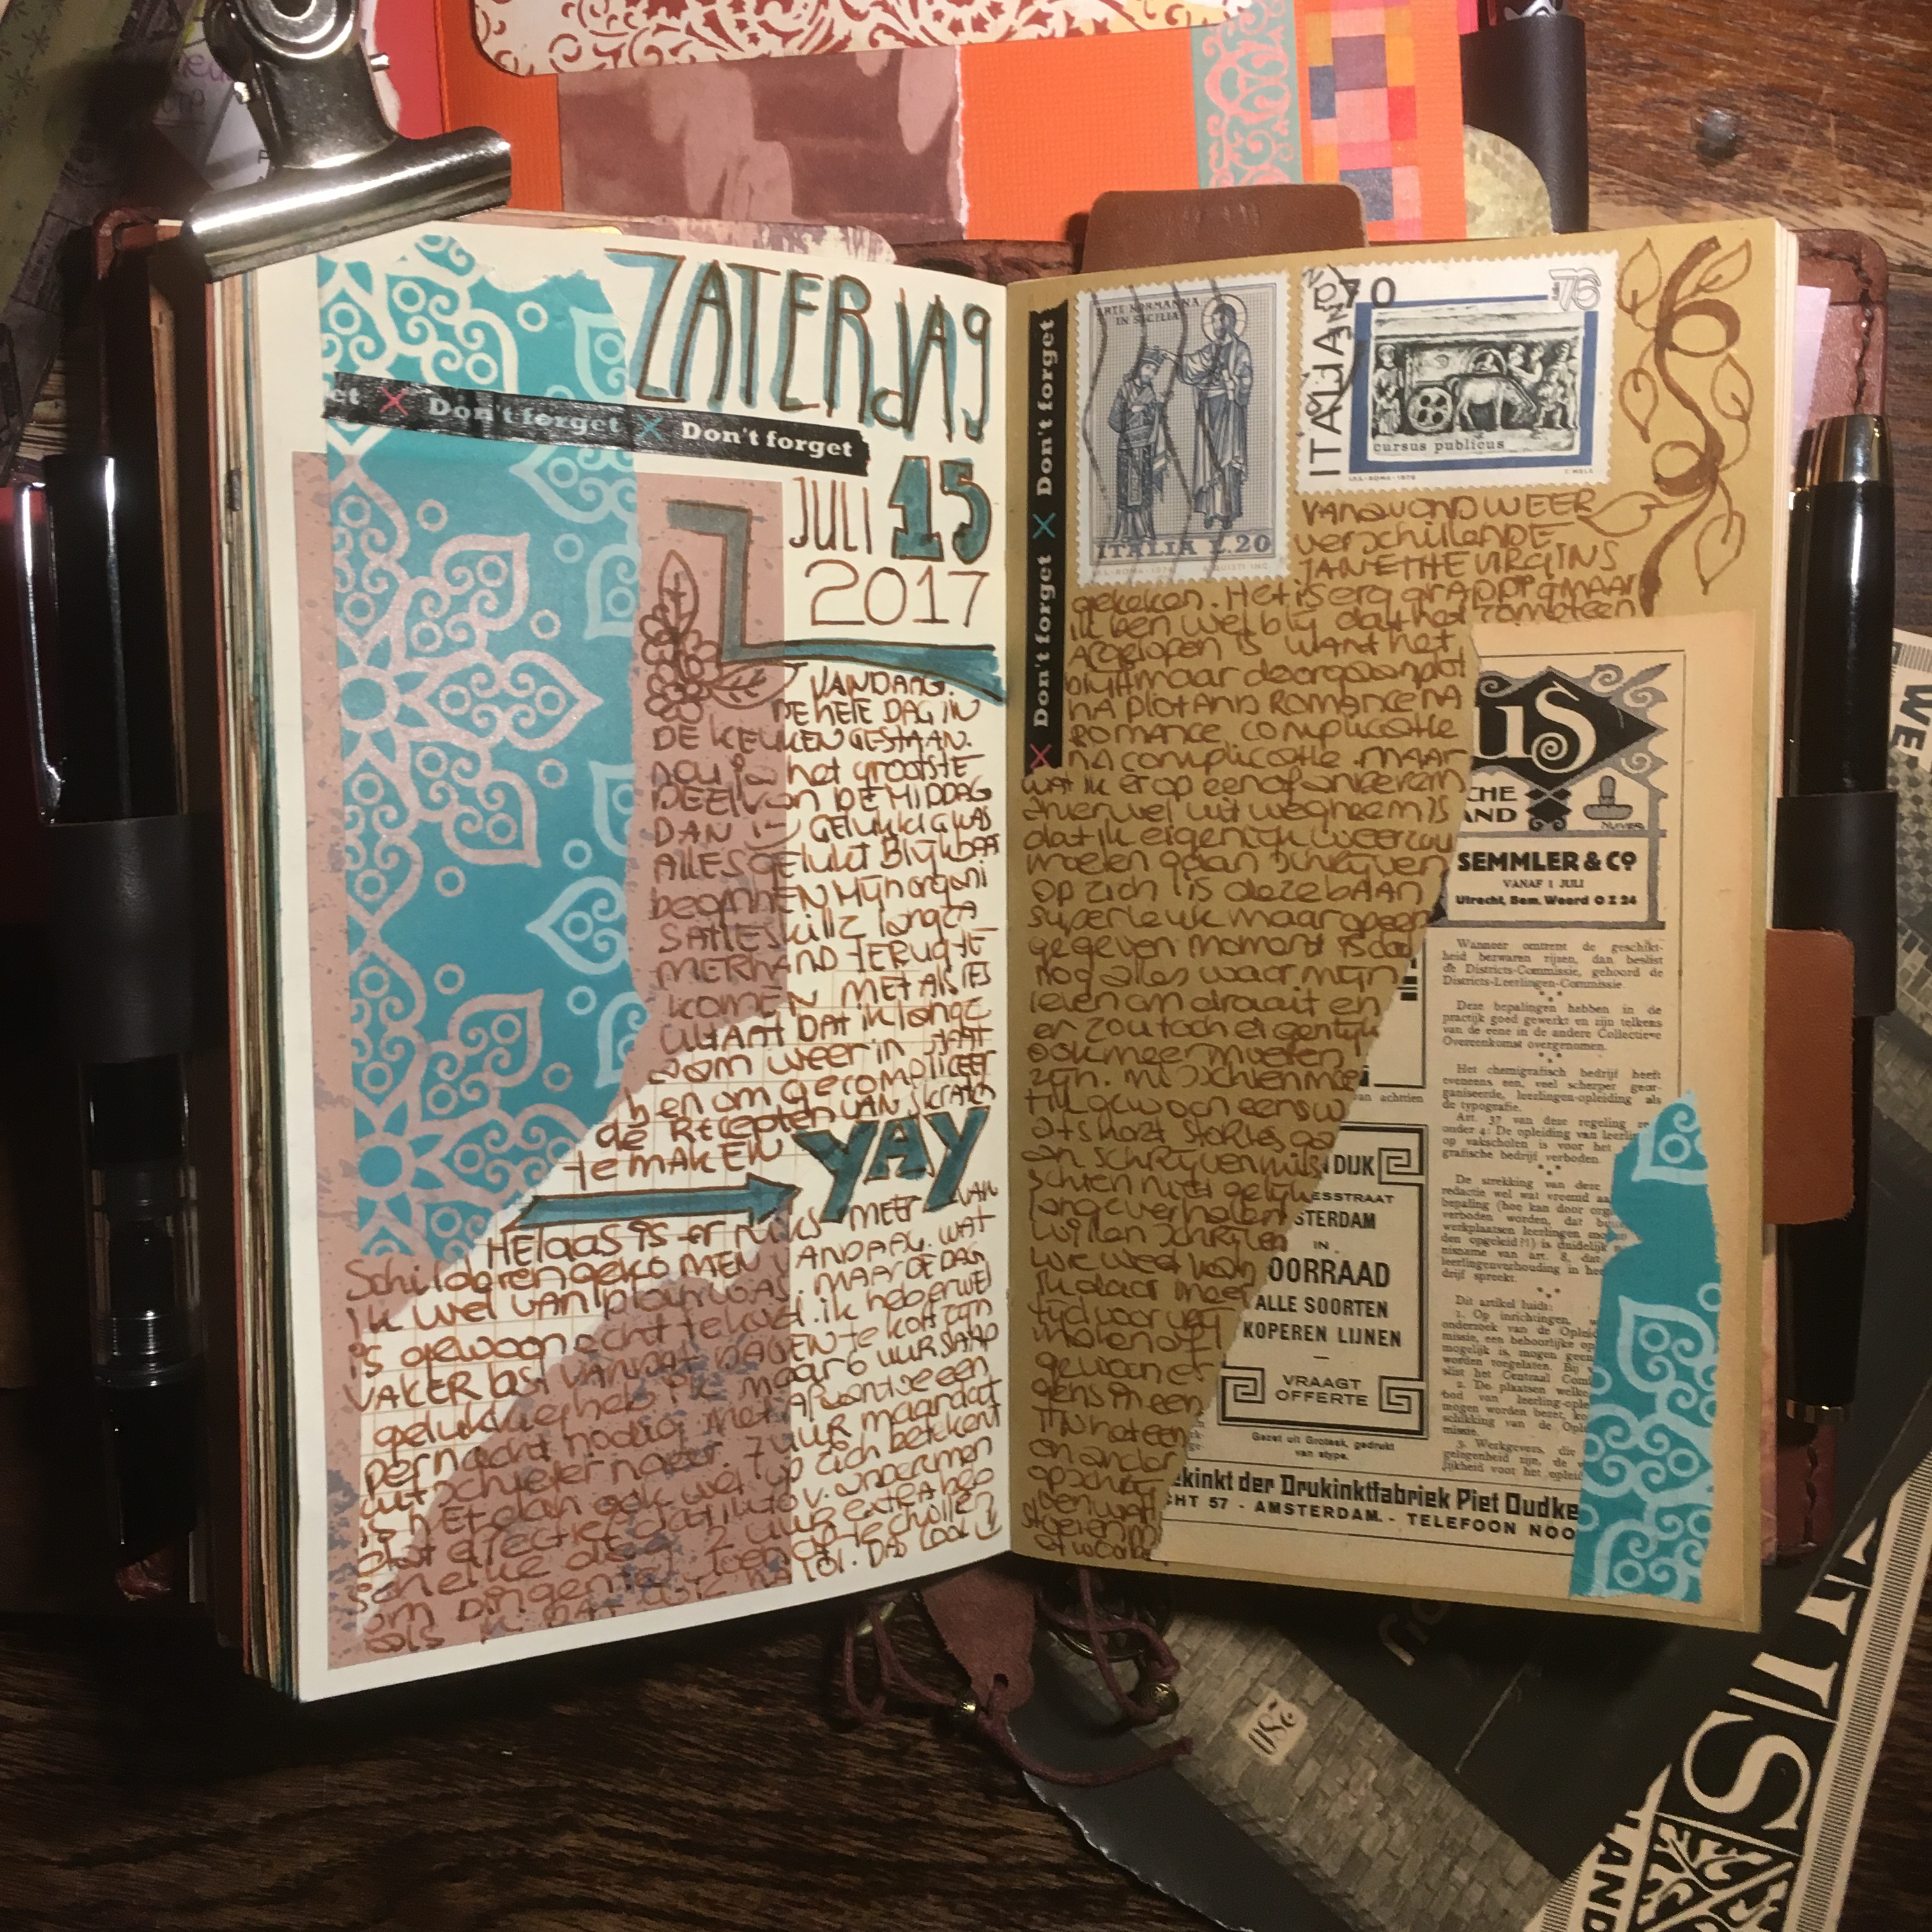
I had some papers already smashed in there when I made the booklet, so that was nice to work with, setting the tone for the spread. These were the last pages I wrote while on holiday...the rest I did at home.

As you can see, I apparently wasn't paying much attention, because I used a picture twice. The last one was printed at home with a regular photo printer and the previous one was printed with a mini travel printer.

Added a few ephemera along the way and figured that I was done when the booklet was full.
This was my first time using my regular journal for holiday journaling and apart from the fact that 38 degrees Celsius is not a good temperature to write, I liked it. Although I think I probably would have written more had there been more pages left in the booklet. As it is I stopped because I didn't want to write the rest in a separate booklet. Which is fine really...

So now the booklet is full and I've replaced it with the new junk journal and will continue writing is this one. No smashing of random papers and stuff this time, although I might still do that at some point. For now it's just 5 different types of paper to write on.

Still happy with my Mahogany B6 slim and really enjoying the way it develops a patina. A few scratches on the cover from being dragged around with me, but I think it adds to the charm.

So at the moment I have in here, a 3 month diary, MOTP-WOTP and added notes papers for bullet journaling, a folder with stuff and my junk journaling insert. All kinds of stuff stuck into the pockets, both in the TN and in the inserts. It's chunky, but not too chunky and feels nice to handle. Looking forward to seeing the patina develop even further.
I'm still on a break this week, which is why I'm still not much on the interwebs. I'll be fully back at work come next Monday, but will start to pick up some things, like messages and Facebook, this weekend.
I hope you all have a wonderful weekend,
xoxo Monique

My planner last month, July
Last month was quite a hectic one and with the holiday at our doorstep I decided to go and try the #onebookjuly challenge and switch from several notebooks to just 1 B6 slim for personal and 1 A5 for work. I changed my personal planner to B6 slim because I wanted to try that size to take with me on holiday and I can definitely say that I enjoyed using this size, so I may end up using it a while longer.
Here's my MOTP spead from July, just a few notes and mostly just doodles. I really enjoy making them to look like this, adding bits and pieces every day.
My weekly's usually contain a bit more text, but I tend to use those mostly as a memory booklet, since my planning with tasks and projects is done in my Bullet journal section.

I start with a bit of decoration and add stuff along the way during the week, mostly at the end of the day.

And although messy, I like the way it ens up and think it looks pretty.

Now my Bullet journal is an entirely different story, because that is all about functionality and keeping track of what needs to get done.
So mostly no pretty washi, or stickers there, no weekly lay-outs, because I can't handle having to draw those out every time. Just my to-do, to-don'ts, my to research and a few trackers...

lol, not pretty trackers, but quickly scratched functional trackers that get the job done and I don't get lost in the endless list of things that need to get done.

My Bullet journal is like that as well. Probably because I want to write quickly to get it all out of my head and onto the paper... preferably before it disappears out of my head forever.
The #onebookjuly also entailed a switch to a new daily journal and I made a junk journal type insert for it, with 5 different papers and have been really enjoying using that. So much so that I made a new one for August and our holiday.
Here's a quick peek at a few pages, but I'll make separate post and a flip-through later in August.
Have a lovely summer everyone,
xoxo Monique

Leather Patina
From time to time I get the question to make a notebook just like the one I posted online. Usually it turns out to be an image of one of my own Traveler's Notebooks, which has been used quite a lot and has a lovely patina and shine to it.
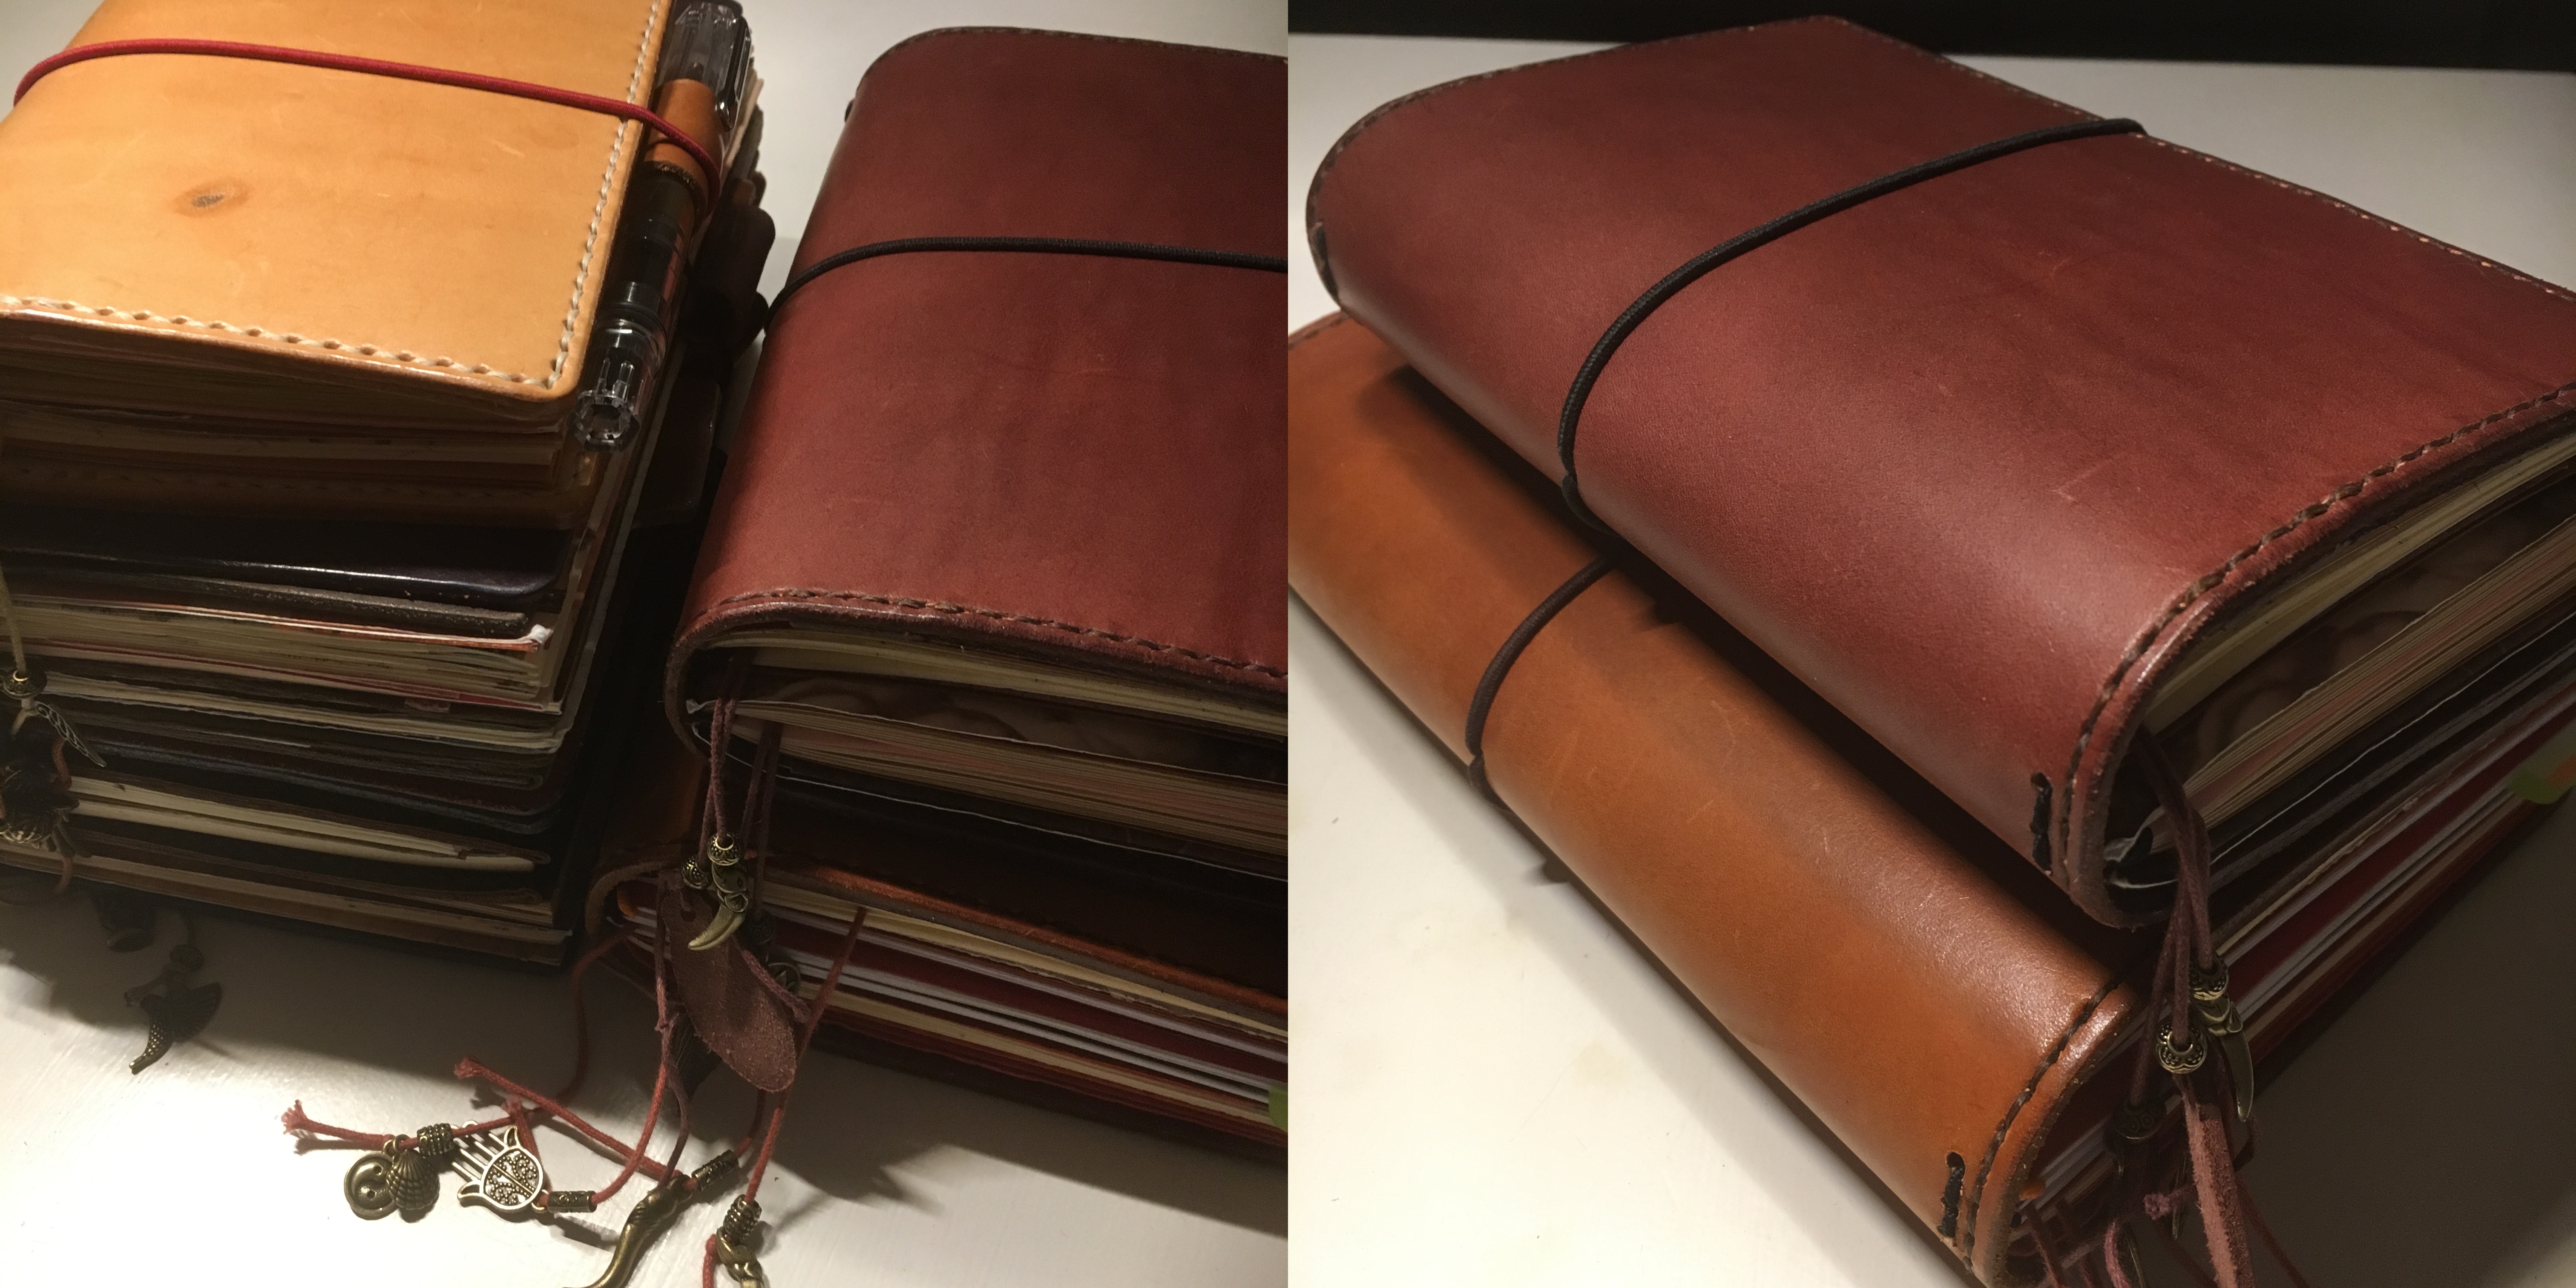
Obviously I can make it just like I made mine, but the patina has to develop over time and will not come right out of the box. To demonstrate this I made some photo's of two TN's, one is brand new and hasn't been handled other than for making it and the other one is mine and has been with me for over 2 years now.
Both are made from exactly the same leather, had the same dyeing process and are the same size.As you can clearly see, they do not look the same....
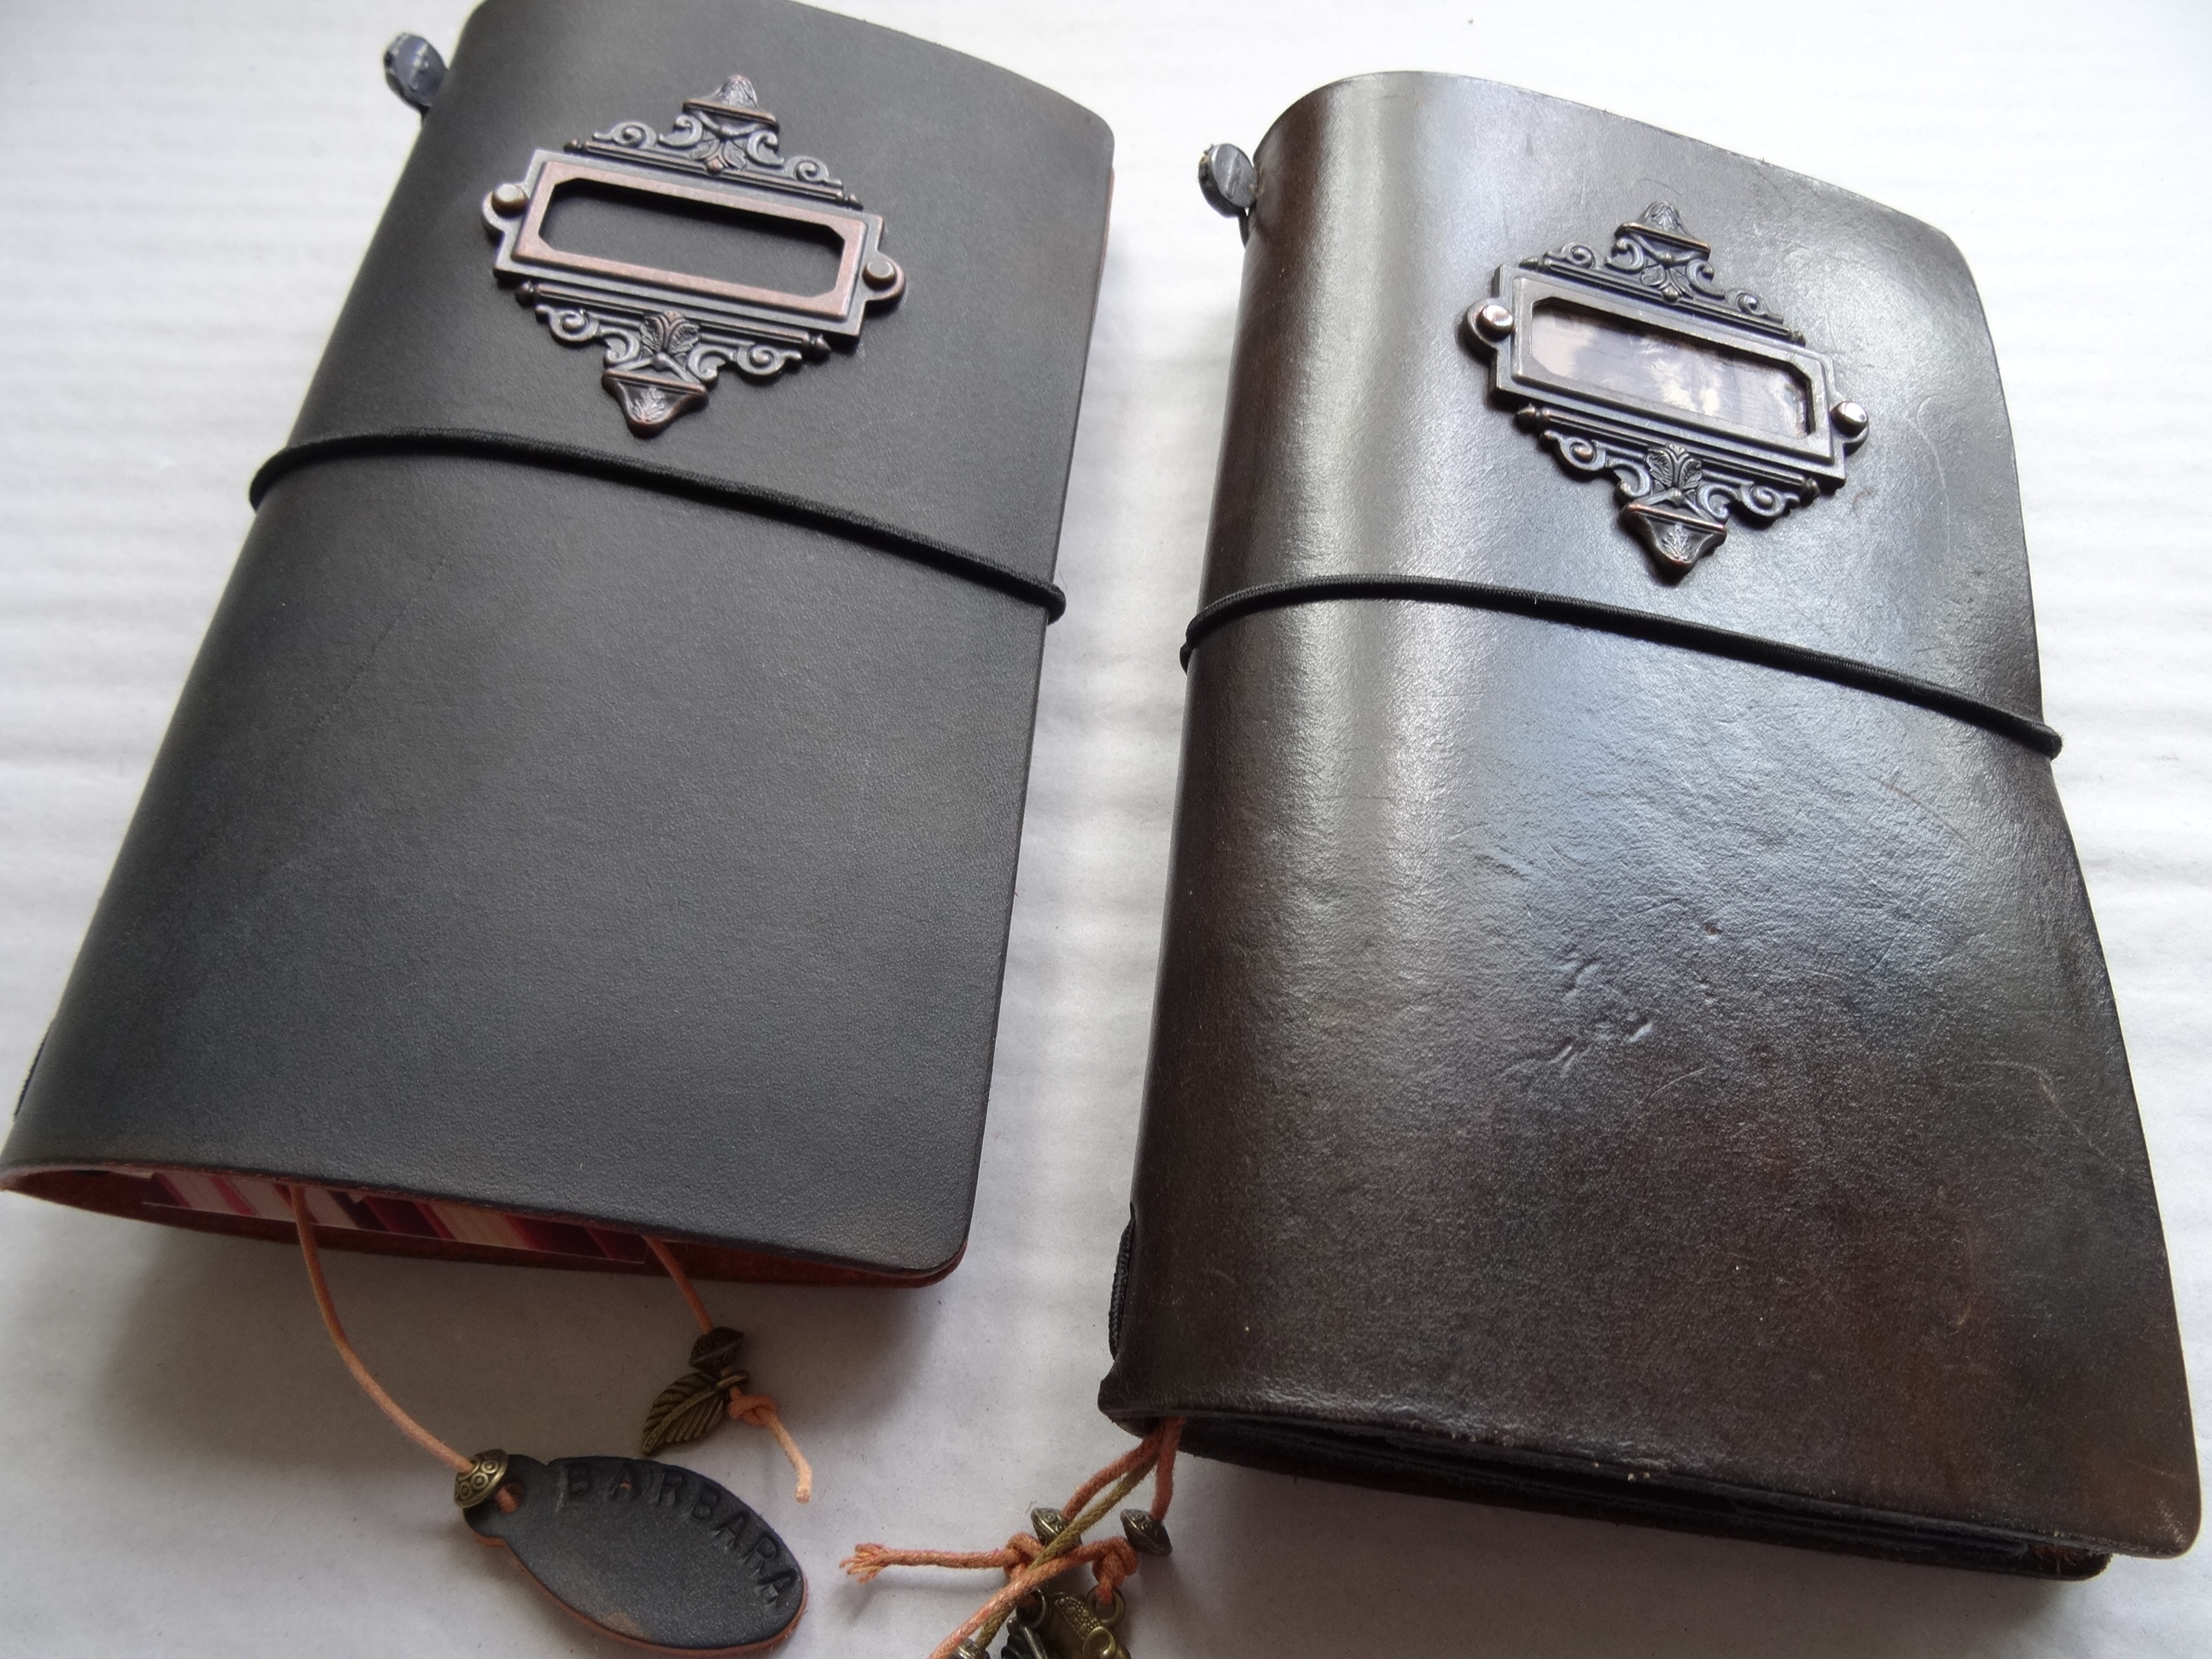
I think you can guess which one is mine =)
There is definitely more shine to mine and you can see a few dents in the leather. It's more flexible and overall looks more aged and worn. This notebook has been with me for over 2 years now and had traveled with me where ever I went.

This change in the leather is the natural aging process for vegetable tanned saddle leather, the patina it develops. This process really starts the moment you start to use your notebook and often the patina comes quite fast, with a few weeks of use.
In this particular notebook, it was dyed with English bridle before dyeing it black (on the outside only). As you can see on my notebook, the brown of the English bridle is shining through the black, giving it a very warm vintage undertone.

The inside of both notebooks are still English Bridle. Mine is the bottom one in the above picture.
So to answer the original question, yes I can make a notebook like one of the pictures you saw, but the patina, I cannot make for you. However, rest assured, it'll come, often quicker than you expect.
I hope you found this post useful. if you have any question, please don't hesitate to ask. You can either email us or leave a comment here.
I hope you have a wonderful week,
xoxo Monique

How to make bookmarks
For the past 4 years I've been using my leather tipped bookmarks in my Traveler's notebook inserts. Many people have asked me if I would make and sell them for the shop.

Unfortunately I have not yet found a way to make these with a consistent look yet. I make them entirely by hand, which makes these slightly different each time. I think that is fine and even part of the fun for my personal use, but I somehow don't feel comfortable enough about that to make them for the shop.
I have made and sold a few before, but they are not available in the shop and I have decided after a lot of hard thought not to list them in the shop. Who knows maybe I'll change my mind in the future.
However they are fairly simple to make yourselves. All you need is cardstock, some scraps of leather, a corner rounder (or a jeans button to cut around), a sharp blade, a metal ruler and glue (white PVA glue will do just fine, any flexible glue will).

To use these kinds of bookmarks the way I do your inserts need to be sewn with a 3 point pamphlet stitch. so you can slide the bookmark between the pages.
You cut strips from the cardstock at about 3 cm wide and fold them so that one part of the strip has the same length as the width of your insert.
I suggest cutting the other part to about 5 cm (2 ") , but you can make it any length you like. Just not too short, since we need that to slide under the pages.

You also need 2 pieces of leather per bookmark you are making. You cut the leather to the width of the cardstock. I tend to make them square, but you can have them any way you like. These here are 3-3 cm (1.18"). You round the corners on 1 side of the leather, either with a corner rounder (one that cuts leather) or by putting the jeans button on the corner and carefully slicing around it with your sharp blade.

You also round the corners on your cardstock pieces. I prefer them to be 1/4".
The next step is to glue the leather pieces to the cardstock with the white PVA glue (some prefer e6000, but that's not really necessary).

make sure the glue is evenly distributed on the leather and glue them to the longest side of your bookmark. Making sure a tiny bit sticks out at the top.

The more you let it stick out the more your tab will stick out from the side of your insert. No need to make this bit very large, since the bookmark will slide under the pages, it'll stick out up to half a cm already.

Now you can glue the second piece on top of that and you will have created your bookmark. Let it dry for a bit, but I find I can usually use them right away.

While you're at it, you can make a few extra =)
You can leave them like this and insert them between the pages of your inserts.

Or decorate them to your hearts content, like I did with the ones below.

Use stamping, washi, or anything that you think would look cute.
To make them more durable, you can tape them with packing tape before you glue the leather to the tabs. I found that the leather stays perfectly on the packing taped bookmarks, so no need to worry that they will come off. And should they do, you can always glue them back onto the bookmark.
I always carry an extra with me, just in case I want to add a second to my insert. Another tip I have is to have a paper clip or magnetic clip at hand for when you reach the middle of the insert. In the middle there are obviously no pages to slide the bookmark under, so I use the clip to attach the bookmark to the elastics. Often I keep a magnetic clip on my bookmark, because I think it looks cute.
I hope you found this useful. Have fun making your bookmarks and if you have any questions, don't hesitate to leave them in the comments.
Have a wonderful week,
xoxo Monique

My planner last Month, June
So in keeping with what I promised in my last post I have another update on my planner last month. Still a messy planner, but it gets the job done and it makes me happy to flip through the pages.
Starting off with the finished June monthly spread, filled mostly with doodles, because I don't like empty spaces. Mostly used to keep track of birthdays and as a quick overview for appointments.
Not a lot of appointments though, since I work from home. My weekly's don't have a lot of appointments either and I mostly use them as a place for little reminders of what I did that day.
and a list with things to do on the right side of the page.

Sometimes I doodle or draw something. Mostly because I like the look of that and I find it relaxing to do.

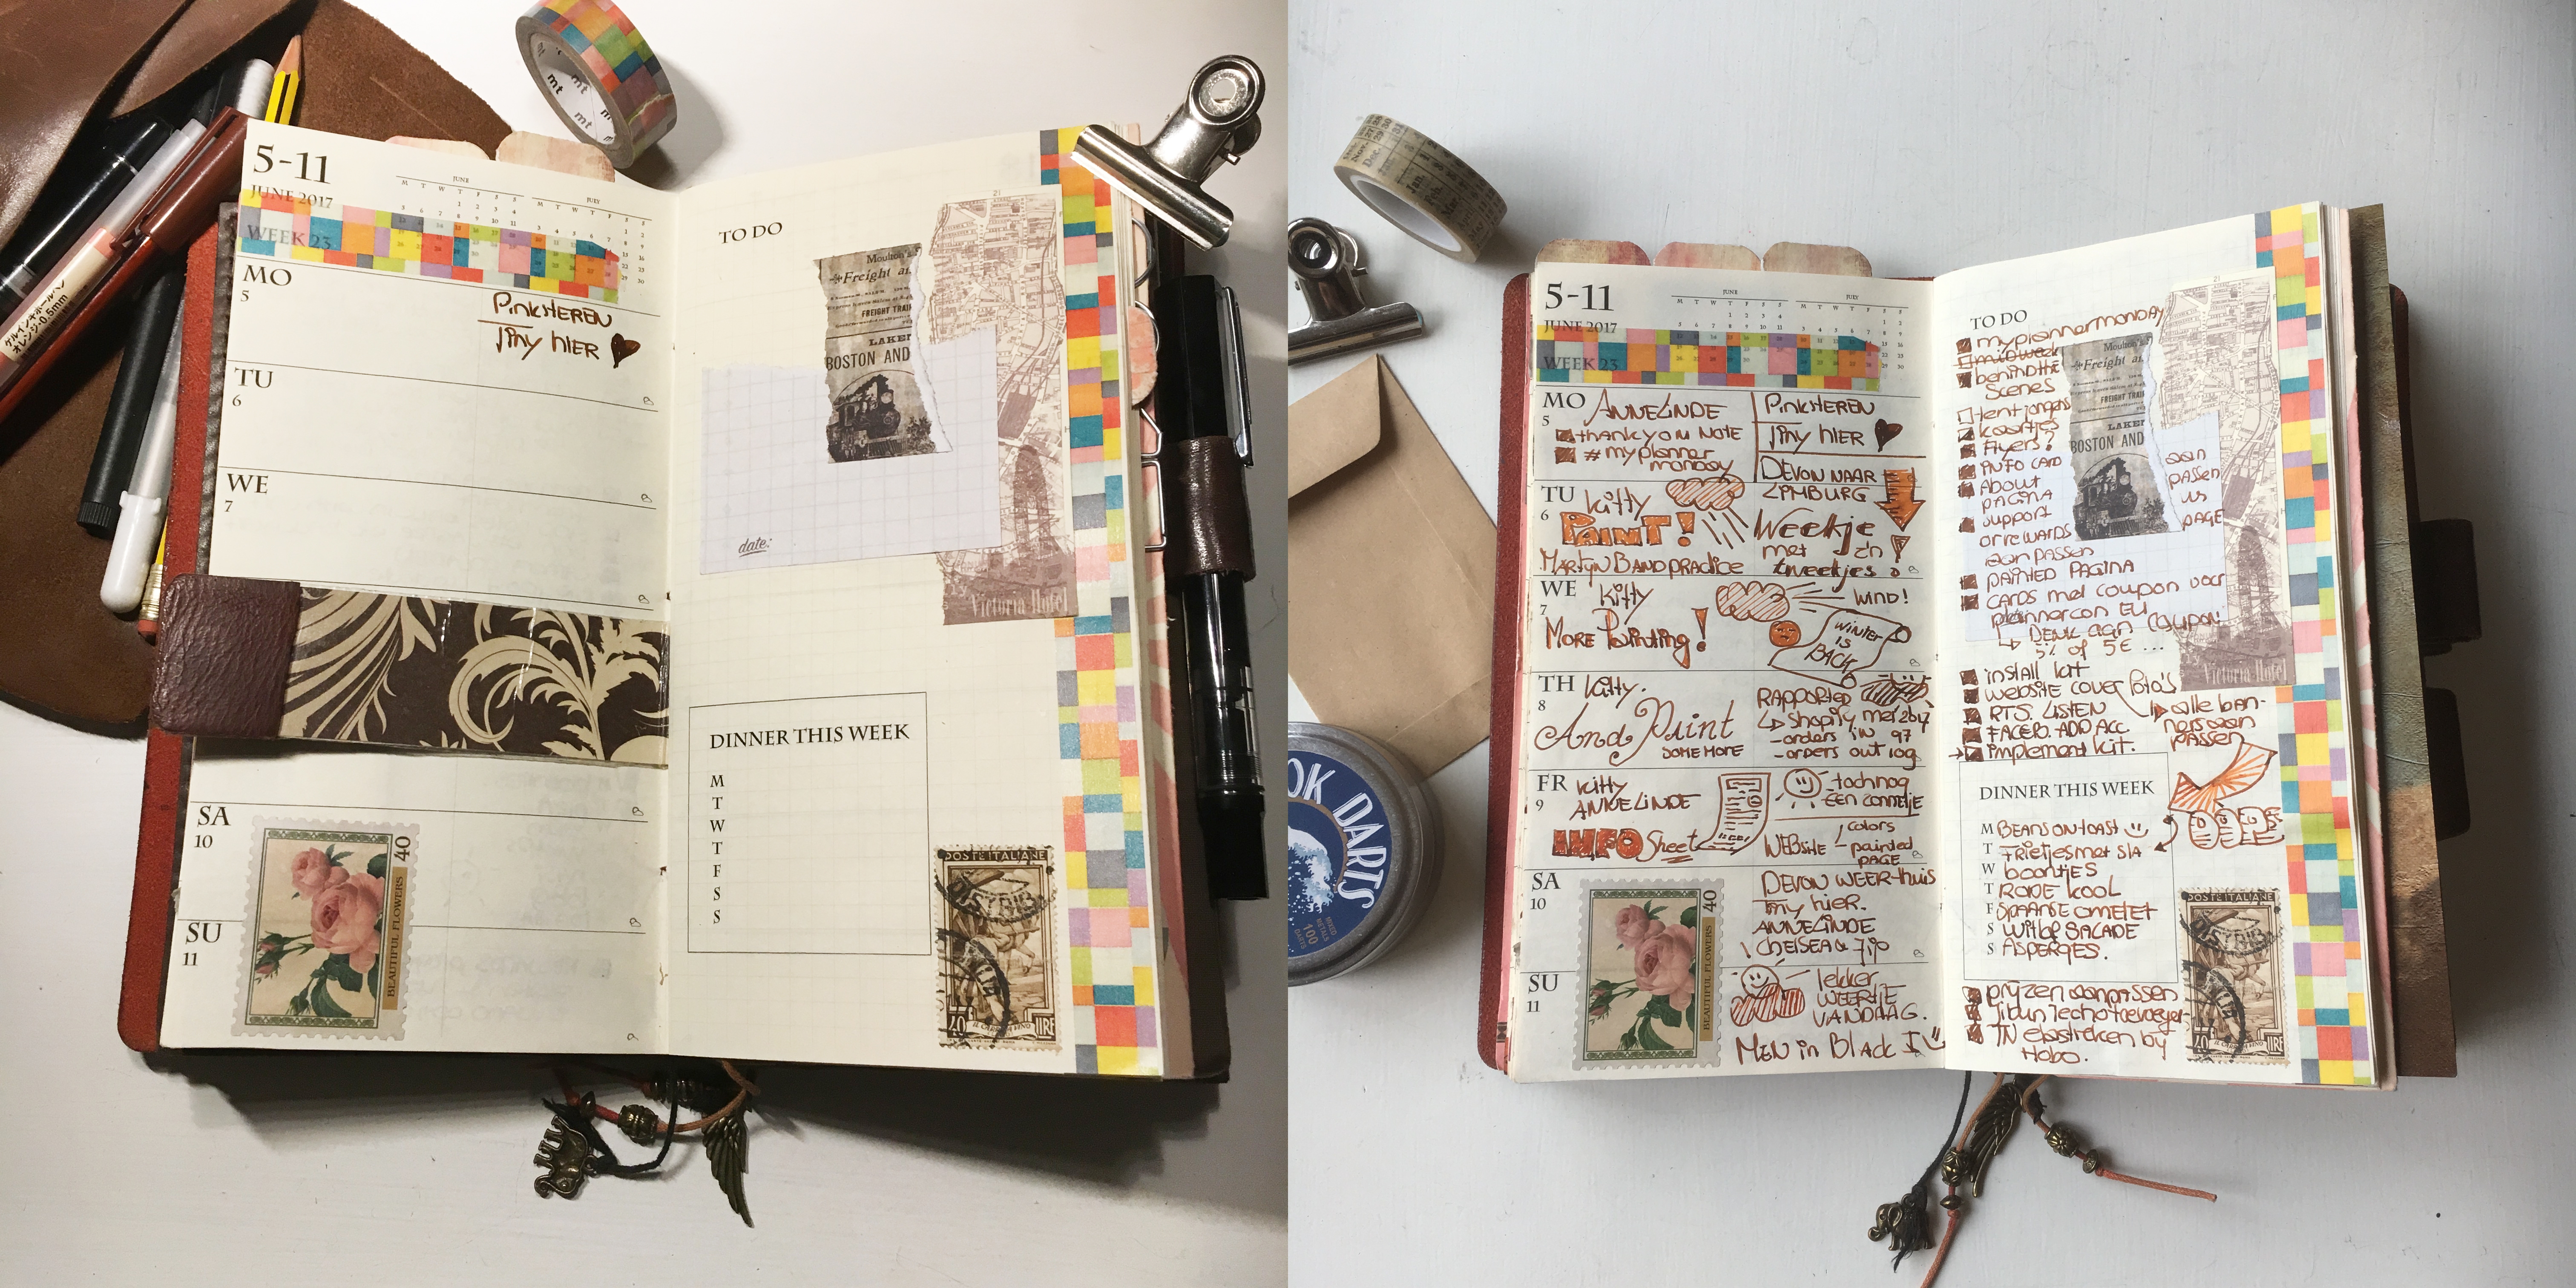
Often I prep my pages at the start of the week, but not always. As you can see in the above photo and since I make and post the photo's on Monday evening to the Lady Falcon Traveler's Notebooks group , I had to take a pic of a almost completely empty WOTP spread this week.

Back on track the next week and started my decorations nice and early on Sunday evening.
June is always a month with a lot of Birthdays, my own being one of them, but my most favorite is my son's birthday, my (not so) little blond Teddy bear. This year there were even more festivities, because he also graduated and will be off to University next year to study Math and Physics, but for now he has off from school and is helping us a little with the shop.
For this month I've switched notebooks, because I decided to take part in the #onebookjuly challenge, after something a lady in one of the Facebook groups said about it not having any rules and that it could also be one book per purpose...so that's what I did, but that'll be for another post.
Going from at least 5 planning and journaling Notebooks, to just the 2 you see on the right. Quite happy with how it's working out so far.
Have a lovely weekend,
xoxo Monique